

digman
-
Posts
4,720 -
Joined
-
Last visited
Content Type
Forums
Calendar
Gallery
Everything posted by digman
-
The polish brush in zbrush can create hard edges depending upon the amount of pen pressured applied. Andrew, stated he made a similar brush but of course will have to wait till we get the update to see how close it functions to Zbrush's polish brush... http://www.pixologic.com/docs/index.php/Mechanical_Sculpting
-
These settinge refer to your 2d grid. Think of each square in the 2d grid as a image file. hence 64 would be a 64x64 pixel size image. The larger the number the larger each grid square will be in pixel units. As usual with 2d grids, it very usefull with the grid snap on as you need to for positioning or having accurate lines,etc. The size of the grid depended upon how precise you need it for what you are working on. Grid subdivision is the next imput for your grid. This will divide each grid square into futher units. 1.00 will divide a grid square into 4 units. Larger numbers the more subdivision levels etc.
-
In reference to what Andrew posted on Twitter. http://twitter.com/AndrewShpagin Mechanical sculpting is the purpose of the polish brush with a few others in Zbrush. Possible brush names: Metal Bronze, first alloy (tin and copper) used on a large scale. Hardedge
-

3D-Coat 3.1 updates thread
digman replied to Andrew Shpagin's topic in New Releases, Bugs Reports & Development Discussion
Thank you Andrew for all your hard work this past year that makes 3D-Coat a great,great application to use. Merry Christmas and a Happy New Year!! -
Phil was correct in mentioning your low polycount number. Another cause of what you are seeing is that you could have a hole in your mesh. Holes in the mesh causes the strands of voxels. So you might have some unmerged vertices. That creates a hole you cannot even see. Use your modeling program to merged duplicate or unmerged vertices. Also if you have holes like say for the eye sockets then you would have to choose to make mesh closed on import or merge as skin. The two solutions above have helped a number of 3DC users to fix the same kind of import problem. Last thing you can do is upload the obj file here and I will take a look at it...
-
Go to the retopo menu at the top of the screen. Select Apply symmetry. Next turn symmetry off and you will see both halves are merged together. Now you can export your whole model. If you post a picture of the bare spots it would be easier to understand where on the mesh that is happening.
-
A wish for feature requests and wishes for the future
digman replied to Taros's topic in General 3DCoat
I stand corrected as I did not know that Andrew had stated that but maybe a change would help because of bugs and stability issues at times... -
A wish for feature requests and wishes for the future
digman replied to Taros's topic in General 3DCoat
Just stating by opinion below: Andrew's statement on the forum section for updates: New Releases and "Betas" Links to newest updates will be posted What we have here is what I term in the business world as a "confusion of the facts" We have the fact of bugs, stability, etc but there is some confusion on how all this is interelated. Andrew does have a stable version, 3.1.15 which is the one he is selling on his site. That is the version he is most responsible to his customer base to make sure it is as stable and bug free as possible. Part of the confusion is how all the bug reports are put in the same area from version 3.1.15 to now 3.1.19 and soon to be 3.1.20. Really there needs to be two seperate bug report sections, one for version 3.1.15 ( or whatever is the lastest selling stable release.) Any bugs found in the stable version (the one for sell) would have the "highest priortiy" to be fixed even though it is now surpassed by the development versions. Again because that is the one he is selling to the public. He is not selling the development versions. We choose to install them. The fact remains though you have to choose which route to go as you can have only one version of the software running on a single computer. You can stick with the stable release or choose the beta route with bugs and stability issues. Another part of the confusion is that the development versions are not clearly enough stated that they are beta versions and subject to having bugs and somethings could be broken. That is the nature of development software. Andrew makes it almost too easy for us to test the development versions (not having to wait months for a new release) but I'm afraid without very clearly stating that you are installing a development version this leads to some incorrect assumptions. My suggestions: forum section just for the lastest selling stable release that is for sell which would include a bug section. No posting of bugs for the development versions there. forum section just for the development versions. plus having a statement in the installer informing you that this version is beta and subject to bugs and somethings could be broken at times plus only install if are willing to assume the risk. This is a very commom statement in beta software. I like stability and bug free software too. but darn, I like testing all those new features or making some tools better plus we get to help out and make 3DC better by finding bugs and stability issues in the beta versions.I do though keep the other versions if I need to go back.... -
Maybe I am not understanding something right about what you say in exporting a model in mirror or symmetry mode. I do not export a model while in that mode. Under the retopo tool menu, select apply symmetry. Next turn symmetry off and then export your whole model. No need to mirror and weld vertices in another application. Sorry if I misunderstood what you said... My workflow is that has I retopo, at different stages I will apply symmetry,(binds your symmetrical halves together.) then I turn symmetry off to check the mesh for any problems, Turn symmetry back on and keep retopoing.
-
If anyone is looking for a game engine thats not hard to load your models into, check out Cube2 or Sandbox which is based on Cube2. It is a free game engine. Supports normal mapping. The engine is not as advance as unreal but still is very fun to use. You can build terrian maps really fast and import your own models based on the quake2 ,3 or 5 formats or straight as a obj model. The game also supports animation through the quake3 file format... I do have Unity and just downloaded UDK but cube2 is the easiest for importing models. http://sauerbraten.org/ http://sandboxgamemaker.com/
-
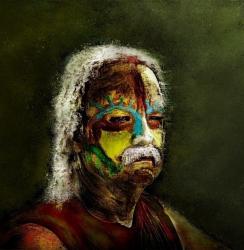
Sometimes it's good to take a break from 3d to do some 2d painting. I worked at simulating more of 1910 colors on a postcard.
-
A wish for feature requests and wishes for the future
digman replied to Taros's topic in General 3DCoat
It is a tough market out there for 3D software. Keeping your core strong, which is painting,retopo and voxels for 3Dcoat plus adding features that would draw new users is not easy. I'm not sitting in Andrew's chair but easy to understand interface, great tools to get the job done and as bug free as possible are the greatest selling points in my decision to buy software. I realise that the development versions will not be bug free and I understand by installing one that their will be some some bugs in the software. I would suggest though fixing them before adding more features in another development version. -
My 1st 'Paint With Texture' ; Wolf Sculpt
digman replied to 3d_sculptress's topic in Finished Projects
Yes, the paint room has lots of tools that get overlook with all the voxels stuff going on. Try the the place an image along a spine tool. It has lots of uses. The great thing about 3dcoat is it's arsenal of powerfull tools. Even with voxels the tools in the paint room are great for adding extra depth detail and they are very fast. Any added details can be saved in the normal map or the displacrment map. The sculpting tool (room) now not used very much still can be usefull. I like it for taking a low polygon model and getting ideas for voxel sculpting. Edit: oops I realized I had posted the frame pictures in your wip thread, sorry... -
My son has the same problem with the ipod touch phone. blank page...
-
3D-Coat 3.1 updates thread
digman replied to Andrew Shpagin's topic in New Releases, Bugs Reports & Development Discussion
It is indeed a Merry Christmas! -
3D-Coat 3.1 updates thread
digman replied to Andrew Shpagin's topic in New Releases, Bugs Reports & Development Discussion
This saddens me to hear of you being the victim of a crimmal. I came home myself one day and found every dresser drawer thrown out on the floor, closets in disarray and generally the house was trashed. In the long run a thief like the two thieves on the cross has a choice to make, one realized his past misdeeds and the other was just an enbittered man. I hope that the one who stole your stuff becomes like the first and sees the errors of his life. -
If you can give some more information on what your seam problems are, that would be helpful
-
Nice work, Deadman21. I think he looks good as is without the over abundance of armor. Thanks for the progress updates too...
-
When I can find some spare time. I have done a few tutorials in the past for 3DC and enjoy doing them.
-
This is the start of a good charactor sculpt. It will be interesting to watch the progress...
-
Now that looks like some alien's sidekick in a funny movie. Nice... Reptopoing is fast become a favorite of mine.
-
I spent a week of testing importing uv mapped models to see what you could do and not do. The main problem you get with importing and snapping your uv mapped Low or mid-range model to the completed Voxel sculpt is that the software because of the large difference in extrusions will not snap correctly in some areas. Sometimes going in wierd spots that no amout of relaxing could help and too time consuming to fix. Hence the reason I resnap (not reimport just resnap) several times during voxel sculpting if I am using an imported uv model as my base. If the voxel sculpt is only adding smaller details then the original snap is all you probably will need. You could relax the mesh some if needed. Once done, then do the normal merging into scene for your normal or displacement map as the above post explain. That is close as I could get to a tradional work flow... I hope all my long bah, bah was somewhat helpfull.
-
Artman, said it already but I will add a few things. I first merge my uv mapped low polygon model into voxels Before sculpting, in the retopo room, import and snap that model to your voxel model. The imported model will snap to your voxel model correctly. Since you have a uv map already in place large changes in your voxel mesh will produce stretching in your uv map. As you know there is no sub-division history in 3DC coat like Zbrush. Though you can still do quite a bit to your model without noticeable stretching. The reason you want to import and snap your uv mapped mid or low polygon model to the voxels right away, is if you get the voxel extrustion to exteme in distance from the polygon mesh, The polygon mesh will snap incorrectly in places. What I do is as I sculpt in voxels, is I will resnap several times during the process. That way your low or mid polygon model with the uv map unchanged is always close to the voxel mesh and does not have to snap to exteme distances.. This works out quite well, though at times be sure to check your mesh to see if any vertices got overlapped. My new method: I though now am starting to just snap my low or mid range polygon model without a uv map. Once you get though the sculpting and snapping process, then uv map your model. Also if you plan well you can add extra edge loops where you need them as you scuplt nice... Uv map in 3DC or your favorite uv unwrapping program and make a uv map for it. You can use the voxel model as a guide to help plan out your uv map as to where to place your seams. Once done with the uv map, Clear the other mesh with the clear button in 3DC. Then reimport into and snap that now uv mapped model to the voxel model. Since it was already snapped to the voxel model it will snap correctly again. Yeah, a extra step or two but no problem and you get little stretching. So in reality you still are just making one uv map but simply waiting till that unmapped uv low or mid-range model has been snap to your voxels,then uv map it. For the normal map as Artman said under the retopo menu, choose merge scene for per-pixel painting with normal map. Your normal map will be created. Once in the paint room under the textures menu use: export--normal map (TS low poly mesh) no need to use the texture baking tool as your normal map was already created. For a displacment map choose merge into scene (mircoverts)( I choose a large carcass mesh) Once it is done,then in the retopo room or paint room use the texture baking tool to bake a displacment map. The above new process is what I used for the golden bust model. http://www.3d-coat.com/forum/index.php?showtopic=4305 I hope this helps and was not too confusing and it's a read but it is really fast once you get it down. I also included a link to a post I did when I was having problems baking a displacement map for imported obj models, I included it here if you need it. http://www.3d-coat.com/forum/index.php?showtopic=4477
-
In fact, Andrew stated today that he is going to make baking the surface possible without changing back to voxels.
-
Gems, that is a good idea, gonna give it a whirl.
