

digman
-
Posts
4,720 -
Joined
-
Last visited
Content Type
Forums
Calendar
Gallery
Everything posted by digman
-
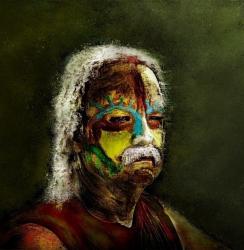
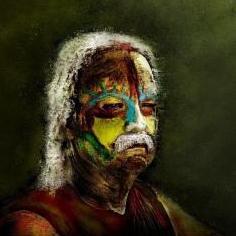
Old gold bust. I'm going to add a little more work to the gold. I think I will place the bust in a musemun type setting when done... All texture work was done inside 3DC. Quick background is just placed for interest... I included the low polyon version and displacement version in Carrara and the sculpt from 3DC. The sculpt was started from an imported low-polygon version about 2500 polys. All texture work was done inside 3DC. As I kept sculpting the low polygon version, I would resnap the imported polygon model in the retopo room to the new voxel sculpting. After all sculpting was done. I resnapped one last time to the voxels. Then Uv mapped the model and saved that version of the low polygon model as my base model for the displacement texture.
-
Thanks Mozzk, The edge flow was ok but not that great,so thanks for the pic. I kinda just winged it with no planning as this was my first learning retopo. Yes, I am goning to add more details.
-
I thought Oh,well, the only way to start retopoing is by jumping into the cold water,"like jumping into the swimming pool" The teeth gave me the most trouble but I did manage to get them and keep the whole model quads. Retopoing, will become I can tell already a favorite of mine. The tool set is really very easy to pick up on and use. Andrew did a great job with them. Thank you for them... Retopo Model is 1638 polygons I kept the model with not much detail, so I could learn easier.
-
Possible displacement map bug
digman replied to digman's topic in SOS! If you need urgent help for 3DCoat
I used tiff files, I only converted to jpg for uploading to show the difference... Never use jpgs for Baking. Sorry my post seem to said that I used the jpgs but was only meant for uploading purposes. -
I had trouble baking a displacement map on imported obj models using the "zero level is black not normalized" that is the one I use for Carrara. I posted a bug report about what I found but if anyone else is having the same problem. Here is a solution. Now if you started from a voxel primitive, then the below is not necessary as the displacment maps bake correctly. I'm using the windows32 bit non-cuda 3.1.17 verion. Solution: ( the below is not meant as a tutorial as you will have to know how to use some of the tools already.) Clear voxel primitive. merge uv mapped obj file. (uv not necessary though) Choose "NO" to keep scale and position. ( you must choose "No" in order to get a correct bake displacement map.) In retopo room import your same low polygon uv mapped obj model, since you said no to scale and position you will have to use the transform tool to resize your imported uv to your voxel sculpt. Depending upon what I'm doing I will snap before making voxel extrustions and sometimes snap after. but you have to be carefull for you can stretch your polygons producing stretching in your uv map. You of course can use quadranqulate or retopo the model and then make a new uv map In retopo room choose "merge into scene" mircoverts. (Also I use "merge into scene" microverts from work started with voxel primitives). I choose a high carcass level ( thats for if I want to do some additional extrustion work in the paint room). After 3dc creates the baked model that shows up in the paint room do the following below. Using the texture baking tool either from the retopo room or paint room now bake your displacement map. The correct displacement map will be created. Everthing above is the normal course of working in 3DC using voxels except I simply said no when it ask you to keep scale and position at the mergeing screen. I hope this helps anyone else who has experienced the same problem. A picture of the now good displacement map is included. "Low polygon model,the displacement model and inside 3DC voxel sculpt" Edit: There was a little confusion in my bug post. I used tiff files not jps for baking, be sure to use tiff files for baking
-
The charactor is looking sharp with very clean lines. nice work...
-
When I got the new version of 3DC. using windows version 3.1.17 non-cuda (3DC user since Dec,2007) I encountered problems with displacement mapping with imported Obj files (merging for Voxel work). I could not bake a correct displacement map. Starting from a Voxel primitives there is no problem baking a displacement map. I knew 3DC should be able to bake a displacement map for imported obj files (merging for voxel work) without having to save up to a 16 meg obj file to get one. Therefore I did hours of testing trying to figure out if I was causing the problem or something in the software. I made all kinds of models, change the Obj material file information at times, tried many different settings and worked on a number of possible solutions. I finally hit upon this possible bug as to what is causing the displacements maps to bake incorectly. In finding the possible bug, I also found a solution. Steps to problem. (using a simple uv mapped obj model for testing) Clear voxel primitive. merge obj file. Choose "Yes" to keep scale and position. In retopo room import your same low polygon uv mapped obj model and snap to voxels. Also tested quadrangulate and auto seams, same baking problem. Do some simple extrusions. In retopo room resnap to voxels, can be left undone if voxel extrusions are not to extreme. "Not worried about uv stretching on my testing" Also tested quadurangulate and auto seams Next in retopo room "merge into scene" mircoverts . I also chose a high carcass level. tested all carcass levels and no-subdivision too. I also tested all the other merging options. Bake displacement texture(zero level is black not normalized) using texture baking tool either from the retopo room or paint room, the created displacement map is no good. (picture included titled "bad displacement.jpg") I closed 3DC before starting new work as it seems that the program will leave left over junk from your previous voxeling when you don't close the program... My testing always started with a clean plate just to be sure. Solution: Only change the below step, keep all other steps in their order Choose "No" to keep scale and position. Add this step You have to use the transform tool to resize your imported model to fit the voxel sculpt in the retopo room. Now after following the rest of the steps you get a correct baked displacemnt map. Now, it still could be user error or a bug on my verison only but I thought it best to post this as displacment mapping on imported models for voxel sculpting is a feature that is highly used. I included pictures showing the bad displacement map, the good one, and a picture of a low-polygon model (appox 2500 polys) with the good displacement render. I reduced the size of the displacment maps for uploading here...
-
I do not know whether you started from a voxel sphere or a imported model. If you imported a model to start with, it is possible that the model's symmetry and pivot point were off to begin with, worth a check? I found several models myself with bad symmetry or pivot points and had to fix them before loading into 3DC.
-
Good going with your Wip.
-
I really like these type of charactors you are creating... good work!
-
When you get your exporting and quadragulation problems fixed... Direct paint ( per-pixel) has no smoothing routine {except for how a game would smooth a model) That is why no sub-division is your first choice in the dialog menu. Per-pixel is great for painting Low polygon game models (with normal map if you made one) . It's intended use. It was a much requested feature to be included in version 3 of 3DC. The reason you get the bad looking depth is because of the above reason. Choose mircovertex painting. Select a high carcass mesh. plus choose somewhere around 6 millon polygones or more as this is used for your normal map or displacement making(depth painting map). Now you can use depth painting which is really creating a normal map (on the fly) on the surface. For true polygon vertex sculpting use the scuplting room. It still a fav of mine even with voxel sculpting included in 3DC. It great for fast sculpting or just getting ideas... for your voxel sculpt. If you use the sculpting room, use the texture baking tool to get the correct normal and displacment maps. Most of your problems (not all of course) are from just not understanding how 3DC works. Now does 3DC have some bugs yes but which Andrew is fast to fix... He has now fixed the reduction crashing bug. :} Edit: You can though import up to a 1 million polygon model into per-pixel painting.
-
If you are using the quadrangutlate feature, I recommend using from the vox tree only the quadrangulate feature.Your voxel sculpt will then load in the retopo room only. Turn off symmetry if it is on and check to make sure that the quadrangulate covered all areas of your sculpt. In the retopo room use the retopo menu at the top, choose per-pixel with normal map or merge with microverts as that bakes a displacement map on your sculpt. Increasing resolution helps for higher detail voxel sculpting. Think of voxels as a pixels. The more pixels you have the greater the detail in your painting. I start out at a lower resolution of voxels to quicky build major forms of my sculpt.( like a base undercoat in painting to get the forms down). I then start increasing my resolution for higher details.
-
Great work and some great tips, thank you very much...
-
So far the best way I found to make a good displacement map is merging into scene (mircoverts) my high detailed model, then saving a high polygon obj file (up to 16 meg) with the same UV map as my low polygon obj. I load the low polgyon version and then import using the "big mesh" feature. This process makes a nice clean and great looking displacement map plus I can paint my textures too. I have tried all the ways of merging into scene from the retopo room but none make as good and clean displacement map as the above way. Now it would be great if internally 3DC would do be able to read the imported low polygon model (uv mapped) from the retopo or uv room and make the displacement map from the new high version model without going through the saving of a high polygon model. You would get all the details without having to save a up to a 16 meg obj file. I know 3DC is limited to about 700,000 polygons so a feature like this would be a big boost for making highly detailed displacement maps internally for painting then rendering. I seen alot of voxel sculpts at the gallery but few renders of high displacement and painted models. I know you can save a high detail model from the voxel room but there is no way to paint that model. Added displacement tools (possible new room for them) would to be a big feature of the program as you then could can take your highest detail model and in a straight forward fashion make a displacement map then paint your textures and render. 3DC has great voxel tools, painting tools and retopo tools, now add straight forward internal displacment tools. (if possible) P.S. I know there is no subdivision history of your model as in Zbrush, but hopefully it is possible to add internal displacement tools. I been using 3DC since 2007 and the new version alittle over a month... Edit: One reason for upgrading to the new version was to be able to make higher detail models for renders. I was somewhat surprized when I found that displacement mapping was not intergrated in the new version as completely compared to the other new tools for the new voxel sculpting.
-
3DC exports quads. When you merge into voxels, you lose any uv map and your quad polygons,voxels are not quads in nature. If you export a obj from the voxel room, you will not get quads.(exporting from the voxel room is mainly used for static renders,hence the reduction tool for it. You have to retopo the mesh to get quads either by manually(great retopo tools in 3DC) doing it or using the quadrangulate feature (like the above post said) in the vox tree.
-
A very interesting alien start... I like the tentacles.
-
Looking good and thanks for sharing your ongoing wips as they progress...
-
Edit: I had to delete my post to make sure I uploaded the correct obj file. Ok, you had either some duplicate or unmerged vertices. I used Hexagon modeler to average merge all vertices. That way if you got a few that are unmerged (not connected) then they are merge into one. You get rid of any unseen holes that way. reference other post. Also it will get rid of dupicate vertices. Also you cannot not start out with smooth voxels as your polygon structure is either from a scan or export from the voxel room. You will have to retopo it for a useable uv map. You can mannually smooth your voxels though after import. I inculded a fixed version. I checked again to get the number of unmerged vertices. appox. 300,000 unmerged vertices. After using the merge command, 5710 vertices for the obj model. edit: quad polygons are the best for smoothing... obj.zip
-
Thanks for the reply Phil. I had addressed make mesh close in an earlier post. I checked the obj file and he had some unmerged vertices which causes a hole but you can not see it, too small... I found it best just to use the merge vertices command in your (insert favorite modeling progam here) on any files pior to loading into 3DC.
-
You are welcome, maybe too much information LOL, enjoy your work, I look forward to seeing it when I check the fourms...
-
A very precise and clean looking model. great work...
-
If you have used the quadrangulate feature in the voxel room, then in the retopo room merge your object using merge into scene (microverts) other selections will works but I just use this one. The uv map will be created using the automap feature. Now you can export your model as a obj file and the uv map will be included with it. If you have made your own uv map in 3DC, then use the export option in the retopo room. Save the model as a obj and the uv map will be included with it. In Zbrush the UV map will load with the obj file, there is nothing you have to do. You can check seams if you like and of course use can choose different texture image sizes. Remember that 3dc can only support up to about 750,000 polygons. so you have to make a displacement map in Zbrush and load that in a layer in 3DC to get the high level details. or save in zbrush up to a 16 meg high detail obj file. The uv map will be exported as well. First In 3DC for reading the up to 16 meg obj file use the microvertex painting import not per-pixel. Then load the low polygon version(same uv map),make a new layer and then under import options choose load big mesh.Choose the up to 16 meg obj file. 3DC will read the high detail level obj file(same uv map as low polygon version, make a displacement map and load it into the layer for the high level details. Then paint away. Any texture maps saved in 3DC or Zbrush use the normal import options in both programs...
-
If you can zip your files and upload them here (if they are not to large for the forum), then I will download and look at them. Maybe, I can find the problem. I'm no expert but will give it a shot... One thing if your last model has a hole somewhere in it, ( not like donut hole but a polygon hole or maybe even one unmerged vertex which would create a hole but you could not see it) you can get that stuff. Also if the model has no depth like a head model open on the bottom, just two-sided polygons. Those you have to bring in using the merge as skin which is right above the select mesh tab or make mesh closed tab.
-
I think it could be a bug, I get them sometimes when I used the pose tool. I need to post a bug report in that section. Take that screen shot of yours and put it in the bug report section of the forum. Andrew is real good at tracking and fixing bugs when they are really bugs in his software.
-
You need to increase your polycount.You have only around 98.000 appox. When you import the object, (before hitting the enter key or the apply button)left click on the object's white cube and drag. The polycount will increase plus,keep dragging till at the desired polycount. 2 to 3 millon polycount should give you all your details(the object size in the screen will increase too). The higher the polycount the higher number of voxels created. You can go higher in your polycount, up to what your computer can support without being bogged down. Also you can click on subdivide a few times to smooth the object after you get your polycount and before you hit the enter key or apply button. That way your voxels look smooth to start with. I subdivide till I no longer see any polygon squares. This does not increase your polycount as I believe that is it only a smoothing routine. Edit: Increasing the resolution will not give details that are not there to begin with, hence you need to have a high enough polycount to begin with to capture all the details for the voxels...
