Search the Community
Showing results for tags 'rendering'.
-
Hello everyone I wanted to render a turntable in 3DCoat, but I noticed that when I set the number of rays to anything higher than 50, and sometimes if I try to render in a higher resolution like 4752x2886 the render fails. It does render the whole thing, but when the save folder opens, either the video is not there or it has 0KB and can't be opened. I can't find any solutions anywhere and I don't know if it's the program or my hardware. Is there some kind of size limit on what you can render?
-
I was going between 3DC and Blender a bit trying to hit the sweet spot I wanted for something, and I noticed differences between the two renders, especially caused by varying roughness values. I decided to get a bit scientific about it, so here's the results of my tinkering. I used the studio.exr panorama from Blender in both programs for a fair comparison. The 3DCoat environment settings were left at default, but the light was deactivated. The HDRI was normalised when I imported it. The HDRI strength was left at default value in Blender too. A simple sphere, identical colour value in all renders. I'm making no judgement as to which renderer is 'better'. This is just purely for comparison, to see how roughness values appear in each in order to make texturing a bit more predictable. I did notice that in the HDRI there is a tiny but bright spotlight high up adjacent to the other light, but for some reason this isn't picked up in the 3DCoat renders. Perhaps it's just a tiny pinprick and too small to be picked up. I don't know. There also appears to be a light down low, right of centre, but only on the renders for 25% to 40% roughness in the 3DCoat renders. I don't know where that's coming from. It isn't apparent in any of the others. The most noticeable differences is that the reflections in the 3DCoat Paint Room preview are a touch more intense than both of Blender's renders, but the same reflections are a bit feinter in 3DCoat's Renderer. Also, at around 35-40% roughness, the 3DCoat Renderer has greater blur on the main reflections near the centre, which has almost become a single bright patch, whereas all the others still have two distinct light sources. Like I said, this isn't about picking a 'winner' or 'favourite'. It's just to help me predict how my textured objects will appear and render in Blender to save time to-ing and fro-ing making adjustments. Just thought I'd share. Regards, Derek
-
From the album: Artworks
You maybe know my old fantasy character called Windrunner. I never really finished the figure, so it disappeared in my harddisk for a long period. In the last months I like to experiment with blender materials. So I took my old 3D-Coat sculpting and added some new materials to it, completely created in blender. The interesting about the materials is, they are completely procedural. No UVs are used. The only texture I used is the normal map for the weapon. But the Rusty Gold and the Cold Lava materials are completely procedural. The Figure and the Stones are from 3D-Coat. I added the teeth and the foundation in blender too. The weapon is from my free 3D-Coat tutorials on YouTube, you maybe already know. If you have any questions drop me a line. -
Hey, folks, I just want to share some work we are creating here in Brazil using 3D-Coat on an online training course focused on characters. It's the first one in Brazil! Until now, we are working with everything that 3D-Coat has to offer, from hard surface to organic sculpt. The classes about human characters (cartoonish) will start in a few weeks, so until now we are starting to learn the software creating some robots and weapons. Hope you like it and will update here soon!
-
More images here - https://www.artstation.com/artwork/8Rlox Hello, everyone! This is my last personal project which I did in my spare time. Hedgehog modeling and sculpting - 3dCoat Fur and needles - Ornatrix plugin Grass - Forest Pack Render - Octane Hope you liked it! You can buy this model soon... Best regards, Andrew!
- 6 comments
-
- 3
-

-
- ornatrix
- octane render
-
(and 8 more)
Tagged with:
-
Hello All! For those of you already on Pluralsight/Digital Tutors or those of you who might want to be, I recently had a 4 1/2 hour course covering some techniques in Character Sculpting published. If you want, please take a look at the course overview below: 3d-coat-character-concept-sculpting-techniques One thing that is different about it is that it covers a way of taking the voxel/surface sculpt directly to Cura to 3D print. In my case it is a Lulzbot TAZ 5 3d printer, but the techniques could apply to other printers as well. Excelsior! Eric Kunzendorf
-
From the album: Macalabs Sketch Dump
-
From the album: Polaris Sector game. Human race
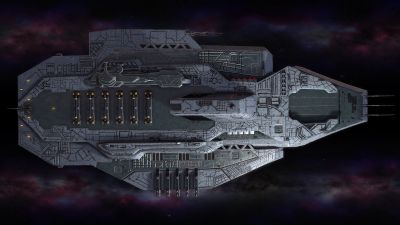
Model for Polaris Sector game. Race - Humans. Video presentation here - https://youtu.be/KW5JNs_2NUA 3DCoat - Texturing, Shading and Materials. Marmoset Toolbag 2 - Render Zbrush - Modeling.© artofcharly
-
- 1
-

-
- polarissector
- spaceship
-
(and 8 more)
Tagged with:
-
From the album: Polaris Sector game. Human race
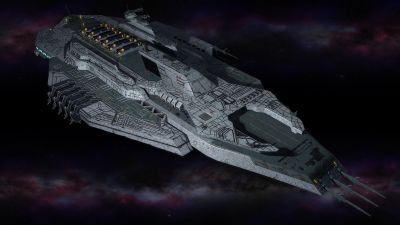
Model for Polaris Sector game. Race - Humans. Video presentation here - https://youtu.be/KW5JNs_2NUA 3DCoat - Texturing, Shading and Materials. Marmoset Toolbag 2 - Render Zbrush - Modeling.© artofcharly
-
- polarissector
- spaceship
-
(and 8 more)
Tagged with:
-
From the album: Polaris Sector game. Human race
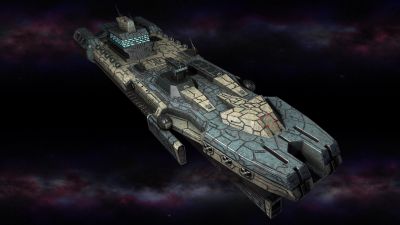
Model for Polaris Sector game. Race - Humans. Video presentation here - https://youtu.be/KW5JNs_2NUA 3DCoat - Texturing, Shading and Materials. Marmoset Toolbag 2 - Render Zbrush - Modeling.© Artofcharly
-
Just doing a test to try to get a quick workflow for producing sample images with PBR. I have attached a couple images from 3DC and Blender Cycles. I like the speed and basic quality of the 3DC render but do not know how to set it up without getting the black artifacts on the polished cat forms ( I assume they are fireflies). I tried increasing the sample number but didn't seem to work. Any suggestions for tweaking render settings to produce clean metal renders greatly appreciated. Thanks, bk
-
I found this pretty neat website on siggraph project documents about different methods of capturing normals, albedos, speculars, and other stuff, from surfaces. So... i was thinking... is it possible to actually get real-world readings with just a camera, a linear polarized filter, a black box, sequential hemispherical lighting on all 360 degree? What i mean is, taking a picture from a polarized camera thats 90 degrees aiming down to the surface, and each picture will have a different lighting value. Then with some editing, recreate all the maps? Or is it more complicated than this? http://www.pauldebevec.com/index.html
- 3 replies
-
- PBR
- Real-World
-
(and 8 more)
Tagged with:
-
Hello everyone, Iam selling my Messiah Studio 6 Pro License inclusive my Setuptab Account! This means the one that buys from me the MS 6Pro License also gets all the Tuts i have bought at Setuptab.I want to have 190,- US Dollar via paypal. Messiah Studio works pretty good togehter with 3D Coat!!! Iam also selling one of my Audio Tools called Reaper.Great Digital Workstation and as good as Cubase but much cheaper and from my experience more stable.I want to have 160,- US Dollar for the full commercial License. you can check the demo out first http://www.reaper.fm/ have all a great week Dominik
-
Hi everybody, my name is Marco and I'm a new 3DC user from Italy. I've chosen 3DC as the main tool for doing post-processing on models coming from full-body scans (scanning human beings is the core business of the company I work for at the moment). I'm not a graphic artist by any means, in fact I'm a software developer specialized in the production of real-time rendering engines (I've done a lot of work on the open-source OpenSceneGraph library). As such, I'm curious about the technique that 3DC uses to render its voxel-based scene. I'm really impressed by the performance level it achieves. Can I ask 3DC developers to share some insights about the rendering engine? Is it based on rasterization or some kind of accelerated ray tracing? Are voxels converted to polygons on the fly by running marching cubes or similar algorithms? Also, I'd love to better integrate 3DC with my own tools, but the 3B format specification that I've found on this forum is lacking the color part, so it's not that useful to me... Thank you for your help, and keep up the awesome work!


