Search the Community
Showing results for tags 'Tutorial'.
-
Hi All, This is just a sneak peek at how I've been approaching sculpting with Dynamic Materials. It feels like a natural way to sculpt. Not all models, but it's been great for naturalistic props with natural or organic materials. I plan to make a more Indepth video. -Alex
-
Here's a new retopology video, showing manual vs auto retopology with 3d coat.
-
- 1
-

-
- retopo
- retopology
-
(and 2 more)
Tagged with:
-
Hi everyone, this is a WIP and not (yet) official guide, I'm working on a tutorial that might be clear-cut method from start to finish. You can leave a comment if I'm missing something, or point out an error. Some information is entirely my own understanding, some may have been used from your own posts etc Subheading: PaintRoom --> Retopo Room --> Bake to MicroVertex --> Bake Displacement to Lowpoly mesh This Article discusses the the complete workflow(s) from model creation to Baking both Material maps and mesh of your Highly detailed Per Pixel Painting, Microvertex and Ptex Projects using Smart Materials that utilize displacement maps. 1. Displacement Topology - Preparing your model: Voxel meshes are ideal for displacement due to uniform faces that prevent painted textures on the surface from stretching and other glitches. It's also very important that your models don't contain hard edges otherwise faces will likely mix into each other creating distortion. If you need high performance in your 3D application, tris are best for game engines due to efficiency, performance and file size but Micro Vertex working with tries can create artifacts. Using Quads with Microvertex maybe more ideal to paint characters and in general quads are preferred for smoother surfaces and better deformations for animations. For Film & Game Engine Optimization that uses Automatic Frustum & Occlusion culling, plan your model. Large objects such as cliffs or walls can hide/disable other parts or areas not seen by the camera or animation viewport, so it's ideal to slice the model in such a way as allowing parts to be automatically hidden to speed up Renders and Game Performance while making visible and focusing only on what the camera actually sees. There is an essential rule of mesh resolution that needs to be followed and that is that your lowpoly model needs enough resolution initially to be subdivided from. The reason is that your model could likely be full of cracks in other programs when displacement maps are applied, it doesn't have enough actual geometry to deform (even with tessellation) You will see that smooth mesh by subdivision helps but may not fix the problem, the model needs enough resolution from the beginning of the paint job. There are a few methods of preparing your model for painting and we have it numbered from best to least under: Displacement Topology -Preparing your model, UV Mapping, Painting and Baking the Mesh. (1) Per-Pixel-Painting Topology: Ideal for landscapes -use meshes with tries (can be set upon import) Import a low poly mesh, in the menu set to "Triangulate" if using quads, set UV to "keep UV" , Subdivision can either be 0 of you want to use tessellation instead while painting (faster but lower smooth quality) or use "subdivide" (higher quality but slower to paint) If you use Subdivide 3DCoat may automatically choose a medium setting which may be sufficient. You can always add tessellation to each of your paint objects (models) later. Choose "full smoothing" if you want accuracy using Smart materials that use height maps. (2) Ptex Topology Method Topology: Ideal for Characters using quads. Upon New Ptex project topology, import model, choose" Auto-Retopo with Ptex". -It will do the the retopology for you and then send you directly to Ptex painting. (3) Micro Vertex Topology Topology- Ideal if you have to use models with quads for quality Character deformations in animations. -unless it's best and safe to convert them to tris upon import and simply export the maps but the maps might have to be exported for quads. UV Mapping: Manual UV tip: Best approach to avoid glitches is to cut UVs in a grid with straight lines, Voxel topology makes areas to cut easier to identify. Cutting into grids has equal/balanced pull on the vertices in all directions. To get more detail especially with landscapes that don't need organized UV islands, aim for islands to be square or rectangular and aligned vertical or horizontal. The more UV space filled in the better. Automatic UV Method: (1) Using Per-Pixel-Painting Mode: (Community input required for the general consensus of the best UV creation in 3DCoat -ideally with parameters that are used in the manual UV creation process) (2) Using Ptex Method Mode: The Ptex Paint method provides automatic UV mapping upon export. (3) Using Micro Vertex Mode: (Community input required for the general consensus of the best UV creation in 3DCoat -ideally with parameters that are used in the manual UV creation process) Painting Tip: When painting displacement closer to less rounded edges, reduce Depth value to approximately10 or lower, paint and test, undo, reduce or raise value, paint and test etc. Some Smart Materials contain AO, after selecting one that has AO maps you will be asked if you want to generate an AO layer because the smart material requires it. This is optional, It might be better to keep your project light, and bake AO at the end of your painting but painting with AO can help you see details better and know what you're getting right away. You can create and edit your smart materials to fine tune it. Learn about creating Smart Materials Here (You can create Smart Materials in any existing or empty project) (1) Per-Pixel-Painting: is currently the Best Method to paint Smart Materials using displacement, to understand why, visit this link (2) Ptex Painting: Since Ptex and Smart Materials have been made compatible with each other, more investigation is needed to determine if it's more advantageous over Per-Pixel-Painting but at this time it uses Quads but can it be exported to tries and still look good? (Community input required for this for the general consensus) (3) Micro Vertex Painting: Since Micro Vertex and Smart Materials have been made compatible with each other fairly recently more community input is required to determine the benefits. *Micro Vertex is compatible with creating displacement maps and "in theory" is compatible with Vector Displacement Smart Materials which should open the door to paint complete whole Colorful photo-scanned models but Smart Materials may or may not yet have added Vector Displacement Map Compatibility. A Smart Material with Vector maps maybe the first of its kind to produce Vector Displacement and Color at the same time. Baking Displacement to low poly to reduce the need for high tessellation in other 3D applications -WIP This wasn't the workflow in the past. Generally Displacement maps are created from the differences between the original and the high poly version (which is what you want) however, this is just for creating the correct displacement maps. During your painting with displacement maps used in your Smart Material, as it changes the vertex positions in the high poly it also changes some in the low poly. Bake To Hi Poly Mesh (1) Using Per-Pixel-Painting Mode: bake the displacement into a newly created high poly mesh added to a layer in the paint room using "Bake sculpt mesh onto paint room mesh" (Top Menu Under Bake) Exporting Textures: Normally when exporting textures with subdivision levels, layer o must first be selected. The (1) Using Per-Pixel-Painting Workflow: (2) Using Ptex Method Workflow: (3) Using Micro Vertex Workflow: Bake Displacement -To-Lowpoly Mesh: (1) IF you're using "Per-Pixel-Painting" send to: Retopo Room, choose "bake into scene Microvertex" then bake sculpted mesh to sub-D (you set it with option menu when bake) + displace applied mesh in paint room as polygon group name layer. (real deform high polygon mesh) (2) IF you're using "Ptex Painting" send to: The Ptex Paint method provides automatic UV mapping upon export. (3) Send Micro Vertex to: Different Displacement painting methods and evolution - what you need to know before you decide your workflow: https://3dcoat.com/wiki/index.php?title=3.1_Per_Pixel_vs_Microvertex Methods of Setting up Displacement in external applications Using traditional Methods - Adding extra geometry to instruct the shader or the program to add more vertex points and positions 1. Tessellation - Set tessellation level only as high as the details need to be. Tessellation can come in two common forms; 1.Distance-based that offers Level of detail (LOD) on the model the closer it is to the camera and 2.Full tessellation (currently used in 3DCoat) 2. Smooth mesh By Subdivision - Subdivision like full tessellation offers no ability for LOD, meaning it's going to reduce performance but like tessellation you can increase or decrease levels. It's the best visually and if tessellation doesn't close cracks due to lack of geometry, smooth mesh by subdivision might fix that. This mode is also incompatible with some GPU Renderers like Iray and will greatly slow it down. Your application may let you combine both methods; "Smoot Mesh By Subdivision" and "Tessellation." Generally using Level 1 of "Smooth Mesh By Subdivision" and "Tessellation" level between 1-2 gives optimal results for rendering. Emerging No Extra Geometry Methods 1. Screen Space Displacement mapping (SSDM) - Some initial experiments from developers have shown real-time game play of 500-1000+ FPS in Unity from the developer "Oddity Interactive" (Using the performance heavy photo-scanned RD-Textures was more in the 400 FPS range) Another Example
- 1 reply
-
- 5
-

-

-
- per pixel painting
- displacement workflow
- (and 10 more)
-
Latest tutorial building a basic temple structure in the modelling room. Aimed at beginners, with the modelling room being fairly new in 3DC 2021, this will hopefully help to get started. https://youtu.be/OOpIml3giaM
-
my first glass attempts in 3D-Coat: ClearGlass.3dcpack IMPORTANT: Make sure Layer 0 opacity - 25% or lower! then on layer one (or any other layer above 0) use the glass material. make sure the material is on 100% opacity but the layer opacity is on a low % (me = typically choose 15% or less) --- message me if you = need any help sorting it out :]
- 15 replies
-
- 4
-

-

-
- glass
- transparent
- (and 10 more)
-
Is there a fast way to select a Paint Object from the 3D view? I want to single out a spesific object to paint on it, but finding it in the Paint Objects pannel takes way too long. I know you can hit H and it will automatically select a voxel layer but that doesn't work with paint objects. Is there a way to convert paint objects to voxel layers Another possible workaround would be if I can somehow see the Paint Object's name when I hover over it in the 3D view. Even naming the layers won't help btw because there are way too many of them.
-
Sculpting windows in 3D Coat for displacement maps in Quixel Mixer. In this video, I continue to show how to sculpt details for a displacement map in 3D Coat, as well as how to work with the new Curves tool. Video content: 0:01 - Intro 0:08 - Forrender.com Render Farm 0:17 - Info Partners 0:21 - Subtitle Information 0:25 - Greetings and info about the lesson content 1:00 - Using primitives in 3D Coat to create other window details. 1:26 - Cutoff tool to trim the shape. 2:16 - VoxHide. 4:58 - PoseTool 6:58 - Creating a primitive for the profile of the curve. 10:07 - Ending 10:26 - Preview of other lessons and playlists. If you like this video: ► Click on the “Thumb up” ► Subscribe to the channel to avoid missing new releases ► Share with friends - do not be greedy =) After all, they also want to get this knowledge =) Enjoy watching! Best regards, Andrew Krivulya aka Charly
-
Creating a monster in 3D-Coat and rendering in Corona Renderer - without UV and retopology. Part 2. Video Content: 0:01 - Intro 0:18 - InfoPartners 0:22 - Important information about turning on of subtitles. 0:29 - Information having an impact on the development of the channel and the output of the following lessons. 0:45 - Continuing to edit the proportions and details of the monster by using the different brushes. 3:03 - Use the Pose tool to correct proportions. 3:19 - Creating a mask and adding details to the base layer by using the Clay brush. 4:00 AM - Adding parts with the Draw brush. 5:25 - Using the Pose Tool to correct a pose. 8:45 - CutOff-brush to remove unwanted parts. 10:10 - I make special masks with the help of Freeze, in order not to touch the separate parts during the editing of the geometry. 10:26 - Continuing to work with the Pose and Move Tool. 10:59 - I draw additional tentacles in voxel mode with the Sphere brush. Also, again - I use Freeze and CutOff. 11:30 Paint texture in Paint-Room and export to FBX. 11:39 - Import models in 3Ds Max. 11:56 - Creating CoronaSkinMtl and configuring VertexColor. 13:43 - Lighting setup in Corona Renderer. 14:15 - The ending. 14:31 - The ending. Video preview of other lessons. A subscription button. If you like this video: ► Click on the “Thumb up” ► Subscribe to the channel to avoid missing new releases ► Share with friends - do not be greedy =) After all, they also want to get this knowledge =) Enjoy watching! Best regards, Andrew Krivulya aka Charly.
- 1 reply
-
- 1
-

-
- 3d coat
- corona renderer
- (and 6 more)
-
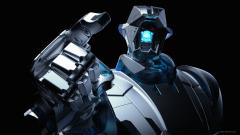
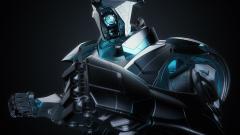
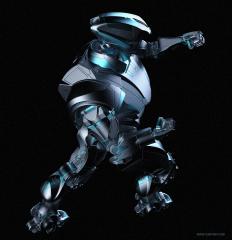
From the album: Designing Massive Mech in 3DCoat - Tutorial
-
From the album: Designing Massive Mech in 3DCoat - Tutorial
-
From the album: Designing Massive Mech in 3DCoat - Tutorial
-
From the album: Designing Massive Mech in 3DCoat - Tutorial
-
The 3D Coat Youtube Channel is an official resource for Tutorials, New Feature Demos and more. New content is being added continually, so make sure to subscribe or check in often 3D-Coat Official YouTube Channel 3D Coat Training Channel
- 204 replies
-
- youtube
- retopology
-
(and 3 more)
Tagged with:
-
Hello all. I've been running a youtube stream which is for entry level users, and I invite you all to drop by at 7.00pm GMT on Friday 5th Jan 2018 if you want to ask about what I'm doing. Or help me do what I'm doing (you know what 3d Coat can be like sometimes lol). The modelling is in parts 1 & 2, this coming stream is part 3. I am making a coffin (as you do) and this stream deals with retopo, UVs and painting the models. Cheers Ron.
-
I have done a lot of research and found loads on youtube, some videos to buy on steam, and found on pluralsight. I bought 3d coat for several reasons and read lots of things about it before i made my decision. The questions i am hoping to be helped with is there anyone that knows a good tutorial to show how to do curves over a hard surface? i was trying to do a bagged pickup truck to try out the modeling. I have been learning blender and i have known about 3d coat for years but finally had the money to buy it. is the pluralsight hard surface 3d coat tutorials any good? could i do a good job in time making characters female or male? would i be better off to sculpt characters in zbrush if i bought it down the road or can i do the same in 3d coat? is it harder to do same stuff in 3d coat as in zbrush? should i just stick to blender for hard surface modeling? I am sure there are more questions i could come up. I have done a lot of reading and i know some answers in ways but not to my liking if that makes sense at all. My plan is to one day be good enough to make my own characters, and etc bring them into i am guessing blender to do small animations with for fun, this is all hobby and would like to create my own universe of people and things that i enjoy that i could share with others for fun. Ty for any help you can give. ( I posted this on steam forums to under the game but i was not sure how many actually used that ( since i bought from steam ). Was not sure to put in 3d coat under general or here so i decided to play it safe to. )
-
Hey, folks, I just want to share some work we are creating here in Brazil using 3D-Coat on an online training course focused on characters. It's the first one in Brazil! Until now, we are working with everything that 3D-Coat has to offer, from hard surface to organic sculpt. The classes about human characters (cartoonish) will start in a few weeks, so until now we are starting to learn the software creating some robots and weapons. Hope you like it and will update here soon!
-
Hi, guys. I just started a series in order to introduce 3D-Coat to the brazilian audience. The tutorial is in portuguese and it's really basic this time (its just a introduction to some basic painting workflow). Hope you like it!
-
2017 | Spaceship Cockpit Panoramic 360/VR Painting Tutorial by Jama Jurabaev Full Panoramic 360/VR Painting Сouse in 3D Coat: https://gumroad.com/jamajurabaev Official site: jamajurabaev.com FB: https://www.facebook.com/jama.jurabaev Instagram: https://www.instagram.com/jamajurabaev/ ----------------------------------- Another Tutorial How to create a panoramic 360/VR painting VOL.2 Starting from 3D coat basics you will learn all the tools you need to create panoramic 360/VR paintings from scratch. You will learn how to use perspective grids,symmetry and other powerful features to speed up your painting or design process in 360. In the end of it you will be able to export your 360/VR painting and share on social media or view it in a VR headset. https://gumroad.com/jamajurabaev#
- 4 replies
-
- 1
-

-
- jama jurabaev
- 360/vr painting
-
(and 1 more)
Tagged with:
-
Here is the process of creating a Octopus Walking Cycle for the more curious ones!
-
Hi everyone, Here is a tutorial for those who are curious and want to start animating in Blender. You can find the other parts in my channel. Thanks!
-
- 3 replies
-
- tutorial
- assembly crane texturing
-
(and 1 more)
Tagged with:
-
Here is the process of creating a low poly skeleton and making sure we get the most important features of each bone. Thanks For Watching!


