Search the Community
Showing results for tags 'lightwave'.
-
Source... Vizrt, the world’s leading provider of visual storytelling tools for media content creators, has acquired NewTek, world leader in IP-based, software-driven live video production solutions. The acquisition creates the largest company in the broadcast space that is dedicated to enabling IT based video production. The goal is to make it possible for people to tell their story using video, whether they are a kid in a classroom or a tier-1 broadcaster.
-
OD_Copy paste allows you to copy and paste geometry between applications. Please somebody do 3dcoat version https://heimlich1024.github.io/OD_CopyPasteExternal/ The following applications are supported: Modo : Vertices / Polygons (incl. Subpatch and SubD)/ WeightMaps / UVMaps / MorphMaps Lightwave : Vertices / Polygons (incl. Subpatch and SubD)/ WeightMaps / UVMaps / MorphMaps Blender : Vertices / Polygons (incl. Subpatch and SubD)/ WeightMaps / UVMaps / MorphMaps Maya : Vertices / Polygons / Weights (via Vertex Normals) (Implementation by Andre Hotz) Houdini : Vertices / Polygons / Weightmaps, UVMaps (Paste Implementation by Chris Wells) Others : Looking for contributors to write implementations for other 3d Apps (see TODO)
-
I noticed that if I take in a scanned object with "Repair Scanned Mesh", it retains all of the colors of the original. I assume these are vertex colors, but I don't know for sure. The original mesh in this case was exported from RealityCapture and DID have a UV map in the original. But when I finish my repairs and export it, there is no UV map, and no vertex colors at all. How do I repair the model AND retain at least the colors? They're still there, in the 3D Coat file. Just not in the exported FBX file. Thank you! -Chilton
-
I import a LW object, which has two surfaces named, for UV mapping. The dialog is the one for importing a mesh for per pixel painting, and maybe this is where I misunderstand. Once I hit OK, I have only the first UV set. Kind of confusing (to me), when it looks like it's going to generate one UV set per surface. I assume it isn't, because it doesn't, and that if you want different uv sets per surface, you have to set that up separately.
- 16 replies
-
- lightwave
- multiple uv
-
(and 2 more)
Tagged with:
-
Hi, Is there a way to make a brush act like the Trim Smooth Border brush in Zbrush? Basically it uses the initial normal detected when you click, for all subsequent actions, until the mouse is released. Thank you! -Chilton
-
New Tutorial!! Hard Surface UV Mapping in 3D Coat 4.5 http://www.learn3dsoftware.com/3dc_4_vol_21_hard_surf_uv_map.htm In this twenty-first video volume of 24 volumes 3D Instructor Adam Gibson goes through a project based session of Hard Surface UV Mapping of a multi-mesh layered sci-fi vehicle. UV Mapping for a lot of 3D artists can be a frustrating task. In this course easy to use work-flow tips and concepts are discussed and demonstrated to get you UV Mapping your 3D models quickly and efficiently. *Bonus: Content Folder Included. Table of Contents for Volume #21 Chapter 1- Intro Chapter 2- What is Hard Surface UV Mapping? Chapter 3- 3D Model Preparation Tips and Gotchas Chapter 4- Breaking Up Model Layer into Easier to Unwrap Pieces Chapter 5- Importing Model Into 3D Coat & Surface Materials/Paint Objects Visibility Chapter 6- Interior Compartment UV Unwrap Chapter 7- Exterior Compartment UV Unwrap Chapter 8- Rear Hatch Plate UV Unwrap Chapter 9- Front Wing Rotators UV Unwrap Chapter 10- Front Wing Thrusters UV Unwrap Chapter 11- Front Wings UV Unwrap Chapter 12- Upper Laser Cannons UV Unwrap Chapter 13- Lower Laser Cannons UV Unwrap Chapter 14- Cockpit UV Unwrap Chapter 15- Tail Fin UV Unwrap Chapter 16- Rear Wing Thrusters UV Unwrap Chapter 17- Rear Wings UV Unwrap Chapter 18- Rear Wing Rotators UV Unwrap Chapter 19- Rear Compartment UV Unwrap Chapter 20- Tail Fin Support UV Unwrap Chapter 21- Cockpit Nose UV Unwrap Chapter 22- Top Cap Panel UV Unwrap Chapter 23- Compartment Doors UV Unwrap Chapter 24- Rear Fins UV Unwrap Chapter 25- Export to UV Unwrapped Model to Lightwave Chapter 26- Final Running Time: 4 hrs. 4 mins. High Quality (Screen-Res 1920 x 1080 pixels) Video Format: MP4 (.mp4) Level: Beginner
- 2 replies
-
- uv mapping
- texture
- (and 6 more)
-
I am dead in the water on a client's project and have tried everything I can think of. I am getting bad smoothing on import. I've tried OBJ, FBX, and LOW formats. Has anyone else run into this? Does anyone have any solutions? I've made sure that the "OBJ Write Normals" box is checked in LW Preferences. I think that I am not getting a vertex normals map on import. I'd love to hear that I'm overlooking something obvious. Tech specs- I'm using LightWave 10.1 and the 3DC 4.5.19
- 1 reply
-
- lightwave
- vertex normals
-
(and 2 more)
Tagged with:
-
Hey guys, just wanted to let you know that after many months of work my second tutorial for Digital Tutors is up. This one is an arch viz scene done with LightWave and LWCad 4.51. Also included is a bit on using Denis Pontonnier's DP Verdure plugin to make some trees and bushes. Of course DT is a pay site but it is 5 hours long and if anyone is really interested in watching the whole thing I have a couple of invites I can give out to watch it for free. I would rather those go to people who really want to watch it all though since I only have 3 and don't want them to be wasted. Check it out at the link below, the first video is a preview for anyone to see. http://www.digitaltutors.com/tutoria...n-LightWave-3D Digital Tutors also made a preview video of it on Vimeo: https://vimeo.com/139497880
-
It appears that I'm getting significant normal map artifacts with the latest version of 3dCoat 4.1.17D. In previous versions, I would always get clean normal maps by simply exporting the object as a LWO. I've tested the objects in both Lightwave 11.6.3 and Lightwave 2015.1 to see if it was a Lightwave problem, but the same artifacts show up in both versions. I then loaded scenes with objects and normal maps generated by previous versions of 3dCoat and the renderings are clean with no artifacts. See images. The first image is an older scene using Lightwave 2015.1. The second image is a new scene using Lightwave 2015.1 ... it looks the same in 11.6.3.
-
Hey Guys, Were having a $7 dollar Video Sale at Learn3DSoftware.com on all our tutorials!! -Save 63% OFF all our Software Titles!! -Over 100 Titles to Choose From!! http://www.learn3dsoftware.com/7_dollar_madness_Back_to_School_2014.htm 3D Coat Version 4 Tutorials ---------------------------------------------------------- 3D Coat V4-Volume #1-Getting Started -$7 3D Coat V4-Volume #2-Getting Started II-$7 3D Coat V4-Volume #3-UV Mapping I-$7 3D Coat V4-Volume #4-UV Mapping II-$7 3D Coat V4-Volume #5-Retopology I-$7 3D Coat V4-Volume #6-Retopology II-$7 3D Coat V4-Volume #7- Voxels I-$7 3D Coat V4-Volume #8- Voxels VI-$7 3D Coat V4-Vol.#9- Voxels III-$7 3D Coat V4-Vol.#10- Voxels IV-$7 3D Coat V4-Vol.#11- Voxels V-$7 3D Coat V4-Vol.#12- Voxels VI-$7 3D Coat V4-Vol.#13-Dino Detailing I-$7 3D Coat V4-Vol.#14-Auto-Retopology Secrets-$7 3D Coat V4-Vol.#15- Photo Painting & Masking Tools-$7 --------------------------------------------------------------------------------------------- 3D Coat Version 3 Tutorials ------------------------------------------------ 3D Coat 3.5-Auto-Retopology -$7 3D Coat 3.5-Retopology-$7 3D Coat 3.5-Retopology II-Project Suchomimus-$7 3D Coat 3.5-UV Mapping-$7 3D Coat 3.5-Normal & Displacement Maps-$7 3D Coat 3.5-Painting Color-$7 3D Coat 3.5-Voxel Sculpting-Project Dragon-$7 3D Coat 3.5-Photo Painting I-Project Elephant-$7 3D Coat 3.5-Photo Painting II-Project Human-$7 3D Coat 3.7-Painting Tools & Alpha Brushes Vol.#1-$7 3D Coat 3.7-Painting Tools & Alpha Brushes Vol.#2-$7 3D Coat 3.7-Starfighter UV Mapping-Quick Method-$7 3D Coat 3.7-Starfighter Detailing-Normal Maps-$7 3D Coat- 2D Sci-Fi Alpha Brush Collection Vol.#1-$7
-
A cross grade offer, if you own a 2D / 3D app, you can get LightWave at 50% of the regular price, $695 instead of $1495 https://www.lightwave3d.com/crossgrade_promo lasts until September 30, 2014
-
Hey Guys, I just wanted to let you know about a new tutorial I just released for creating Sci-Fi Normal Maps in 3D Coat for use in DDO (3D Texturing Plug-in for Adobe Photoshop). http://www.learn3dsoftware.com/dDo_for_lightwave_users_vol_3.htm Table of Contents for Volume #3 Chapter 1- Intro Chapter 2- Creating Input Normal Maps Using Other Software Packages Chapter 3- Creating Normal Maps in 3D Coat for DDO Introduction Chapter 4- Painting Normal Maps in 3D Coat for DDO (Part One) Chapter 5- Painting Normal Maps in 3D Coat for DDO (Part Two) Chapter 6- Painting Normal Maps in 3D Coat for DDO (Part Three) Chapter 7- Painting Normal Maps in 3D Coat for DDO (Part Four) Chapter 8- Exporting Normal Map from 3D Coat Chapter 9- Exporting Normal Map from 3D Coat Chapter 10- Loading Input Maps in DDO Chapter 11- Testing Normal Map with Smart Textures Chapter 12- Normal Map Error Chapter 13- Normal Map Input Fix Chapter 14- Exporting Textures in DDO Chapter 15- Testing Final Textures in Lightwave Chapter 16- Final Running Time: 3 hrs. 0 mins. High Quality (Screen-Res 1920 x 1080 pixels)
-
Hey Guys, I just made a new tutorial on Dinosaur Detailing and Normal/Displacement Maps. --------------------------------------------------------------------------------------------------------------------------- 3D Coat 4.1- Volume #13-Dinosaur Detailing I-Normal and Displacement Maps-by Adam Gibson In this thirteenth video volume of 24 volumes 3D Instructor Adam Gibson goes through a fun project based tutorial on how to add detail through Normal and Displacement maps onto a Giganatosaurus dinosaur in 3D Coat Version 4.1. A great tutorial for beginners and those who want to create their own Jurassic Park. http://www.learn3dsoftware.com/3dc_4_vol_13_dinosaur_detailing_I.htm Table of Contents for Volume #13 Chapter 1- Intro Chapter 2- Lightwave Model Review in Lightwave 11.6 Chapter 3- How to Import Mesh Layers and UVs into 3D Coat Chapter 4- How Set-Up Alpha Brushes for Creating Scales and Creatng your Own Alpha Brushes Chapter 5- Creating Body Scales Chapter 6- Creating Tail Scales Chapter 7- How to Fix and Touch Up Bad Scales Chapter 8- Creating Arm and Finger Scales Chapter 9- Head Detailing (Part One) Chapter 10- Head Detailing (Part Two) Chapter 11- Gum Detailing Chapter 12- Gum Detail Review Chapter 13- Horn Detail Chapter 14- Exporting Model and Maps from 3D Coat Chapter 15- Checking the Normal Maps in Lightwave in VPR Mode Chapter 16- Connecting Displacement Map Node and Final Running Time: 3 hrs. 15 mins. High Quality (Screen-Res 1920 x 1080 pixels) Video Format: MP4 (.mp4) Level: Beginner
-
Hey Guys, I just finished creating a new video tutorial for 3D Coat 4, Part II of Texture Baking. http://www.learn3dsoftware.com/3dc_4_vol_17_texture_baking_II.htm
-
- 1
-

-
- texture baking
- video
-
(and 5 more)
Tagged with:
-
From the album: Phil Nolan's work
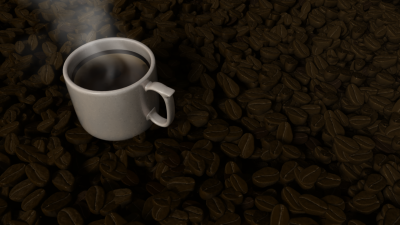
I recently made this short animation which required sculpting a coffee bean in 3D-Coat, then auto-retopoing and bringing it into LightWave where it was instanced many times to make the "floor" of the scene. This was Episode 7 of my series, jWords, where each epoisode teaches a few Japanese words. -
Hey Guys, Just wanted let people that I released a new Get-Started Trainng Series for 3D Coat Version 4 for beginners or people who are new to 3D Coat. http://www.learn3dsoftware.com/3dc_4_bundle_pack_I_Vol_1_to_12.htm This collection of 12 Volumes of Tutorials contains over 28 hours of 3D Coat Version 4 Training. An ultimate get-started guide for new users of this amazing software package. This 3D Coat bundle contains the following titles: 1) 3D Coat 4- Volume #1-Getting Started 2) 3D Coat 4- Volume #2-Getting Started II 3) 3D Coat V4-Volume #3-UV Mapping I 4) 3D Coat 4- Volume #4- UV Mapping II 5) 3D Coat 4- Volume #5-Retopology I 6) 3D Coat 4- Volume #6-Retopology II 7) 3D Coat Version 4- Volume #7-Voxels I 8 ) 3D Coat 4- Volume #8- Voxels II 9) 3D Coat 4- Volume #9-Voxels III 10) 3D Coat 4- Volume #10-Voxels IV 11) 3D Coat 4- Volume #11-Voxels V 12) 3D Coat 4- Volume #12-Voxels VI
-
From the album: Phil Nolan's work
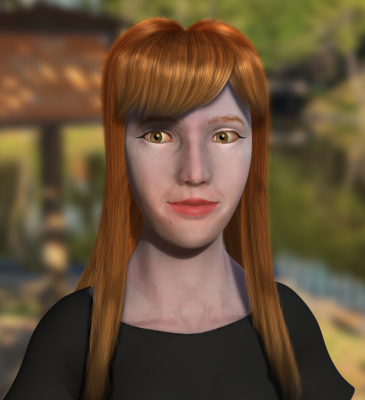
This is a shot from a short animation I did, which was inspired by a girl named Rachel who makes YouTube videos about Japan where her husband lives. She sent me reference photos to use for the sculpting and textures. The scullpting, retopo, and texture painting were done in 3DC while the hair as well as final textures and rendering were done in LightWave 3D. This is the animation. It was edited in HitFilm 2. You can find Rachel's videos here: https://www.youtube.com/user/MyHusbandisJapanese© Phil Nolan
-
Happy New Year Everyone!! We are are having a $7 Video Madness Sale at Learn3dSoftware.com All 3D Coat Video Titles are only $7 Each along with our other 3D software packages. So that's approximately 63% OFF our regular prices!! Or $12.00 in savings for each video title!! Visit Us At: http://www.learn3dsoftware.com/7_dollar_madness_New_Years_2014.htm Sale ends soon!!
-
- voxels
- retopology
-
(and 6 more)
Tagged with:
-
New User from the UK here, Downloaded the Trial Version to sample 3DCoat over the next few days before making my final decision to buy. I am using 3DC in conjunction with Lightwave 11.6 on the Mac and have tried setting up the I/O app connection with partial success. I can File>Export to Lightwave and receive the file but cannot Export to 3Dcoat. *I believe i am using version 1.3 (finding this version was slightly confusing as I believe it would be easier to either keep the applink download up to date or keep ALL versions in most recent release order on the 1st post of the thread detailing the downloads, as well as a duplicate link on the most recent post announcing its release.) This though has had the positive effect of making me work with and understand workflow between the two applications. One thing though has me a little stumped - that is Brush creation. From what I understand to create a *.psd useable in 3DC it must be of size 128,256 or 512 in size and have four layers named as follows; Color HeightMap Specular EraseMask Once created the base colour of these should be set to; Color=White (white areas will be of current paint in 3DC with grey providing tints, I assume black = no colour.) Height=Grey 127,127,127 (any white will result in extruded/raised surface with black resulting in the reverse.) Specular=White (any black will result in specular being painted.) Erase=Black From what I understand I save this as a PSD and can then drag the file to 3DC to create a brush, all I get though is a small cancel window. So I tried an alternative method of going to the brush window and clicking the plus sign and selecting the PSD from my desktop, this results in nothing happening. Is there a limit on the Trial version I have missed e.g. certain functions restricted, this being one or am I doing something wrong? Any help would be gratefully received, thanks.
-
Hey Guys, I'm having a MOVING SALE!! All our 3D Coat and other Software Video Tutorials are on sale for $10 Each (Almost 50% Off) -Over 65 Titles!! http://www.learn3dsoftware.com/quick_pick_list_10_dollar_moving_sale.htm All our videos will be on sale for only $10 Each until we have reached our goal of 500 videos sold. Don't forget to check out our Free Model Packs (Windows Collection Vol.#1 and #2) and our Youtube Channel with hours and hours of free video beginner 3D training. Have a Great Weekend:) Learn3DSoftware.com
-
Here's the first of my questions, and apologies in advance if it's a case of RTFM. There's a host of info out there and parsing through all of it in a short time can be overwhelming--so here I am, asking you. I started by bringing in a .lwo object of a human figure. It's a pretty low-poly base mesh smoothed in subD. In the import process I was asked how many polygons I wanted to use, which gave me pause because i really wasn't sure how to answer. I picked an arbitrary intermediate value and then went to town unwrapping the model. The unwrap process was a dream, by the way--bravo! When I exported the model back to a .lwo, I ran into the issue that brought me here. No matter what I did, including specifying exporting a low poly model, the resulting .lwo's base geometry was changed from the original--it was smoothed a great deal with a higher poly count. Is this result typical? Is there a way to unwrap the model at a higher sub patch level but save the final result back at the original resolution? Many thanks in advance!
-
Some changes/additions to the spline tool in the retopo room could open up a nice Lightwave fiberfx guide creator: 1. Export splines to LW FiberFX compatible guides. (a general spline export would be nice also) Each guide is made up of a 2 point poly chain and a 1 point poly "root" as the base. (see attached sample. And a description on Worley's site here under "Guide Geometry".) the root poly needs to have a separate surface (ie called "root") The rest of the 2 pt poly chain can be called "Fiber" The order of guide creation is important. One way that seems to work is to first create the root 1 point poly at the first point of the spline, then create the rest of the 2 point poly chain. Repeat with the rest of the splines. Creating all the 2 point poly chains then going back and creating all the 1 point root polys does not seem to work. 2. Option to "snap only base". While drawing spline, snap only first point of spline to surface then draw spline on screen plane (ie when cursor leaves object and draws in empty space) this way we can draw splines perpendicular to the surface or raised while the root is attached to the surface of the object. 3. Option to "stick spline base". Stick allows the spline to be modified either by point or by brush but the user cannot move the root. 4. Option to keep distance between points of spline so we can modify their position but keep length of guide the same. 5. Allow the brush to modify multiple splines. 6. Allow points on the spline that are not snapped to surface to be selected and modified. sample_LW_Hair_Guide.zip
-
3D Coat 3.7- StarFighter Detailing Volume #1 -Normal Maps http://www.learn3dso...1_norm_maps.htm In this training video Instructor Adam Gibson shows how to detail a Spacefighter model that was created in Lightwave using 3D Coat's powerful normal mapping and painting tools. Learn how to take simple models and create complex surface geometry like Sci-Fi panels, vents, pipes, rivets, and all kinds of gadgets and nurnies. Tips and tricks on how to use the different brush types along with alpha brush collections is covered in great detail. The concepts learned from this video can be used for all sorts of other projects like machinery, vehicles of all types, and architecture. Great for detailing hard surface models, but not limited to. You can also apply what you learned for organic objects as well. Table of Contents for Volume #1-Normal Maps Chapter 1- Intro Chapter 2- Importing Model into 3DC and View Modes Chapter 3- Hiding Parts Chapter 4- Polygonal Tool and Eraser Tool Chapter 5- Top Fin Base Panels Chapter 6- Top Fin: Adding Detail Part One Chapter 7- Top Fin: Adding Detail Part Two Chapter 8- Top Fin: Adding Detail Part Three Chapter 9- Wings: Top Base Panels Chapter 10- Wings: Bottom Base Panels Chapter 11- Thruster Casing: Top Panels Chapter 12- Thruster Casing: Bottom Panels Chapter 13- Thruster Casing: Front Panels Chapter 14- Thruster Casing: Back Panels Chapter 15- Thruster: Inner Bevels Panels Chapter 16- Cockpit Panels Chapter 17- Hide Tool Chapter 18- Thrusters Main Panels Chapter 19- Long Gun Casings Chapter 20- Rear Long Guns Chapter 21- Front Long Guns Chapter 22- Alpha Brushes: Intro Chapter 23- Alpha Brushes: Detailing Chapter 24- Exporting Normal Map Created in 3DC Chapter 25- Importing the Spacefighter into Lightwave http://www.learn3dso...1_norm_maps.htm Running Time: 6 hrs. 42 mins. High Quality (Screen-Res 1440 x 900 pixels) Quicktime Video Level: Beginner & Up
- 2 replies
-
- normal maps
- detail
-
(and 6 more)
Tagged with:

