


-
Topics
-
Question: How to constrain axis when moving brush
By captainbuckfish, in Questions & Answers
- Awaiting best answer
- 0 votes
- 3 answers
-
Question: Issue with Exported File and File Size ? - 3DCoat / DAZ / ZBrush
By Laticis, in Questions & Answers
- Awaiting best answer
- 1 vote
- 18 answers
-
- 22 replies
- 1,284 views
-
hochauflösende Textur: Texturübertragung von High- Poly Modell auf Low- Poly Modell (3D Modelle)/ High-resolution texture: Texture transfer from high-poly model to low-poly model (3D models)
By ModderLS22, in Materials and Textures
- 2 replies
- 121 views
-
3DCoat 2024 development thread 1 2 3 4 116
By Andrew Shpagin, in New Releases, Bugs Reports & Development Discussion
- 3,452 replies
- 552,039 views
-
-
Who's Online 0 Members, 0 Anonymous, 45 Guests (See full list)
- There are no registered users currently online
-
Posts
-
 I see please ask for feature request at support3dcoat.com Thanks
 -

By captainbuckfish · Posted
Hi, Thanks for the reply, I do use the plane option sometimes but mainly for keeping things on the same plane. what I was looking for is to be able to move the lasso but also to constrain its movement along an axis similar to in photoshop when you hold the shift key and it moves the brush only in one direction. I suppose you could do this with the 2d grid and snapping but that would mean switching that on and off each time I want to do that type of cut -
I found this, it is useful info ? If want to keep polygroups while importing and exporting you can create a duplicated version of the desired polygrouped Subtool and create UV with UVMaster. Enable polygroups will create separate island for each polygroup. So if you want the polygroups back in the imported mesh from other program you can copy from the subtool you have correctly polygrouped and then paste in the new imported. Then Go to Polygroups And press Auto Group with U ZB vs 3DC polycount differs because both programs adds metadata to obj file format. If you open both files on notepad+ (as example) can see the headers differ: On both files, the face location looks similar When I export, I use this set ON I was thinking one way... duplicate the mesh with pgroups on ZB, make UVs on 3DC, export/import and on ZB transfer UV from one mesh to the original. 3DC lacks of ID maps, or polygroups on ZB, FaceSets on Blender. Group faces let to assign user-defined editing regions that can be used in Modeling and Sculpt mode, but since 3dcoat uses different mesh types in sculpt room and modeling/retopo room, that is not possible as I understand it. Will be nice if you ask to add it as feature request at support@3dcoat.com
-
Have you done a fresh install? Or did you install the new version over the previous one? When you have a crash, did you send the crash report?
-

By rosikowski · Posted
nope, I was trying latest versions few days ago, crashes still happening for me -
 Hi, I just want to add a little more to this thread about the workflow. Step 1 - Created a simple mesh in ZBrush, created Polygroups to define region and did a quick and dirty UV Map inside of ZBrush. -------------------------------------------------------------------------------------------------------------------------- Step 2 - Exported from ZBrush as (obj) with SubGroups and imported into 3DCoat (via Per Pixel Painting) - Lock Normals Note: The first intention is to use 3DCoat solely to update and improve the base mesh's UV layout. Which works well except for one major issue. The exported base mesh now has a different vertices count. This is caused by the way 3Dcoat interprets the exported mesh's polygroups as separate meshes. -------------------------------------------------------------------------------------------------------------------------- Step 3 - Re-Exported from ZBrush as (obj) with No SubGroups and imported into 3DCoat (via Per Pixel Painting) - Lock Normals Note: this works, no additional vertices in the exported mesh but via this method lose the polygroups which comes in really come in handy for texturing and for managing the mesh inside of DAZ Studio. -------------------------------------------------------------------------------------------------------------------------- Step 4 - Import the ZBrush Mesh with Polygroups into DAZStudio first, create surfaces from selected faces (using polygroups) - Export mesh from DAZ with ( use Surface Names ) -------------------------------------------------------------------------------------------------------------------------- Step 5 - Import into 3DCoat ( this presents an issue though as it splits up the UV ) - as attached Step 5 - issue. -------------------------------------------------------------------------------------------------------------------------- Step 6 - Select isolated islands, [move selected islands to another UV-set] clean up UV + [apply uv-set] + [delete unused UV Sets] + Save File + Export Mesh from 3DCoat with [use Source Positions] Note: this simple saved 3DCoat file is 49.3 MB ( the original base mesh is only 640 KB ) -------------------------------------------------------------------------------------------------------------------------- Step 7 - Imported the Exported Mesh from 3DCoat into DAZ - gives me desired results ( Updated UV and Polygroups ) but the newly imported mesh Vertices (or order) does not match the original base exported from ZBrush. This is confirmed because I can not make morphs for the new mesh based off the original mesh. -------------------------------------------------------------------------------------------------------------------------- So questions.... 1. Can anyone see if there is a way that might be faster of if there is anything I am doing wrong. 2. Where along this workflow is the vertices order changing. ( I never used to have this issue with earlier version of 3DCoat ) 3. Why are 3Dcoats saved file so large? --------------------------------------------------------------------------------------------------------------------------
 -

By ModderLS22 · Posted
Hello Carlosan. I think the first video is the closest to what I'm looking for. I'll take a closer look and try out what is shown there. Many thanks and best regards, ModderLS22. -
@Elemeno @Mihu83 Sorry but I cant replicate, are graphics drivers uptodate ?
-
-
 Hi, version 2024.19 - all brushes are off center, kinda like badly calibrated tablet. In version 2024.18 all works fine. Also, something that is pretty frustrating with something like Vox Layer tool and many other that include shape selection/masking - very often vox layer isn't created and selection disappears, after hitting CTRL + Z selection shows up, but only partially in glitched form and it won't work anyways. It need to be Deselected and draw again... pretty damn annoying thing, that is causing a lot of time waste... Don't remember when was the first time I've noticed it, but this behaviour is there for quite some time.
 -
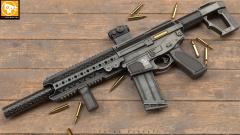
 For people watching this. While this obviously works I want to suggest a more flexible workflow for simple parts like this. Vox Hide is like cut off, only with ability to have volume reappear which gives you insane flexibility. Sketch is a simple but clean tool to create basic shapes at the start.
 -
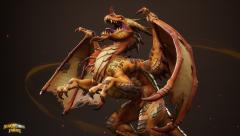
https://fabiomontorzi.gumroad.com/l/tutorial3Dcharacters TUTORIAL I decided to record this tutorial after finally developing an efficient workflow to build 3D characters for concept art. I've always struggled with this because it took so long. I tried different approaches using various software, but I didn't want to rely on clothing simulation programs or software to create characters by adjusting parameters or marketplaces where I have to search and buy clothes and accessories.
-
-
On Carve tool, try activating "On Plane" Hope this help
-
By captainbuckfish · Posted
When I use the carve brush or sphere brush in voxel mode I usually use a rectangle or circle lasso. With the shape I cut or add to the voxel geometry. I can press the spacebar to move the shape around but I cant lock it on an axis. Sometimes I just want to move directly up or at an angle that makes it match the previous cuts position but I cant constrain the axis. Also if I press a number key to create duplicate shapes and want them in a line there isnt a way to constrain to an axis, so its a bit of guess work to get it perfect. Am I missing a keyboard shortcut here? Thanks for any help with this. -
 Yes, thanx! Its worked! I opened is as a TIFF, deleted alpha channels (somehow it had 4 Alpha channels), changed Mode to Grayscale and set 16 bit. Worked with drag-n-drop to Viewport. But still, this issue remains with ton of default brushes, which means if I want to use them - I need to edit every single brush manually and then reload them again, kinda time consuming) Thank you a lot!
 -
I am forwarding this issue to dev team, meantime try this please Take pen.psd on Pshop ot gimp and delete all layers Also remove alpha channel So we have a new image Convert to grayscale, 16 bit Save as png (attached) (not .psd) On 3DC drag and drop the png over the viewport, a panel popup Select create a new alpha, try painting. note: the weird kind of "menu" is like 3DC shows how it was made with channels. remember, 16bit grayscale alphas must be edited externally as TIF Create alpha brushes & decals documentation Remember that if you want a 16-bit alpha (texture) that has logically more quality, convert or save your alphas (texture) in TIF or PNG format and then import it into 3DCoat. > If you want to edit these alphas, I advise you to open the original alpha (texture), make your changes, save to the appropriate extension, and then import Alpha again into 3DCoat. That way, you avoid making mistakes by changing a file with 4 layers (Color, Height, Spec, Erase), it's much easier to work on your original alpha (texture) with just a single layer.
-