Search the Community
Showing results for tags 'smart material'.
Found 19 results
-
Hi all, I'm really enjoying the smart materials, but I keep running into a snag. When I initially open 3DC and start working, selecting a smart material brings up the preview options at the top as well as a twirl down preview window to see the material applied to my model - sounds normal right? This works great, but if I inadvertently close the preview options (which also closes the preview window) then select another smart material, the options pop back up, but I can't for the life of me get the preview window to come back! I've looked at and clicked on everything I can think of to figure out the trick, but the best I could do was to get it to return when I open the smart material editor. Better than nothing, but it only stays as long as the window is open, and I have to close/reopen the editor if I want to try another material, which can get pretty tedious. Any ideas on how to call that preview window back permanently? Thanks!
-
 painting - first layer, smart material with texture; second layer, smart material with no/smooth texture Problem: I want the second layer to not have the texture of the first layer. Currently is just paints over the old texture but using the new color. I want the new layer to remove the texture from the base coat and just be smooth Thank you
 -
 I'm new to 3D modelling, so please bare with me if this is a dumb question. I have a model textured using smart materials in 3D Coat Textura, but I don't know how to export the material as the normal/specular/diffuse textures that Fallout 4 requires. Is that something that's even possible, or do I have to convert the material into another format or something like that? Following a tutorial on YT but that video uses Substance Painter instead, so I'm kind of stumped. Any help would be much appreciated! EDIT: Solved, I had to set up my export preset specifically the specular output
 -
Hi folks, I am using poliigon.com as a source for my textures. They have support for Blender, Maya, 3Ds etc, but no offical notes on 3D Coat usage. Their textures are generally a folder with 2x color maps, 1 greyscale displacement map, one normal map, a gloss map and a reflection map. See example below. My understanding is that 3D Coat smart materials do not use normal maps - correct me if I am wrong. My general usage has been: Either color in color slot, displacement in the depth position, gloss in metalness, and nothing in roughness (example has color 2 in roughness - probably does not make sense). I had a quick chat with one of their support guys who gave me the following comment: You can pretty reliably convert our maps over to the metalness format which 3d Coat wants, by simply taking our Gloss map, inverting it in Photoshop and plugging it into the roughness channel. Assuming it's not a metal material then just use a pure black color for the metalness input and it should be setup correctly. Now for normals you may need to flip the Y channel depending on what 3d coat is setup to read; opengl normals will stay the same as they are now, but directx normals will require the Y flipped. You can do this in Photoshop by selecting just the green channel of the normals and inverting it and saving. Hope that helps! Based on my understanding, I should not be using the normal map at all. I have also seen others on youtube that uses gloss in metalness, but based on his recommandation this is incorrect. He also has a comment regarding using opengl vs directx - since 3D Coat has two ways of running (gl - I assume opengl) vs dx (I assume direct x), does it actually make any difference in terms of smart material texture usage? And what is your recommended usage of the textures for the different slots? Should I use a different provider? Your help is much appreciated! Thanks, Terje
-
 I've recently picked up 3D coat to explore its features. I'm extremely new to this and it's exciting to delve into the many features of the software. I've used Substance Designer and Painter extensively and have become accustomed to a procedural workflow. This is a very different approach and I'm slowly getting the hang of it. I especially love 3D coat's painting tools, but have found shortcomings in the smart material system. Perhaps this is just my lack of knowledge about 3D coat, or perhaps there are features that are missing here. So I have a few questions about this. Any help would be much appreciated! 1. Can I set the blending method for a smart material layer? (overlay, screen, ect.). This is where I feel severely gimped. Being a Photoshop artist, I've gotten used to the results of juggling colors on top of each other in a certain way (such as the result when you use red with soft light over skin tones)... Things just happen in a way that is to be expected. It's a lot more difficult to make complex materials without layer blending options. 2. In the future, I hope there be options to apply effects to smart material layers. (such as Blur or HSL). this goes in hand with layer blending. 3. When I save a smart material, then move the textures used to create it, I get an error that the material is broken. However, if I export the file as a 3dcpack and then import it, it's fine. This is awkward and could be improved. 4. can the "More on Bumped" and "More on Dent" options be local to the height values of the smart material itself? 5. The "Apply Procedural Noise" checkbox could be a lot more useful if I could access other noise types (or upload them). Such as perlin. Thanks for your time I hope that these issues are just hidden options I've missed. I really am loving 3D Coat regardless. If they're absent features, then I hope there is a workaround, or maybe they will arrive someday in the future! Cheers, Allen Grippin
 -
 So i started to learn 3d coat and i dont really know if this is intended or not so i started to try out smart materials and i noticed that the smart material preview has got a lot more details/quality than after i paint. Picture: The model that i want to retexture is a UV mapped - high poly model with 2048x2048 textures. I want to make 4k textures for the model basically. What should i do to get these crisp details for the final texture too? thanks in advance
 -
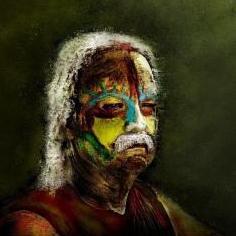
I have had this interesting puzzle for some time now. When I apply a smart material, the preview box shows this astounding, detailed, just *gorgeous* material. When it's applied- not so much. Here's a sample of what I mean, as attached. What am I missing?
-
 Hello, I have multiple issues possibly stemming from my custom texture size but who knows. my entire game project is at a texel density of 0.72, putting a 1x1m texture at 144pixels squared. This is a huge problem for the reasons outlined in 3dCoat. 1. Custom texture sizes dont stay. If i set a custom texture size, although it sets, if i then go back into the texture size dialogue, it automatically switches them all to the closest power of 2, so if i then make a change to one texture and save, all the others will revert back to the closest power of two. 2. changing to custom texture size refreshes dialogue to top of screen. I am working with multiple objects, changing the custom texture size will reset the dialog and revert to the top of the dialogue, forcing me to scroll down to find the texture again. btw because of u,v i haveb to do this twice a texture. definately needs to be fixed. 3. at 1:1 resolution in UV mapping paint on a smart material, the top pixel is always skipped. doesnt matter what i do, the top pixel is always broken, it will never paint over it. However, if i change the scale in uv mapping to anything other than 1, it will paint?! 4. In the texture editor, non power of 2 textures do not work in smart materials in UV mapping mode. Please help / Fix these issues. Ben Swinbanks
 -
 Hi, I'm having a problem with smart materials, in particular the particle brushes like dirt and scratches. When exporting the psd to photoshop, the particle brush's brush strokes show up as full brush strokes. When I load them back into 3d coat however, they look fine, although creating a duplication of the layer will cause the new one to look as it does in Photoshop (full brush strokes). This means that the object looks fine in 3D coat, but when I try to test it in game or export it to another program like Substance painter I get these thick lines everywhere that weren't visible in 3D coat. My guess as to the problem is that the 3D Coat editor can interpret the layers as particle brushes fine, but the 2D version of the UV map is saving them as full brush strokes. Creating a new layer with the same colour/diffuse information causes the 3D editor to not recognise the layer and interpret it as it actually looks in the 2D editors. I have attached some images to illustrate the problem. Thanks in advance, Matt
 -

Can somebody help a newb with smart material issue?
wheelmanforhire posted a topic in General 3DCoat
I've been struggling with this for 3 days... My metal layer is NOT showing through my chipped paint layer on a Voxel model - it just shows "black" where the metal should be (see below). It works great on a UV model, I tried adding UV but still no luck! I'm missing something really simple but I'm ready to give up in frustration! Thanks in advance -
Hi there, I accidentally lost the metal smart material. I tried to reload it back but couldn't find it in my C drive. Any suggestion? thanks
-
Hi everyone, Juste a simple question. Do you know a web site or a link where i can get more smart material for 3d coat? Something like a pack with several smart material, i don't know if that existe bdw. I need to make a middle-age scene in unity and a scisfi scene in unrial engine and i look for stone/wood en metalic texture. If you know something, please tell me becouse i just find noting on the web. Sorry for my sentences, i don't speak very well english Thanks Skylynne47
-
Hello 3D Coat! I've recently dove into PBR in general and I decided to go with 3D coat since I already own it and can directly upload to sketchfab. I've viewed some tutorials and I've decided to make my own smart materials to learn the workflow instead of using default ones. I've made some progress but one question I have is that there is the smart material preview window and while it is handy I like to use the paint bucket to fill an object so that it has whatever smart material I'm working on even outside the preview and I don't have to wait for it to render. However, it would appear that once you fill with the paint bucket it keeps the parameters of the smart material at the time and that even if you adjust them later it won't reflect the new ones. That's fine, as I suppose you just fill the area each time you want to update the material (and then use the preview window to view the material as you work on it). However, one thing I noticed is that normal maps seem to be "permanent". Here's an example of what I mean, I'm working on a rusty metal texture, and there is an edge scattering texture and a normal map to give a scattering of rusty and some bump so that the rust isn't flat. So there is the metal latch with the original texture, however if I paste a different smart material... The new material is applied but the rusty normal map remains! This is unlike any texturing program I've encountered as the texture seems to affect the object permanently, which definitely makes me hesitant to experiment and try new textures. Is this normal or is there a way to prevent this? I've seen the "fill with freeze" option in the paint bucket tool which has been suggested but I'm not sure what that does and all it seems to do is fill the area with a checkerboard texture. Ideally I'd like to be able to be able to work on smart materials within the preview window and fill each area when I'm happy with the results. Thank you for your time and please let me know if you know of a solution.
-
Smart material option not coming in 3D coat
-
Hi, guys. I just started a series in order to introduce 3D-Coat to the brazilian audience. The tutorial is in portuguese and it's really basic this time (its just a introduction to some basic painting workflow). Hope you like it!
-
For new users I transposed on my part a few weeks some information on how depth works in the Smart Material Editor. A better way to understand it is below. Top Tool Panel depth is set 100% The best way to think of this is just have the top tool panel set to 100% always when creating your smart material and then just set the smart material depth as you normally would. If on the other hand the top tool panel is set at say 50% depth and you set the smart material at 20% depth, it is going to be 20% of half strength (50%) depth because the smart material gets its depth calculated from the top tool depth setting. Now if you or another person you shared your Smart Material with has a different depth setting in the top tool panel, the 20% in the Smart Material will base off that depth setting in the top tool panel. The smart material will not appear has you made it originally because of this difference. Sorry for any confusion this cause anyone.
-
 Look at screen grab. The left object is the original high res model, the right is a low res paint object. As you can see the copper material is totally screwed up on the paint object. This happens on both release and beta version. Can anyone help me out here? Why is it doing this?
 -
 Hi there I imported a 3DSMax obj format mesh already unwrapped into 3D Coat for Painting. When I create a smart material and see the result in the "Smart Material Preview" window, the details of a noise depth (TextureScale 1% to get a thin result) for example look really nice. But when I paint, I always en up with a pixelated and far less defined result as you can see in the screenshot below : As I work on a 2048 texture map in 3DCoat I should end up with thin enough details ? If someone know a way to fix this issue, it would be great. I have to finish this text for a potential job asap and I'm a bit stuck because of that
 -
 I haven't been using 3D Coat very long so I'm more than willing to admit operator error here, but I've been playing with building smart materials and I'm very excited about what's possible, yet I've run into this frustrating hiccup where the smart material preview looks terrific and detailed, but when I try to fill that texture to the layer, the result looks horrible, blurry, and splotchy. I though that the resolution of the texture might be the issue, but I'm getting the same problem even with 8k textures. Is there a reason that this is happening? What am I doing wrong?