philnolan3d Posted November 18, 2017 Report Share Posted November 18, 2017 I made a normal map texture for a client and he wanted it on an object for renders.That was fine and done but now he wants to 3D print the object so he can actually feel the texture. Is there some way I can use the normal map to get real depth on the object? I thought there was a way, maybe with the smart textures, but I don't remember. Quote Link to comment Share on other sites More sharing options...
Carlosan Posted November 18, 2017 Report Share Posted November 18, 2017 You have a Sculpt mesh where you did the sculpt for normal map baking ? Bake into Scene Microvertex could help, but need to export high resolution mesh to keep details. Millions of polygon is internally what 3DC is going to use to create the displacement map. Multiply the texture width by the texture height to get the minimum number of polygons needed to create the displacement map. 2k x 2k map would equal 4 million polygons. Display mesh resolution-- 3DC will auto decide the subdivision level for the bake. You can choose other sizes but you should subdivide the model for displacement creation. You can still export the low polygon model from the paint room. Quote Link to comment Share on other sites More sharing options...
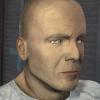
philnolan3d Posted November 18, 2017 Author Report Share Posted November 18, 2017 I don't have a sculpted mesh that I started with. I did a 3d scan of a bracelet to get the texture and in 3DC I duplicated it a bunch of times then baked that onto a single polygon to get a flat normal map that I could tile in LightWave. Now I need to apply that to the model that I made in LightWave. But it needs to have actual depth. This is what the render looked like from LightWave. I just need to to give it real depth. Quote Link to comment Share on other sites More sharing options...
Reputable Contributor Fluffy Posted November 18, 2017 Reputable Contributor Report Share Posted November 18, 2017 Have you tried exporting the depth information from the paint layers as a Displacement Map (Paint Room > Textures menu > Export > Displacement Map of Visible Layers), then applying that displacement map to a high poly version of your model in Lightwave? Quote Link to comment Share on other sites More sharing options...
Carlosan Posted November 18, 2017 Report Share Posted November 18, 2017 Unless your printer can convert a displacement map into height geometry, I understand that the only way is to create a new mesh of high geometry to be able to print the sculpted details. Quote Link to comment Share on other sites More sharing options...
philnolan3d Posted November 18, 2017 Author Report Share Posted November 18, 2017 3 minutes ago, Fluffy said: Have you tried exporting the depth information from the paint layers as a Displacement Map (Paint Room > Textures menu > Export > Displacement Map of Visible Layers), then applying that displacement map to a high poly version of your model in Lightwave? I have not. I will try that, thank you. Quote Link to comment Share on other sites More sharing options...
Carlosan Posted November 18, 2017 Report Share Posted November 18, 2017 Lightwave let you bake displacement map to geometry ? Blender or ZB let you to do it. Quote Link to comment Share on other sites More sharing options...
philnolan3d Posted November 18, 2017 Author Report Share Posted November 18, 2017 Not baking but just applying displacement to the model. Quote Link to comment Share on other sites More sharing options...
Reputable Contributor Fluffy Posted November 18, 2017 Reputable Contributor Report Share Posted November 18, 2017 I don't use Lightwave myself but according to this post from the Newtek forums Quote In layout go to File>Save>Save Trans Object This will save out your object as it is seen in layout. you can save out the visible geometry as seen in layout (so assuming Lightwave is capable of displaying displacement maps on models in the viewport it should be possible to export the displaced geometry). Quote Link to comment Share on other sites More sharing options...
philnolan3d Posted November 18, 2017 Author Report Share Posted November 18, 2017 Oh yes, Save Transforned is very common, we actually learned that back in school. I just have to get it displaced first. Thanks. That's actually what I was trying to do before with the Normal map, but it wasn't displacing, so I thought maybe there was a way to do it in 3DC. Maybe with an actual displacement map it will work. Quote Link to comment Share on other sites More sharing options...
Carlosan Posted November 18, 2017 Report Share Posted November 18, 2017 Import model in Surface sculpt mode, subdivide as desire. Switch to Paint room > Use fill tool > Fill w/freeze = on Pattern Type > Add custom, select your texture > Fill Layer Switch back to Sculpt room, use Noise tool to add details. Quote Link to comment Share on other sites More sharing options...
philnolan3d Posted November 18, 2017 Author Report Share Posted November 18, 2017 Oh wow, that did the trick. I never would've though of going to the Paint room and freezing. Actually the Noise tool didn't fill it evenly but i just used Absolute and painted it on. I just wish I could make the freezing invisible so I could see where I'm painting for sure. Noise: Absolute: Edit: Oh wait, after some more experimenting I can make the Noise work, Just have to put both sides of the curve at the top and set the dropdown box to Normal. 1 Quote Link to comment Share on other sites More sharing options...
Contributor Tony Nemo Posted November 21, 2017 Contributor Report Share Posted November 21, 2017 BTW, Shader Map 4 can generate a displacement map from a normal map. https://shadermap.com/home/ 1 Quote Link to comment Share on other sites More sharing options...
philnolan3d Posted November 21, 2017 Author Report Share Posted November 21, 2017 Oh thanks I was looking for something that would do that. Quote Link to comment Share on other sites More sharing options...
Reputable Contributor AbnRanger Posted November 21, 2017 Reputable Contributor Report Share Posted November 21, 2017 Even in PPP mode, you can make your normal map detail actually displace in the viewport. In the VIEW Menu, toward the bottom, there is a SHOW DISPLACEMENT checkbox. You would obviously want to subpatch it a bit before doing much work on it. Quote Link to comment Share on other sites More sharing options...
Member Speike-Styles Posted November 21, 2017 Member Report Share Posted November 21, 2017 2 hours ago, Tony Nemo said: BTW, Shader Map 4 can generate a displacement map from a normal map. https://shadermap.com/home/ Hey thanks for sharing this. Very useful! Quote Link to comment Share on other sites More sharing options...

Recommended Posts
Join the conversation
You can post now and register later. If you have an account, sign in now to post with your account.
Note: Your post will require moderator approval before it will be visible.