
-
Topics
-
Future development wishlist 1 2 3 4 18
By Andrew Shpagin, in New Releases, Bugs Reports & Development Discussion
- 526 replies
- 103,413 views
-
Question: How to scale by normals in sculpt mode
By whirlypie, in Questions & Answers
- Awaiting best answer
- 0 votes
- 3 answers
-
- 54 replies
- 70,692 views
-
3DCoat 2024 development thread 1 2 3 4 118
By Andrew Shpagin, in New Releases, Bugs Reports & Development Discussion
- 3,523 replies
- 570,493 views
-
- 9 replies
- 1,163 views
-
-
Who's Online 3 Members, 0 Anonymous, 793 Guests (See full list)
-
Posts
-
By Oleg Shapov · Posted
If you have specific steps to repeat the instability in your work, please write them. -
By Oleg Shapov · Posted
Hello! Have you tried the Vox Layer tool? -
 Laptop: Dell Latitude 7350 Detachable review- Collaboration made easy - PCWorld. Mini PC: Asus ROG NUC 970 mini gaming PC review - PC Gamer. Mouse: Alienware Pro wireless gaming mouse review - PC Gamer. Mouse: NZXT Lift 2 Ergo Review - TechPowerUp. RAM: Kingston FURY Renegade RGB Limited Edition 48GB DDR5 8000MHz CL36 Dual-Channel Kit Review - Nikk Tech. RAM: TeamGroup T-Force Vulcan Eco DDR5-6000 C30 2x16GB Review- Eco-Friendly DDR5 Performance - Tom's Hardware. Case: Thermaltake The Tower 300 Review - APH Networks. Headset/Earbuds: FiiO FA19 In-Ear Monitors Review - TechPowerUp. Keyboard: Wooting 60HE+ review- Easily the best mechanical keyboard for a competitive advantage - Android Police. Thanks Neutronbeam. Monitor/Projector: Xiaomi G27i Gaming Monitor Review - 1080p, HDR10, FreeSync, 165Hz 1ms gaming for under $150 - TweakTown. PSU: The Lian Li EDGE EG1000 1000W ATX 3.1 PSU Review- Power On The Edge - AnandTech.
 -
You can Run as admin as Compatibility on shortcut Properties. Testing v2024.22, I cant replicate this issue, sorry Presets are working as expected.
-
 Hi, whenever I add a tool preset, I get this error message. The solution for now is just to run Coat in Admin I think. More annoying, I see now that alphas fail to be selected by tool presets. You save or update a preset with an alpha, and whener you pick this tool preset, the alpha is the first default one, instead of the one displayed in the preset thumbnail: If I manually re-select the correct alpha, it works, but the tool preset fail to select it.
 -
 Hi, basically every tool/hotkey behaves the same. If for example were using a Pose tool, and switching to Sphere tool with a hotkey, hitting it twice will get me back to Pose tool.
 -
-
Seems it is problem for me as well... Tried everything, reinstaling, updating, turning sticky keys in prefs, nothing works, and tool always swaps between last used, while pressing a key twice.
-
-
-
Try changing the Brush Pressure
-
By Omni-Moulage · Posted
Thank you Carlosan, your answers were very helpful. Everything is working well now. Have a wonderful day in this world -
 Hi I'm trying to follow a tutorial and when the dude use the sphere tool with a line brush it has the same thickness as when he uses the circle brush. Why when I use the circle brush it is thinner? (Same all radius) https://imgur.com/a/mtmK0SC
 -
 yep you're right. Obviously that wouldn't work in voxels, thanks. Do you know if there is a method that uses surface mode instead? I wouldn't mind converting to surface and then back again to voxels afterwards, or even lowering the resolution. I just need a rough shape to work with at the moment without having to manually layer brush the whole thing.
 -
 I am simply saying that it is far more efficient to communicate directly with Andrew. That is what I do when I have a problem with the software. Sometimes I might share the problem on here, to see if others are experiencing the same, but I know the best way to get some action taken on it is to go directly to the man who can fix it.
 -
 you have voxels here ... thats essentially the block mesh , if you want to extrude or make something thicker inside sculpt room especially with 700k tris you need to just sculpt it in , imagine youre working with clay , the method you use for clay would be the method you need here, even in blender with such a dense mesh you wouldnt use a solidifier .
 -
Hello, I am making clothing for a character and would like to extrude the pants so that they are thicker than the body, but don't know how to do so. In blender, there is a way to scale by normals and also a thickness modifier that both would work. Is there any tool in 3D coat that would have a similar effect to these two? Thanks
-
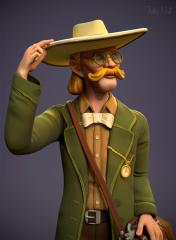
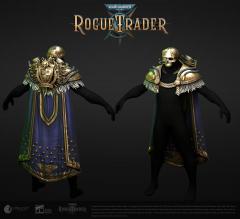
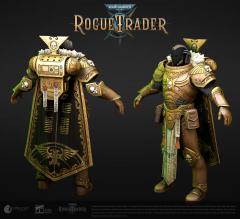
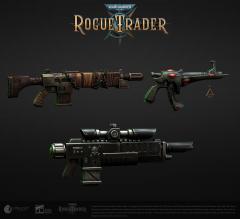
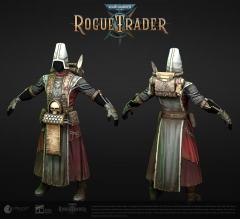
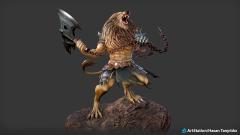
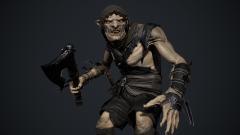
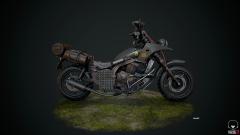
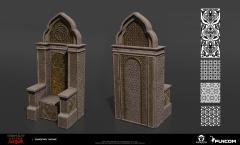
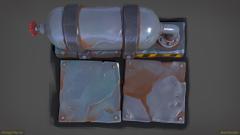
source... What’s most important when you make 3D character models. Step-by-step 3D character development. Character concept design. Modeling. Rigging. Animation. Conclusion. The role of characters in video games is difficult to overestimate. A perfectly designed environment and a well-thought game design are essential for any game. But the look and feel of the characters and their behavior play a considerable role in the game’s reception by players. In some genres, the protagonist even defines the general direction of the plot in which the game develops and sets the game’s pace. The creation of 3D characters is a specific area within game art that requires many different areas of expertise. In this article, we’d like to share our ideas on creating unique game characters that players will remember long after they finish the game. What’s most important when you make 3D character models 3D character production is based on three pillars: skilled artists with complementary expertise, communication, and tools. Skilled artists are the most valuable asset of any studio. Expertise determines a lot — from the quality of execution and ability to synchronize with the project DNA or IP’s history to the power of creating something truly outstanding. At Room 8 Studio, we work in different styles, from realistic, semi-realistic, and stylized to cartoony. We have a big team of 3D character artists with diverse expertise and complementary skill-sets, whose creative decisions are backed by more than 500 3D characters, skins, and outfits created in Room 8 Studio. 3D character development requires smooth communication between teams: from concept artists to 3D modelers and animators, all teams should be aligned to deliver outstanding results. We also strongly believe that the highest project management standards are at the core of any work. Step-by-step 3D character development Character concept design Character concept art is the design of an entire concept and style of a character from scratch. To build a character design concept, an artist needs to embody the idea that captures the essence of a character’s personality, including their appearance, distinctive traits, background, behavior, habits, and many more. Designing character concept art starts with seeking the sources for character inspiration, idea generation, research, and character drafting. To develop a character concept, an artist usually begins by preparing a mood board, then creates several sketches which include the silhouette and main facial and body features of a future character for the client to choose from. Once the character has a design, the artist continues working on the colors and making all the rest of the concept. At this stage, an artist also thinks over the groundwork for the next steps, such as different angles and movement sheets to help the animator capture the character’s theme and personality. After that, the character gets modeled in 3D, rigged, and animated. Modeling Blocking At this step, we block out the body’s basic shape and face of a future 3D character model, its skeleton, and muscle frame. An artist must have at least a basic knowledge of human anatomy. Understanding overall harmony and proportion is essential for both realistic and stylized characters. Even the hypertrophied forms of stylized characters need all body parts to look good together and create the desired overall impression. Sculpting Sculpting is a technique by which an artist creates a 3D character with digital material similar to natural clay. This stage is vital in making realistic, hyperrealistic, and stylized 3D characters. It’s also the most exciting and fun stage in the whole process of character creation. Sculpting allows the artist to reach incredible levels of character detail by inserting details into meshes that would otherwise have been difficult or impossible to create using traditional 3D modeling techniques. Retopology The proper 3D model needs good retopology — the polygons should be organized and aligned correctly and logically to ensure the future animation performs well. Retopology also aims to convert a High Poly model into a model with an optimal count of polygons; in other words, it’s a decrease of polygons in a model. Unwrapping and baking Once we have all the previous steps completed, we’ll need to UV unwrap and bake a character model. Sometimes artists need to manage the process of baking a model that consists of 30 or even 50 different materials. Texturing Texturing is an exciting and creative process. At this stage, 3D artists apply color and surface attributes to the character model. The general objective is to make a 3D character model that matches its concept or real-world prototype in each detail, like hair color, some imperfections like scars on a face or body, clothes, and other unique attributes. The overall correct display of a character and micro-details like the model’s interaction with light is key to believability and appeal. The player’s mind can reject the wrong material of clothes or surface properties as non-realistic. To get an impressive character that could fit a AAA project, we approach the process of texturing with the max attentiveness and consistency, using lots of different tools. Rigging Rigging the model means creating a skeletal structure that helps with model animation, so the model follows the structure of the skeleton. Some automatic ways of rigging are presented as features in several game engines like Unity and Unreal Engine. But manual rigging is an important step in a game character modeling for proper animation. Rigging can never be fully automated if you want to achieve great results. Some tools with their algorithms can be a great base, but the involvement of an experienced artist in this process is crucial. Animation The animation is the final step in the character creation pipeline. Here the 3D character model comes to life — gets facial expressions and body movements. Each movement should reflect the character’s personality, be natural and realistic, and evoke certain emotions in the player, be it joy and laughter or, for example, compassion. All this can be achieved by high-quality character animation. As was mentioned above, the foundation for future animation is laid on the rigging stage, when the character gets a bone structure that defines the possible range of movements. To create the correct script and set the needed parameters of motion in a program, a 3D animator must be familiar with the principles of human motion, bipedal creatures, animals, facial expressions in different moods, and finally, be good in physics. Very often, after the motion capture data is imported, the 3D animator has to fix up the keyframes to achieve perfection in the character’s facial expression or body mechanics. Conclusion Game character development requires a lot of expertise and skills that have been polished with years of work in different styles. An experienced artist can make your game character not just well-designed but memorable and captivating.
-