Search the Community
Showing results for tags 'Paint'.
-
Hi everyone, I wanted to introduce myself to this very helpful community. I've been using 3D Coat for a while now, mostly to UV map hardbody models I've done in Cinema4D. My plan was to do low poly models, then use normals to add additional detail like grooves and panels. Initially I used Quixel's NDO for this, but it runs at a snail's pace on my machine and I simply can't work like that. Yesterday I had a closer look at 3DC's Paint Room and it seems to have a lot of the functionality that NDO and Photoshop would offer. However, for the life of me, I can't seem to get a brush stroke to follow a square or a closed spline path. All I get is a fill in the shape of the spline/rectangle. Mind you, I know about the Spline Paint Tool, but that doesn't offer the flexibility in terms of creating shapes (rounded rectangles, loading EPS files and the like) that the 'E' menu offers. There must be a way to do this. Can you help me find it? That'd be great. Thanks a lot in advance.
-
 Hey Guys, We are having a $7 Video Summer Madness Sale at Learn3DSoftware.com. All 3D Video Tutorials are $7 Each Until 500 videos are sold. http://www.learn3dsoftware.com/ 3D Coat Tutorial Catalog ------------------------------------------------------------------ 3D Coat Version 4.5 Tutorials ---------------------------------------------------------- 3D Coat V4.5-Vol.#18-Smart Materials I- $7 3D Coat V4.5-Vol.#19-Smart Materials II- $7 3D Coat V4.5-Vol.#20-Smart Materials III- $7 3D Coat V4.5-Vol.#21-Hard Surface UV Mapping- $7 ------------------------------------------------------------------ 3D Coat Version 4 Tutorials ---------------------------------------------------------- 3D Coat V4-Volume #1-Getting Started - $7 3D Coat V4-Volume #2-Getting Started II- $7 3D Coat V4-Volume #3-UV Mapping I- $7 3D Coat V4-Volume #4-UV Mapping II- $7 3D Coat V4-Volume #5-Retopology I- $7 3D Coat V4-Volume #6-Retopology II- $7 3D Coat V4-Volume #7- Voxels I- $7 3D Coat V4-Volume #8- Voxels VI- $7 3D Coat V4-Volume #9- Voxels III- $7 3D Coat V4-Volume #10- Voxels IV- $7 3D Coat V4-Volume #11- Voxels V- $7 3D Coat V4-Volume #12- Voxels VI- $7 3D Coat V4-Volume #13-Dino Detailing I- $7 3D Coat V4-Volume #14-Auto-Retopology Secrets- $7 3D Coat V4-Volume #15- Photo Painting & Masking Tools- $7 3D Coat V4-Volume #16- Texture Baking I- $7 3D Coat V4-Volume #17- Texture Baking II- $7 --------------------------------------------------------------------------------------------- 3D Coat Version 3 Tutorials ------------------------------------------------ 3D Coat 3.5-Auto-Retopology - $7 3D Coat 3.5-Retopology- $7 3D Coat 3.5-Retopology II-Project Suchomimus- $7 3D Coat 3.5-UV Mapping- $7 3D Coat 3.5-Normal & Displacement Maps- $7 3D Coat 3.5-Painting Color- $7 3D Coat 3.5-Voxel Sculpting-Project Dragon- $7 3D Coat 3.5-Photo Painting I-Project Elephant- $7 3D Coat 3.5-Photo Painting II-Project Human- $7 3D Coat 3.7-Painting Tools & Alpha Brushes Vol.#1- $7 3D Coat 3.7-Painting Tools & Alpha Brushes Vol.#2- $7 3D Coat 3.7-Starfighter UV Mapping-Quick Method- $7 3D Coat 3.7-Starfighter Detailing-Normal Maps- $7 3D Coat- 2D Sci-Fi Alpha Brush Collection Vol.#1- $7
 -
 Hello friends! Someone is having problems with the Edit Projections in Ext Editor ??? I'm using the latest beta version 4.5.39. (Windows 7 64 bit) When I use the option to Edit Projections in Ext. Editor and selecting any kind of scale or not (image 01_Capture_coat.jpeg), and send to my external editor program like Krita or photoshop, so this file is opened automatically, you can see the captured image, that generated psd file appears quite strange, with problems, it seems corrupted (image 02_Capture_krita.JPG). The face sent is cut in the middle of the screen, not allowing any type of paint or applying textures on the transparent part checkered psd file (image 03_Capture_krita_painted.JPG), ie, the projection is only accepted half up the face when returned to 3d coat (image 04_Capture_3dCoat_projection_failed.JPG). What to do to fix this problem? I've updated my video card driver (nvidia frame 600), and current updates windows 7. I appreciate the attention and await a solution.
 -
I have run into a new problem that perhaps the experts on the forum can solve. Upon exporting a gloss map painted in the paint room I get a bizarre textured result (see attached, map should be solid black and white as seen in texture editor). The map in the texture editor looks fine and the export is corrupted regardless of whether .tga or .png. Any suggestions greatly appreciated. bk
-
Have searched online, in this forum, with no luck, so I'll jsut shoot question here. Is there a way to make frozen selection invisible? I mean not the selected part, but to make that pattern dissappier. I know that that place is froze, but when I am painting texture, I want to see how frozen texture looks like, not somekind flashy effect. And yes I tried toggling effect (the closest to what I want is the one that makes texture whitish..). Show/Hide Freeze (CTRL+F by default) only works in UV map window, not viewport. At least for me... Thanks for help!
-
Ok, so being fearly new to 3D coat, there are a lot of basic things that elude me. Like how to apply or swap a simple material? So I've been working pretty back in forth on my UV's for an item i am painting right now. What I want to do is simply import the new version of my UVs and continue painting with the layers and material I already have in my scene. However, I can't seam to figure out any straight forward way of going this. The only way I have been able to do is so fare is by starting a new scene with my new obj, import all my photoshop layers (which is not acting weird now that I've started using layer group folders *see this question thread for details on that*) So ya! Basically what this question boils down to is: how do I update a mesh(obj) that I modified in a 3rd party program (Maya) back into 3D coat and have it use my existing material and paint layers! Thanks a bunch!
-
Hi guys, Does anyone know why 3d-coat is giving me the wrong layers inside the Paint room? I exported my Obj and then imported it into the Paint room. I've tried restarting the program and selecting other meshes but nothing seems to solve this issue. It's very frustrating not being able to handle my material layers I hope someone knows the answer
-
As I was UV mapping a model yesterday I assumed that the Complex Checker orientation needed to be readable to be correct, but that doesn't seem to be right at all. Here all of the islands are rotated and flipped so that I can read the complex texture (I assumed that's how it's supposed to work): But the result had the opposite effect. I could paint and it would appear as I expected, but on the UV map, everything was backwards–flipped and rotated in the wrong direction: Starting over, I rotated all the islands so that they were upside down. (didn't need to flip anything, they were all already backwards): The end result shows that the painting is in the right orientation: Is it supposed to be that way? Am I always to assume now that my UVs need to be backwards to be correct? Anyone else experiencing the same thing? I'm using version 4.5.23C. Thanks!
-
I have this weird UV island anomaly that I'm unable to paint on top of. What's that all about?
-
 I started painting my model, and noticed that sometimes I get a transparent checkered area as I paint depth. Am I painting too much depth? The depth amount is set low, like 5% or so. See the attached picture which shows the issue better. Thanks!
 -
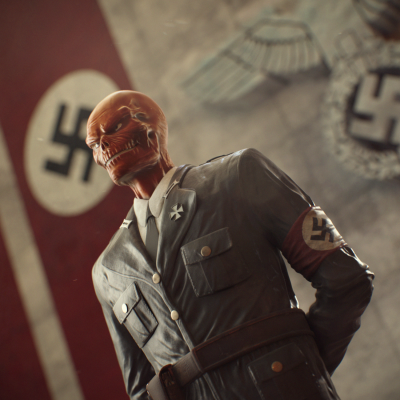
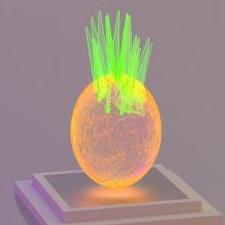
From the album: FanArt
After reading Red Skull: Incarnate I decided to create a illustration. 3D Coat + Modo. Hope you liked it! -
Hey guys, This is the latest 3D Coat training bundle that I created. A great way for beginner 3D artists to get started learning 3D Coat. The bundle includes: 1) 21 Volumes of 3D Coat Training 2) Sci-Fi Alpha Brush Collection- Volume #1 (100 Alpha Brushes) 3) Sci-Fi Alpha Brush Collection- Volume #2 (50 Alpha Brushes) 4) Creature Eye Pack 5) Dinosaur Mega-Pack (40 Dinosaur Models) You can get it at Liberty3d.com for 25% Off the regular price until April 3rd. Coupon Code: L3DST2016 http://www.liberty3d.com/
-

Bug: Retopo to Paint from Script resets 3D-Coat Preferences to defaults
Guest posted a topic in General 3DCoat
Version: 4.5.19(DX64) Windows7 Home These operations, running from own Script: Bake w/ Normal Map (Per-Pixel), Retopo->per pixel (no baking), and maybe other Retopo->Paint operations (not checked), reset 3D-Coat Preferences (Edit->Preferences) to default, and used it, not actual: Normal Map Software Preset Normals Calculation Method Normal Maps Export Triangulation Method Tangent Space Standard and maybe other fields (not checked). -
Hey Guys, Were having a Super Halloween Special at LEARN3DSOFTWARE.com. -Lifetime Memberships are 50% Off -Only $249 US (Reg.$499) Until October 31st!! -Training for 3D Coat, Lightwave, ZBrush, Modo, Substance Painter, and DDO training. -One Time Fee and you get Access to All New and Older Tutorial Releases!! -Over 157 Video Titles and More Being Added Every Month!! http://www.learn3dsoftware.com/membership_lifetime.htm
-
win 8.1 3dc 4.5.03 cuda dx64 in PPP room can not paint on a few small faces . The object was a spline curve in blender converted to mesh all normals are facing out and tried all brushes and paint bucket options etc. The uvs look fine . Then on the TEXT also from blender (not converted to mesh) the paint on all of the text are hit and miss . The text has a bevel on it and it is there that I cant paint on those spots Normal and uv look fine. One thing that did happen was I saved that file in 3cd closed up shop then reopened that file and on the Text 1/2 of the non-painted spots on the Text where painted. Also what does the * mean up top at the end of the file name? All other regular objects paint up fine and using color swatches no smart materials . I did not unwrap UV in blender I let 3dc do it in ppp. Thank you for your time.
-
I want to create characters that look like they are created from globs of paint, almost like the surface of a painting. heres a 2d example: Heres 3d examples Is there any way I can create a stamp with the shape of a pallet knife stroke, and at the same time assign it a color that is slightly random? or something like that Thanks!
-
does it keep track (show you) what colors you have used on your model? meaning if I use say 8 different colors on say 3 different layers and save it then reopen it later ill still be able to see my colors that I used or have a history layer. also can you copy all paint used on a layer or object and paste /apply it on a different part of your model. it drives me crazy and waste time trying to find what colors I used on models. I use blender and when I create a new color/material it stays there and I can name it also when I use the color picker it gets chosen but I use it mostly for modeling thanks.
-
You can see 3D Coat used (at the 2:05 min mark) by GameLoft on their game "Siegefall." Gameloft Montreal presents Siegefall, a new strategy game. Meet the team and get a glimpse of the game in our Dev Diary. Source
-
Hey Guys, Just letting you know we are having a $7 Video Tutorial Summer Sale http://www.learn3dsoftware.com/3dcoatvideos_menu.htm -All 3D Coat titles are all $7 each!! -All Other Software Tutorials (Lightwave, Zbrush, Modo, Substance Painter, DDO) are $7 each!! ------------------------------------------------------------------------------------------------------ 3D Coat Tutorial Catalog ------------------------------------------------------------------ 3D Coat Version 4.5 Tutorials ---------------------------------------------------------- 3D Coat V4.5-Vol.#18-Smart Materials I-$7 3D Coat V4.5-Vol.#19-Smart Materials II-$7 3D Coat V4.5-Vol.#20-Smart Materials III-$7 ------------------------------------------------------------------ 3D Coat Version 4 Tutorials ---------------------------------------------------------- 3D Coat V4-Volume #1-Getting Started -$7 3D Coat V4-Volume #2-Getting Started II-$7 3D Coat V4-Volume #3-UV Mapping I-$7 3D Coat V4-Volume #4-UV Mapping II-$7 3D Coat V4-Volume #5-Retopology I-$7 3D Coat V4-Volume #6-Retopology II-$7 3D Coat V4-Volume #7- Voxels I-$7 3D Coat V4-Volume #8- Voxels VI-$7 3D Coat V4-Volume #9- Voxels III-$7 3D Coat V4-Volume #10- Voxels IV-$7 3D Coat V4-Volume #11- Voxels V-$7 3D Coat V4-Volume #12- Voxels VI-$7 3D Coat V4-Volume #13-Dino Detailing I-$7 3D Coat V4-Volume #14-Auto-Retopology Secrets-$7 3D Coat V4-Volume #15- Photo Painting & Masking Tools-$7 3D Coat V4-Volume #16- Texture Baking I-$7 3D Coat V4-Volume #17- Texture Baking II-$7 --------------------------------------------------------------------------------------------- 3D Coat Version 3 Tutorials ------------------------------------------------ 3D Coat 3.5-Auto-Retopology -$7 3D Coat 3.5-Retopology-$7 3D Coat 3.5-Retopology II-Project Suchomimus-$7 3D Coat 3.5-UV Mapping-$7 3D Coat 3.5-Normal & Displacement Maps-$7 3D Coat 3.5-Painting Color-$7 3D Coat 3.5-Voxel Sculpting-Project Dragon-$7 3D Coat 3.5-Photo Painting I-Project Elephant-$7 3D Coat 3.5-Photo Painting II-Project Human-$7 3D Coat 3.7-Painting Tools & Alpha Brushes Vol.#1-$7 3D Coat 3.7-Painting Tools & Alpha Brushes Vol.#2-$7 3D Coat 3.7-Starfighter UV Mapping-Quick Method-$7 3D Coat 3.7-Starfighter Detailing-Normal Maps-$7 3D Coat- 2D Sci-Fi Alpha Brush Collection Vol.#1-$7
- 3 replies
-
- 1
-

-
- tutorials
- smart materials
- (and 5 more)
-
I have a model I've painted, and I can't seem to export the texture; choosing 'Textures' -> 'Export' -> 'All Layers Color' produces transparent (empty) layers in the Photoshop file. It's also 256x256 which leads to my second question: choosing 'Edit' -> 'Mesh & Texture Resolution' doesn't do anything-- is this where you'd set the size of the exported texture images? EDIT: one more question-- when I export 'object and textures', I'm only getting the files for the object (obj file) and the material (mtl file) but not the actual image file that goes along with the material. Thanks! Bryan
-
Hello everyone! For video game development, it would be nice to be able to paint tilable textures onto meshes in realtime. Especially terrain heavily uses texture tiling + blending. Then, for exporting, 3D-Coat could use vertex painting or an RGB/RGBA-splatmap for describing where the different textures are located and how opaque they are. For example: 1. I have 3 textures that I can tile. 2. Painting the mesh (maybe on a special layer blend?) with the 3 textures referenced 3. Export mesh and splatmap or mesh including vertex colors (referencing the textures) 4. In the game engine, use the 3 textures and vertex colors or the splatmap for blending the textures. Right now, I am using two different ways: 1. Paint RGB on the mesh and export it as a texture, which can be used by Unity for texture splatting 2. Vertex paint on the mesh in Blender, then use vertex colors in Unity for texture splatting The problem with these approaches is, that I don’t see the tiled texture blend in realtime. Many thanks in advance, Greetings, Shu
-
Hello, I am a relatively new user to 3DCoat, but I am having difficulties with version 4.5. In version 4, I can easily paint depth with the paintbrush tool. For example, I could select a texture/stencil, adjust my depth, and build normal maps. However, in version 4.5, I can no longer seem to paint depth at all. At any depth setting, no depth appears whatsoever. I'm not sure if I am just not pressing the right buttons or what, but I was unable to find help for this topic on the forum. This is a very frustrating issue, and I really appreciate any help to solve this problem! Thank you! - Cory
-
Привет всем !! Проблема: →когда я рисую текстурой по воксельному объекту (режим Surface) то на объект наносится текстура низкого качества (файл Texture_Paint_Real), в то же время при масштабировании-перемещении этой же текстуры по объекту она отображается в её реальном (высоком) качестве (файл Texture_Preview).← Я заметил такую закономерность: чем выше разрешение сетки в режиме Surface - тем выше и разрешение наносимой текстуры - то есть получается что-то сродни PTEX-текстурированию - в каждый отдельный треугольник сетки заключается определённое количество пикселей текстуры... Вопрос: Это нормальное поведение программы в режиме рисования по воксельному объекту - так и должно быть? или я что-то не так настроил? Почему я рисую именно по вокселям : Я хочу сделать довольно-таки обширную локацию, окружённую стенами из скал, а также отдельно стоящими скалами. Потом этому всему надо будет сделать ретоп и преобразовать в лоу-поли объект - и желательно чтоб он состоял из минимального количества отдельных кусков Ну и потом запечь карты с воксельного объекта на Low-Poly И чтобы потом не текстурить детально всю эту огромную скальную стену я пришёл к такому алгоритму: 1) Сделать модульный "конструктор" из нескольких детально проработанных скал на которых сразу будет сделан мелкий рельеф, нарисована диффузная карта и блеск 2) Потом собрать из этих деталей конструктора весь скальный массив - так как это делается в игровых движках типа Unreal или Unity - и он сразу получится с текстурами. 3) Слить эти детали в один единый объект... вот тут и пригодятся воксели! - Все детали объединятся в единую оболочку, и поверхности из мест взаимопроникновения деталей удалятся! Собственно поэтому я и затеял все эти манипуляции с вокселями, ведь после слияния у меня не будет лишних поверхностей утопленных внутрь соседнего объекта - а их может быть немало при многократном наложении/пересечении деталей "конструктора" 4) Дальше - по стандартной схеме: ретоп, запекание Normal, Diffuse, AO, Spec maps 5) Дорисовка текстур уже по лоу-поли модели Как думаете - можно ли каким-то менее сложным и более быстрым способом реализовать такой модульный подход? - чтоб не моделить и не текстурить каждый участок скального массива с нуля, но при этом не получить лишних полигонов, которые проходят внутрь соседнего объекта?
-
Hey guys, have you been messing around with the new PBR Smart Materials in version 4.5, but you don't feel like you really know what you are doing, or if you are doing it correctly? Well don't worry, because I found this really great tutorial about how to paint with the new PBR Smart Materials in 3D-Coat! It is made by an Italian guy who goes by the name of DoctorDanko on Youtube. His Italian accent is only mild, so his English is still very easy to understand. (Big thanks to DoctorDanko for making the video!) In the video you get a good explanation of what the new PBR Smart Materials do, how to paint with them, and also how to build your own. Enjoy! https://www.youtube.com/watch?v=7hyz8OrzBtA
-
Hi at all. After several testings with the new PBR Materials, i feel something wents wrong if you have to change some colors, roughness and metalness on your existing models. In Substance Painter there is an easy way to do that job. It is called Fill Layer. I have created a little Video about the Problems and how it works in Substance Painter. Problems: 100% Roughness and Metallness In 3d Coat you have always to work with 100% Roughness and Metalness, if you want be able to change these values on the fly. That means, if you fill your object with 50% Roughness, you where not be able to go above 50% in the layer. If you need 75% or 100% you have to fill the complede layer new. Same with Metalness. HUE, Saturation and Brighness The next big problem is the color change. Hue, Saturation and Brighness did not realy work in realtime. On the other side there is no Color palette or something like that, it is always trial and error to find the correct color. Tiling If you want to change the tiling of your Material, you have to delete the layer befor, because 3d coat where not be able to delete the old material and replace it with a new one. If you dont delete it, you have both tilings, old and new, in your current layer. Solution Fill Layer In Substance Painter there is an option for it, it is called Fill Layer. This layer stores the material infos and let you modifiy it on the fly in a non destructive way. You are not be able to paint on it, because it is only for the used material itself. Something similar would be nice for 3d Coat. Long story short Feel free to add you +1 here if you think a Fill Layer would be a good idea. Mantis http://3d-coat.com/mantis/view.php?id=1736 Trello https://trello.com/c/ghjYS3DG/312-fill-layer-for-paint-room Cheers Malo