Search the Community
Showing results for tags 'modeling'.
-
Hi All, This is just a sneak peek at how I've been approaching sculpting with Dynamic Materials. It feels like a natural way to sculpt. Not all models, but it's been great for naturalistic props with natural or organic materials. I plan to make a more Indepth video. -Alex
-
Warning: This is not a 100% reliable, completely fault proof approach. In some circumstances, the "quadrangulation" on the re-imported mesh to modeling room from sculpt room will not be completely like the original, and some manual fixing might be necessary. I discovered this after some subsequent testing, models which've been bent a lot seem to not get their topology back 1:1. You have an object in your Modeling or Retopo workspace. It is retopo geometry, so quads or mostly quads. You want to bend it around a curve, but still preserve retopo geometry, so quads not triangulated. For example, you modeled a character belt "straight", you made curve cross-section of character waist, now you want to bend the poly model belt over character's waist. Workflow: 1. Modeling / Retopo Room Of object to bend, make sure longest side points in direction world up (default Y+), shortest side in direction X+ -> goto Sculpt Room 2. Space to bring up tools, select Import tool. Select Pick from Retopo to get your object from Modeling or Retopo room. - Make sure ✅ Import w/o Voxelization ✅ No subdivision more than what you had ✅ Sculpt Tree layer to import to is "S" as in Surface Mode 3. Create Curve you want to bend to. (For example, make Cut Slice over object and produce curve from that) With object to bend in Sculpt Tree as selected Sculpt Tree layer, RMB on Curve, choose "Bend volume" Observe model is bent along curve. Adjust parameters to taste. RMB curve again when satisfied, get the Bend Volume modifier's options, select "Detach Curve Modifier". By this point you should have your bent model, except it's tris. 4. RMB on the Sculpt Tree layer with your bent mesh (Default name: Curve_CurvedBend, name produced by the bend tool) Select Retopo via decimation For the dialog box select "Don't decimate" Observe you get your bent model, still tris, as a new occurrence of item under Poly Groups 5. Select all faces of the Poly Group Title bar menu : Mesh -> Apply Quadrangulation Your model should now be quad like the original, unbent retopo mesh. (Bonus) ABOUT GETTING UVs back I can not just yet speak to whether you can also get UVs from this process, since I haven't tested yet But you might be able to get the UVs if 1. You export the UNBENT object with correct options first, and then 2. With new occurrence of bent object, import UVs that you used for your original Or possibly if you 1. Unwrap the bent object 2. Copy-paste UVs of original, unbent object.
-
Currently when you turn on sculpt mesh in the modeling room it will create a sculpt mesh for every poly group. Instead it should only create a sculpt mesh for the current active layer or even just visible layers. Because if you have a layer hidden it will create an empty sculpt layer and that just clutters the sculpt tree.
-
Hello, I know you guys probably hate hearing zbrush this or blender that so I'm sorry in advance. I've fallen in love with 3D coat and I want it to be the best. With that said I'd like to request a tool that is super convenient for big and small edits in both the modeling and sculpt rooms. This is a brush option that will allow the user to move all vertices that lay underneath the brush. This would be insanely useful in the modeling room where the geometry is low and predictable. Allowing the user to work in an orthographic view and affect all the geometry behind. I believe zbrush does some sort of trace the size of the brush and any vertices that arent masked are moved in screen space. If this functionality already exists let me know because I need it! Here are some youtube links of the brush inside of zbrush to use as an example Example one Example 2
-
Hello. I would like to strictly in the modeling room (because I know the sculpt room would take a massive overhaul to implement) have Non destructive booleans. Im not sure about the memory footprint of 3d coat and how heavy it is currently but I did have an idea for implementing this. It would require new features added to the poly groups. Right now the only option you have for poly groups when right clicking is to change the color reference. You also cant parent poly groups. The ideal workflow though should be similar to zbrush where it automatically creates a new "Subtool" for you whenever you want to add more geometry. I know there is a boolean feature when using the primitive tools but this should be something that has to be triggered by the user. For me when I'm blocking out I like to add shapes quickly and I dont want to have to deal with them creating their own booleans by default anyways when I hit the apply button I would rather have something similar to every other program where booleans are something you must explicitly turn on. I do want new geometry to automatically add itself to a new poly group. Now this will require some added functionality written into the polygroups. Something similar to how the sculpt tree works in sculpt mode where you can ctrl or shift drag a layer on top of another to activate a boolean. What I think would be even cooler is if you could make a polygroup a child of another polygroup layer and have right click options on the child layer to set it to "Union, Subtractive, Intersect" This way the parent geo would know that its child is affecting it in a specific way and could render properly based on that. In theory this should allow users to move these children using the transform tools and have an update be triggered on the parent. I should also add that there should be by default no booleans when parenting on only toggled on by a right click menu. This way you could easily merge object together but still keep them housed in there own groups. I wonder if this is possible to try and implement with the scripting api's.
-
Hello. I currently have Auto Unwrap Attached Faces unchecked in the mesh settings withing the modeling room but somehow when doing certain operations like "Split Rings" or using "Points To Polygon" tool and holding the "Ctrl" key to add an edgeloop my model automatically adds seams on that edge. Also the seam seems to be random. this also happens when using the "Cap" tool on an open edgeloop. Im sure this is a bug because when I go to the "Mark Seams" tool to use the "Ctrl" key to unmark seams these seams dont remove themselves. Very Odd. On a positive note I'm loving the modeling tools they are super handy. I spent the last month learning zmodeler like the back of my hand in ZBrush and in comparison to that these tools are second to only maya and blender. Going to spend the next month putting this software through its paces. I've used it before but not in a sense where my mind was constantly looking at other software. If it passes my tests its an automatic purchase for me! And this time I wont stop my rent to own payments 4 months in lol
-
Hello. I have a problem with appearing normals (shadows on the surface). I am sure that i am doing something wrong in the topology. Please one of the good modellers can tell me what i doing wrong and how solve that to make smooth normals? I've also attach two screenshots that showing the problem.
-
Hi everyone, I'm creating this topic that may be one of the most important topics for 3D-Coat and maybe controversial. Currently, 3D-Coat has Rooms that allow the execution of a certain task like Sculpt, Paint, Retopo, UVs, Render and etc. 3D-coat acts as if it were different and independent programs in one. This way the problems and confusions in relation to the 3D-Coat workflow begin. I was already a new user of 3D-Coat and at that time I was completely confused the way the program behaved with a Mesh. Why did a mesh appear in a Room and was not present in the other Room? It was as if I used different programs and at the same time did not communicate with each other or that there was no compatibility. I kept wondering how this was possible if I'm using the same program? I had so many questions and doubts about 3D-Coat that I could not understand. The time has passed and I think that new users and even some users who use the program for a certain time still have doubts, can not understand how 3D-Coat works and at certain moments are frustrated. This separation of Rooms also gave rise to the separation of users within our community who use 3D-Coat. I've seen people saying that it was not interesting for them to have certain functionality or tools because they simply did not use that Room. An example of this is people who use ZBrush and then use 3D-Coat to do reptology (perhaps UVs or Painting) and those same people would not be interested in developing and implementing tools in the Sculpt Room. The reason for this is the simple thought that ZBrush offers all those features and will only use 3D-Coat for a certain workflow complement. Again, I repeat, people are free to use the program as best they please. I have nothing against these people. But what does that mean? This means that there will always be one room more developed than the other because people who use one room more than the other will want improvement in that room. It does not matter if a particular room is left undeveloped. This becomes an arm-twist among the users of 3D-Coat and not a union in favor of a strong program as a whole. In my opinion, it would be very important for 3D-Coat to change the direction of its development. This change would be in relation to the workflow and structure of the program. I know it would be difficult, but the solution would be the merging of all Rooms, allowing a single mesh being worked through the whole program without having problems of communication between the Rooms and their respective tools and features. So instead of working in Rooms, 3D-Coat would have Layouts or Menu Sets that could even be customized by users according to their work or task. This merging of Rooms would allow a fluid and interactive workflow between the "Rooms" or better said Layouts. This type of workflow would be the kind of workflow that any user would expect when using a program because it would facilitate usability, efficiency, interactivity and at the same time we could have all the tools, functionalities, and future modifiers (similar to Blender / 3DS-Max have) and addons working together in a harmonious way and that would result in a powerful workflow. Imagine all the tools working in favor of a single Mesh, the freedom that users would have to perform any kind of worklow they wanted and in the end would be a job of extreme quality. This merger would open new and great possibilities for tools and functionalities without breaking the workflow and the most important would be the attention of new users. In my opinion, 3D-Coat is fantastic, but it does not see its potential. What do you think about this merger? Leave here your thoughts, suggestions and opinions on the subject. Thank you.
-
Dear friends! Let's discuss here the new surface modeling features that are available in build 4.8.35. How can I enable the curve tool functionalities? Edit->Preferences->Show beta tools. In the topic of Retopo - next big Step, we discussed the Future of the Retopo room. Thanks for the feedback. Let's make 3DCoat better together. For programmers, the challenge is not to spoil what works as you have been used to for many years. Сurve tool functionalities working in Sculpt Room at now. tokikake, in the next release, this will work in the Retopo room. Andrew said that we will make the best interaction between Sculpt Room and Retopo Room. We will add more primitives to the Retopo room. And the most important thing! There are 2 workflows in Retopo Room: - Retopo after Sculping - Modelling LowPoly. Perhaps you need to add another Modeling Room. To Modeling Room need to add some functionality from Retopo Room. ---------------------------------------------------------------------------- The Swept surface is created from a profile curve that moves in space along the guide. If the Auto-orientation option is enabled, the Profile is located at each Guide curve point so that the Profile plane is perpendicular to the tangent vector at this Guide curve point. If the Auto-orientation option is enabled, then you can change the angle and offset dX, dY of the profile. Dx=-500 Dx= -500 Creating a surface of revolution Polyhedron Swept Surface 2 Two guide curve and one profile curve Swept Surface 3 One guide curve and Two profile curve Example of using Swept Surface N Gener Sword Goose Later we will add more user manual and video tutorials. Perhaps still need to add this feature - Kinematic Surface
-
I just wanted to create a thread here dedicated to hard surface sculpting/modeling in 3D-Coat. Feel free to post any tips, tricks, tutorials, or whatever you know about it so as to help the community out. I'll start by adding a nice timelapse video I found on Youtube. I saw some useful techniques used here that I thought were worth sharing. Enjoy! http://www.youtube.com/watch?v=3AVERcG9Qy8
-
Hi, is there any tutorials available on character modeling similar to Shane Olsen’s (https://www.3dcharacterworkshop.com/) but for 3D coat. I’ve searched on YouTube and there aren’t any that I found that isn’t sped up. I’m looking for a tutorial that explains everything step by step.
-
Hey everyone, This is thread to follow the development of a project that I have been developing called Gladiotron. It is an original project and hopefully the first of many. My pipeline consists primarily of Blender and 3D Coat, with some other applications for authoring PBR textures and then ending up in Unity. Our target platform is PC and Console initially, then possibly mobile afterwards. I have a few goals with this project. 1. To engage the 3d Coat and Blender communites 2. To share development progress on the art assets and the game 3. To work with the 3D Coat team in a similar way to the way the Blender Foundation creates film projects to drive the development of the application
- 11 replies
-
- 8
-

-
- gladiotron
- concepts
-
(and 7 more)
Tagged with:
-
I think it would be best to unify the Paint and Retopo mesh structure in 3DCoat so the Tweak Workspace can be removed > Retopo workspace will be renamed TOPO or POLY EDIT Workspace and become the environment to work on all low poly meshes. No more Paint Mesh and Retopo Mesh...just Low Poly Mesh. That would allow the UV room to be the dedicated workspace for ALL UV work...no more UV room for just Paint Meshes and UV tools in Retopo Room for Retopo meshes. This creates too much confusion for new users, and if users need to modify or fix their Paint Mesh, it's a bit of complicated and convoluted process to do so, currently. They have to send a copy to the Retopo Room > fix/edit the mesh > replace the Paint room mesh and hope it doesn't cause a mess with your UV's and texture work. With a unification of Paint and Retopo Meshes, then the addition of more comprehensive modeling tools will make sense. Right now, new users expect to just Retopo in the workspace. Adding a whole new section of modeling tools will overcrowd the Retopo workspace, because half the toolbar is UV tools. Adding a new modeling room would just add more confusion and complexity. That is why 3DCoat needs to be simplified first. If we don't, 3DCoat will only become a big MAZE of disparate rooms and more convoluted workflows. SIMPLIFY. SIMPLIFY. SIMPLIFY. Please.
-
Okay, I throw my hands up. Calling for open advice! So I've been working on a weapon model and I drew up some reference, brought it into 3D-Coat, ready to do some voxel sculpting. Almost immediately I hit a brick wall. So here's what I'm trying to pull off. This is a screenshot of the sculpt shortly after doing a little cutting to match the silhouette. As you can see from the reference drawing, the sword's blade transitions from a thick depth at the back to a tapering edge at the front. My plan was to narrow that thick front plane down to a fine edge...you know, like any sword. Here's another image: The complexity of this edge is such that I have yet to find any great method of cleanly performing this operation. Pose tool, cutting off at specific angles, rebuilding the edge with curves, etc...all of these methods have been failures or felt really impractical. The only other thing I've been able to think of so far is just getting in there and free handing it to perfection. I went on a number of searches to find advice on blades, beveling in general, etc...I didn't turn up much help. I found a lot of advice on beveling, but none of the methods were quite adequate to recreating this exact geometry. Frustrated, I just went ahead and built the thing with traditional modeling. I'll put a shot of that up just as a further example of how I wanted it to look: But, the fact that I couldn't figure out a great solution to this really drives me crazy and I'm still trying to figure it out. I'd like to be able to rely on 3D-Coat from the ground up, since I really love the feel of working in it otherwise, but hitting such a hard wall right away on a pretty simple model made me feel like I ought to be using it in more of a secondary role. I'd love to see if anyone has any great advice here; anyone know how to pull this off nice and cleanly? Let me know if I can clarify anything for you.
-
Hey folks, Just a quick question. I love using the stamp, click and drag with the alpha on the brush to create interesting forms when making concepts. My only issue is that I can never drag beyond the limits of the mesh. By that I mean, if I click a point to start my stamp and drag out it works fine as long as my cursor is over mesh. Once it leaves that area and essentially is over the background my stamp disappears. Anyone else have this issue?
-
Hi guy's, I am new around here and i was recently shopping for my next sculpting app and i am very interested in 3d coat after a video i saw here : I come from Mudbox and i have experience in zbrush and no one on both forum were able to answer this except for Blender who had a working solution but not very good because it involved too many polygons to work with. What i want to achieve is positioning snake scales along tapering body of a snake so all scales have equal distance between them and scale uniformly without deforming in the tapered tail section, here a few images to better explain : Will be really appreciated if someone can find an elegant solution to this.
-
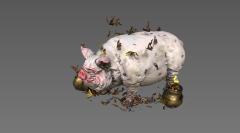
From the album: Lamnho
-
From the album: FanArt
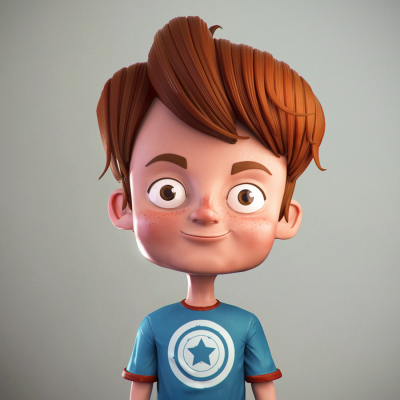
This is some kind of self portrait featuring the upcoming Marvel's Civil War movie. I'm joining Team Captain America! Also this is my first character render. The next one will be Iron Man - or should he be Iron Boy? -
From the album: 8 Classic Lamps
All the sculpting I did in 3D-Coat in voxel mode, and Render in Unreal Engine 4. I did not use any post processing.-
- classic lamps
- textures
-
(and 7 more)
Tagged with:


