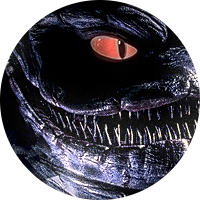
Contributor ajz3d Posted November 21, 2012 Contributor Report Share Posted November 21, 2012 Hi there. I have decided it would be good idea to take my chances in the cool Mixamo zombie contest, so I started my own zombie yesterday. I don't know if I will be able to make it on time, as there're only nine days remaining until they stop accepting submissions, but what the hell. This is fun, so I will finish it anyway. So, I came up with an idea (of course apart of sticking to Mixamo character requirements - aka fused pumpkins), to consolidate into single character some of the things I was afraid of when I was a child. And who I always was terrified of in my childhood, are stilt walkers. Their giant silhouettes and legs completely out of proportion, bending in the wrong places, always have been scaring the hell out of me (same with clowns, but let's leave'em alone - it would be too much ). I imagined a circus arriving to Dullahan Grove. Stilt jugglers, dressed in old school top hats, tail coats and bow ties, came out of the tents to entertain the public. Then the fog came. Many times I've been told a tale of Baba-Yaga, a children-eating witch who lived in a wooden house on chicken legs, deep in the heart of forest. She supposed to have a long, crooked nose with a large wart near its end. The crooked nose is already in the model (no wart yet - still trying to keep head relatively symmetrical), although I think I'll adjust it a little bit more. The stilt zombie is also going to receive a torn left-trouser leg, revealing a chicken like leg standing on a stilt (I will have to test it out first to see if it works with the rest of the model). I also grew up on a duo of Sam Raimi-Bruce Campbell and demoniacal creatures featured in their horror flicks. White eyes, stretchy distorted faces. I still can't forget the garage scene in "Drag Me to Hell", even though this particular movie didn't star Mr. Campbell. Gypsy old woman stretching her jaw so widely, that she almost swallowed the whole face of the main character. Very grotesque looking. Carpenter's "The Thing" will come into play when I will be fusing the left hand with some roots to the pumpkin on zombie's left thigh. Again, will need to test it first to see if it works. Also, stilt walker's right hand will have a very long fingers (Bennings-like, but not distorted). On the back you can see a large hunchback made of pumpkin. I'll add some face attributes to it so it looks like a twisted human face. Also, it will stretch its wooden arms (build from sticks or whatever) towards the night sky. Heh... That's the idea anyway... The last attribute of the model will be a large pumpkin that he drags behind him. It's roots entwined around the left stilt and fusing smoothly with the chicken leg. You know, something like ball and chain. Okay, but enough of this babble.. The model is pretty much in its early stage. While the head is relatively detailed, the rest of the body still needs some shaping. I hope to finish the sculpture before sunday and then quickly proceed to retopo. 1 Quote Link to comment Share on other sites More sharing options...
Advanced Member Garagarape Posted November 22, 2012 Advanced Member Report Share Posted November 22, 2012 Cool and creepy Zombie! The pose and looks are original. I can imagine it as a new character category in Left4Dead Keep it up! Quote Link to comment Share on other sites More sharing options...
Contributor Tony Nemo Posted November 22, 2012 Contributor Report Share Posted November 22, 2012 Great project! This will be fun to follow. Quote Link to comment Share on other sites More sharing options...
Contributor ajz3d Posted November 22, 2012 Author Contributor Report Share Posted November 22, 2012 Hey guys, thanks for some positive waves! They will keep me running. I'll post an update tomorrow. Anyway, I've a question perhaps someone will respond to. I want to give the man some longer, sparse hair clumps, that are dropping on his shoulders. I don't want them to be stuck to his neck as this would make him look too much like a plasticine figure. How would you approach this in 3D Coat? Sculpt them with very thin spikes or curves at high resolution (but what then...)? Add polygons during, or after, retopo and manually paint alphas for the hair in the paint room? Quote Link to comment Share on other sites More sharing options...
Advanced Member Garagarape Posted November 23, 2012 Advanced Member Report Share Posted November 23, 2012 For a Video Game asset, I would choose the alpha mask way. The problem is that, when you sculpt a character, you want to have all the parts on it to get an harmony between parts and make subtle arrangements. Difficult to wait until the whole body is perfect, then go in another app to build the geometry where you'll put the hair alpha tex. Another thing that is annoying, is the baking of Ambient occlusion. If you bake the whole character without its long hair, you will get something that is not correct and you'll have no choice but editing the baked AO afterward. You can probably do nothing but tweaking the hair in another application in that case IMO. If it is not a game asset, and that you just want great renders, there are probably other solutions, like paint effects, but I'm not very familiar with it so I can't tell you much more. If you choose to make it all in 3dC, make a dummy cylinder around the neck of the zombie, and "paint" hair from the top of the head to the bottom of the cylinder with tools like "spikes". The cylinder will avoid the hair sticking on neck issue. When you're satisfied with the hair, just remove the cylinder. It's quite cheep and low-tech way, but I think I would have a try like that. There is surely plenty of other solutions though... Good luck. Can't wait to see more. Quote Link to comment Share on other sites More sharing options...
Contributor ajz3d Posted November 23, 2012 Author Contributor Report Share Posted November 23, 2012 Man, you're a godsend. I think I'm gonna do something in-between of both solutions you suggested. I see several non-uniformly scaled cylinders attached to the stilt walker's head. I'm going to make them after the retopo normal map is baked (meaning: add them in 3rd party app). I'll paint those new assets in the paint room. AO for the hair (or for cylinders, to be precise) could be baked in the external app and corrected in a PS. Then, the last think to do would be to add an alpha texture. I think this should do the trick. But... On the other hand... It might not. There's still a normal map of the added hair remaining to be dealt with and this might be a problem. Baking a normal map would require involvement of 3D Coat - polygons created in the retopo, as well as in the voxel/LC big mesh. I have to think about it. Anyway, if it happens that I have enough polygons left (this is supposed to be a game character with max 12.000 tris) I'm gonna take a shot at what you said: painting on the cylinder and retopoing the hair with as few tris as possible. Otherwise, the stilt walker will have to survive without the rockstar hair. Quote Link to comment Share on other sites More sharing options...
Advanced Member Garagarape Posted November 23, 2012 Advanced Member Report Share Posted November 23, 2012 You know, you can treat the hair part differently. Depends on if you want to give it a lot of volume or more just a hair texture look like thin hair falling down. If you look at other designers work, they often combine both. --> Big volumes sculpted (no alpha) + Thin hair on planes added afterward (alpha mask) Yeah, adding it in a third party app may be the best. But if you don't want to make something too complicated, you can try the "all sculpt" way. I don't know what are the specifications for your contest, but for a video game asset, most of the time the alpha masked parts are done with another texture. With the "all sculpt" way, with no alpha, you can put all on one texture. Don't fear to treat hair differently. Using 3dCoat to sculpt hair is not the only way. You can bake a Normal map in Photoshop with the Nvidia Plugin (free stuff): https://developer.nvidia.com/nvidia-texture-tools-adobe-photoshop If you have stains on your texture after a bake, or want to make some of the model parts look flat, you can also paint directly or add layers on you texture with the neutral NM color (R 128, G 128, B 255). Knowing why you get stains is also good though. hem, I'm going of the rails... I just want to say that hair can be tweaked ore created within Photoshop. You paint your hair as a color map, turn it to NM with the plug in to get your normal map, then add the alpha mask on the color map. You can also get a specular map from your NM map using X-normal soft or plug-in (added to Photoshop plug-in when you install the app) or use software like Crazy Bump (this one is not free, but not too expensive). Good luck to finish your Zombie! Quote Link to comment Share on other sites More sharing options...
Contributor ajz3d Posted November 26, 2012 Author Contributor Report Share Posted November 26, 2012 Thanks Garagarape. That's a lot of useful information! A brief update on the progress. It's taking a little bit longer than I thought. I've been exploring some design concepts (some of which were mentioned), but a lot of them proved to be a failure. Chicken leg, for example, composed horribly with the tall character. Still to do until I move to retopo: - shape of tail coat and its creases, also - torn textile on the back and on the left thigh - where the pumpkins are, - veins from the ground pumpkin either: entanlging the left stilt or fusing with the left hand, - need to think about that connection of the thigh pumpking with the left hand (looks a bit awkward to me, what do you think?) - convert everything to surfaces and start sculpting the details with the LC, - dispose of proxy head and replace it with an already sculpted LC-one with hair, - reposition the eyes, - a feather in a top hat (?). Note: The head shown on the image is still a voxel version that I use as a proxy. No hair to be found on it, nor eyes. Oh, and sorry for the model varying in height. I think it's either the perspective's fault or mine, being unable to figure out how to set a centre of rotation for the turntable rendering. By the way, can Live Clay separate "islands" be connected into one single mesh? Like it can be done with voxels? EDITED: I've uploaded an imageshack link as well. Viewing and saving an attached image looked like it was resized to tiny dimensions and compressed too much. Quote Link to comment Share on other sites More sharing options...
Advanced Member Garagarape Posted November 26, 2012 Advanced Member Report Share Posted November 26, 2012 The tree roots hand (ivy?) + pumpkin you added makes him even more cool. Keep on the good work! Quote Link to comment Share on other sites More sharing options...
Member joshy Posted November 26, 2012 Member Report Share Posted November 26, 2012 waiting eagerly to see it in colour Quote Link to comment Share on other sites More sharing options...
Contributor Tony Nemo Posted November 26, 2012 Contributor Report Share Posted November 26, 2012 Pumpkin tumors! Very creepy! Quote Link to comment Share on other sites More sharing options...
Contributor ajz3d Posted November 29, 2012 Author Contributor Report Share Posted November 29, 2012 Hello. Thanks you for your heartening comments. I'm posting a new update. I'm done with shaping the model. What I'm going to do now is to convert everything into surface mode and with Live Clay: - fix all errors awaiting to be fixed, - smooth edges where needed (tail coat goes first - I can't look at its edges anymore), - sculpt details on the whole model (most importantly on the left hand vines and clothing), - decimate where possible. I hope to finish LC sculpting tomorrow. If I won't, there will be no chance for me to complete the zombie before the deadline. 1 Quote Link to comment Share on other sites More sharing options...
Contributor ajz3d Posted December 1, 2012 Author Contributor Report Share Posted December 1, 2012 Darn. I'm out of time. Oh, I wish I had noticed the contest several days earlier. Two or three more days for retopo and texturing would be sufficient. But never mind. Tomorrow (or is it today?) I will be posting some shots from a completed sculpture. That is, if I won't encounter BSOD (0xC4) again during rendering. Happened to me just a while ago while render engine was processing a 17 million tris mesh (it managed to reach 30 rays and then BAM!). I guess my old junk-box cannot stand this amount of digital information. It would be a good idea to decimate the model wherever possible, I guess. Anyway, next stop is Retopo Room. Now that Mixamo contest ends in like three hours, I'm not liimted to 15k tris anymore. However, I am going to use as little polygons as possible. Ebenezer (my friend told me today that my zombie's face resembles Mr. Scrooge) is going to be rigged and animated and I think animating this sticky chap is going to be a lot of fun. Quote Link to comment Share on other sites More sharing options...
Contributor ajz3d Posted January 15, 2013 Author Contributor Report Share Posted January 15, 2013 After changing my machine I have returned to my zombie. My old rig kept BSODing during rendering, I don't know why. Working with the scene is much more pleasant and comfortable now. I've almost finished with the retopo - only head and the top hat is what's left to work on. Meanwhile, I'm uploading the final state of the sculpture. 1 Quote Link to comment Share on other sites More sharing options...
Contributor Tony Nemo Posted January 15, 2013 Contributor Report Share Posted January 15, 2013 Is that a musket ball embedded in it's face (between the eyes)? Quote Link to comment Share on other sites More sharing options...
Contributor ajz3d Posted January 15, 2013 Author Contributor Report Share Posted January 15, 2013 By all means, no. It's a bare bone. Quote Link to comment Share on other sites More sharing options...
Contributor ajz3d Posted January 22, 2013 Author Contributor Report Share Posted January 22, 2013 Retopo done, but bake test returned some normal map errors in some places. This is the first example: The brim is relatively thin. Perhaps 3D Coat falls into confusion and doesn't know from which side of the brim (upper or lower) should he take the normal vectors? So it mixes them up in the thinnest areas. Can anyone help in sorting this out? As a last resort, I might try adding more geometry to the retopo mesh and see what happens. Quote Link to comment Share on other sites More sharing options...
Advanced Member Garagarape Posted January 22, 2013 Advanced Member Report Share Posted January 22, 2013 Hi there! This is not a baking issue due to a 3dCoat bug. You'd have the same problem with another app like Xnormal. The angle between the main part of your hat and its border is too sharp for the app to calculate properly. 3 solutions to fix it ---> 1) add a loop edge (edge ring?) in the thin areas of your low model and rebake. 2) avoid angle that are sharper than 90 degrees in your low model (add a "one cushion" quad strip to avoid angles lower than 90 degrees)... same as no1 3) Get rid of the stains with the stamp tool in Photoshop (Oh! This is evil!) Good luck. Waiting to see this zombi all done! 1 Quote Link to comment Share on other sites More sharing options...
Contributor ajz3d Posted January 22, 2013 Author Contributor Report Share Posted January 22, 2013 Thanks for those tips. I've analysed the problem a little bit more and it appears that the fault lies on my side, because with such thin volume to work with, I should have taken care to evenly space the polys on both sides of the brim. It's not clear to notice that in the Retopo Room, but I think there are some edge interpenetrations going on between the polygons from the upper side of the brim and those from the bottom. That's why normal map is rubbish. Oh, before I figured it out, I tried adding some edge loops to smooth out those hard edges a bit, but with the thin brim 3D Coat doesn't know to which side of it (upper or bottom) should it snap new vertices. This results in awful zing-zags along the loop and even plenty of normal map errors. I guess, I'll have to rework the whole hat again and do the brim point by point. Luckily for me it's a basic object. And by the way, a word of warning for everybody. Whenever you work in the Retopo Room on a specific layer and have the remaining ones hidden: check them regularly. Yesterday I finished the head and toggled the other layers' visibility on, only to reveal this awful mess: I don't have a slightest idea how that could have happened. All layers but the one containing the head mesh, on which I was working, were hidden. And to me a hidden layer means a locked layer. Well, apparently not in 3D Coat. I had to browse through several dozens of my incremental saves to find the most recent intact meshes in order to use them as replacement parts. I was so steamed up that I almost exploded. So once again - guys, check your hidden layers from time to time. Quote Link to comment Share on other sites More sharing options...
Advanced Member Garagarape Posted January 23, 2013 Advanced Member Report Share Posted January 23, 2013 Yes, I noticed this problem too. It often happen when using the brush tool to move some vertices. Quote Link to comment Share on other sites More sharing options...
Carlosan Posted January 23, 2013 Report Share Posted January 23, 2013 is this the bug ? a hidden layer means a locked layer, but not when using the brush tool to move some vertices. there is a mantis request open, please add +1 http://3d-coat.com/mantis/view.php?id=739 Quote Link to comment Share on other sites More sharing options...
Contributor ajz3d Posted January 24, 2013 Author Contributor Report Share Posted January 24, 2013 Carlosa, thank you for the link. I think the only reason this bug is on the loose is because it's very hard to reproduce. I've tried several times to no avail. Quote Link to comment Share on other sites More sharing options...
Contributor ajz3d Posted January 24, 2013 Author Contributor Report Share Posted January 24, 2013 Turns out I was wrong here: I've analysed the problem a little bit more and it appears that the fault lies on my side, because with such thin volume to work with, I should have taken care to evenly space the polys on both sides of the brim. It's not clear to notice that in the Retopo Room, but I think there are some edge interpenetrations going on between the polygons from the upper side of the brim and those from the bottom. That's why normal map is rubbish. Oh, before I figured it out, I tried adding some edge loops to smooth out those hard edges a bit, but with the thin brim 3D Coat doesn't know to which side of it (upper or bottom) should it snap new vertices. This results in awful zing-zags along the loop and even plenty of normal map errors. I guess, I'll have to rework the whole hat again and do the brim point by point. Luckily for me it's a basic object. I was racking my brain trying to figure out what the hell was going on with that top hat, as even after retopologising it again the problem persisted. It was ridiculous, because the object is so basic and there weren't any problems with NM baking of far more complex areas of the character. So, I spend some time today troubleshooting this issue and it turned out that it wasn't retopo problem at all. It was the LiveClay layer that didn't have enough resolution, even though it appeared to be very smooth! I imported the hat again, subdivided it a good couple of times, retopologised and it works like a charm. Who would've thought? Quote Link to comment Share on other sites More sharing options...
Contributor ajz3d Posted January 24, 2013 Author Contributor Report Share Posted January 24, 2013 Head topology, NM bake test: two subdivision levels and auto UVs. A few tweaks remaining to do to right ear (retopo mesh not snapped to surface), hat ribbon and back hair LC (not shown). 1 Quote Link to comment Share on other sites More sharing options...
Advanced Member Garagarape Posted January 24, 2013 Advanced Member Report Share Posted January 24, 2013 That's clean! I mean a clean work for a hugly zombi. You used a lot of quads on the low mesh, but after all, you will not rig it, don't you? Quote Link to comment Share on other sites More sharing options...
Contributor ajz3d Posted January 25, 2013 Author Contributor Report Share Posted January 25, 2013 Low mesh isn't that huge. It's 32000 polys. I could probably make it lighter by removing a few edge loops here and there and go under 30000 (the veins protruding from the left arm have a significant impact on the overall poly count). Below the comparison of low poly mesh and 2nd subdivision (sorry for heavy files). Damn, just noticed some bad normal map spot on the pumpkin. Gotta fix that. 2 Quote Link to comment Share on other sites More sharing options...
Taros Posted February 1, 2013 Report Share Posted February 1, 2013 Retopo done, but bake test returned some normal map errors in some places. This is the first example: The brim is relatively thin. Perhaps 3D Coat falls into confusion and doesn't know from which side of the brim (upper or lower) should he take the normal vectors? So it mixes them up in the thinnest areas. Can anyone help in sorting this out? As a last resort, I might try adding more geometry to the retopo mesh and see what happens. You need to check the baking parameters, this should solve it. Change the values for the inner and outer baking distance. You will find the baking parameters in Retopo->Baking_parameters Very nice! Best wishes Chris 1 Quote Link to comment Share on other sites More sharing options...
Reputable Contributor AbnRanger Posted February 1, 2013 Reputable Contributor Report Share Posted February 1, 2013 You need to check the baking parameters, this should solve it. Change the values for the inner and outer baking distance. You will find the baking parameters in Retopo->Baking_parameters Very nice! Best wishes Chris I find that even with baking parameters at the appropriate levels, if I have persistent trouble spots, it is usually because some vertices are actually snapped below the mesh, in a pocket of sorts, or just doesn't have enough resolution to keep edges from dipping below part of the voxel object. So, I may add an additional loop where needed, and I will then turn auto-snapping off > select verts in the trouble spots > transform tool > gently move them outward just a slight amount, so there is no chance that they fall below the voxel object in any way. This will usually work a treat. 1 Quote Link to comment Share on other sites More sharing options...
Contributor ajz3d Posted February 1, 2013 Author Contributor Report Share Posted February 1, 2013 Thank you guys for you posts. It happens that I've been battling weird white islands on baked maps today (white on normal map and colour, black on local occlusion map). Can't really pinpoint the thing that causes the problem. While those islands sometimes (but not always) seem to appear near faces sharing a <=90 degree angle (what Garagarape said), they also appear on relatively smooth angles (see: picture on the right). Nothing seem to affect them. Pumping more geometry, tweaking scanDepthIn/scanDepthOut baking parameters, moving vertices around. I've literally spent hours and hours to solve that problem. Tweaked the retopo mesh, tweaked UVs, baked the maps - all of this a good couple dozen of times and all to no avail. I don't remember such thing happening to me in ZBrush. I'm very confused. What I'm doing wrong here? Quote Link to comment Share on other sites More sharing options...
Carlosan Posted February 1, 2013 Report Share Posted February 1, 2013 hope it helps Normal Map Projection Correction Quote Link to comment Share on other sites More sharing options...

Recommended Posts
Join the conversation
You can post now and register later. If you have an account, sign in now to post with your account.
Note: Your post will require moderator approval before it will be visible.