Search the Community
Showing results for tags 'Texture'.
-
Hello! I'm very interested in question: is there a way to control a texture in the shader dialog? I mean to control is rotation and position. It would be a really useful thing and save much time.
-
Almost all the coloring work I did somewhat looks like this. It feels and looks like something's missing and it's bothering me. Earlier I tried to show the edges by following the wireframe, but I did not get the results I wanted on the line. I am open to any suggestions that may lead me forward. I also started to study drawing. I think it will be useful.
-
I`m moving between applications in my workflow (sculpt in 3D-coat, paint in Substance Painter). I have heard that the following is possible, though I`m unsure how exactly. I want to : 1. Import a mesh (originally sculpted in 3D-coat, but textures are generated in Substance Painter) 2. Import multiple texture sets for said mesh (from Substance Painter: they all belong on the one mesh, but for different "parts", and therefore needs to be merged since it can`t be done that way in Substance Painter) 3. Somehow combine the textures into a single UV-tile (that can later be applied to the mesh inside of e.g. Maya). 4. Export (... the newly combined texture as a single file.)
-
When I have a lots of layers and over two material (uv) the exporter not works properly. I have to bake texture and have 1 mat to work. It's frustrating problem. I use Linux version, but also in windows have the same problem. The texture are flat. Cheers
-
Is there a documentation for converting pbr textures from one format to another from a developer standpoint? The math, algorithms and formulas behind pbr export and import. We are trying to write a plugin for exporting textures from our renderer but our dev doesn't understand the docs from https://www.marmoset.co/posts/pbr-texture-conversion/ as its too artist talk and not developer friendly.
-
Hi! I am new with 3D Coat. I've been trying to create seamless hand painted textures. Ex: grass patch, wooden floor, stone wall etc... I imported a unwrapped plane from 3ds max. Is there an option to make the texture tile? Thank you very much for your time, I can't seem to find any answer on the internet.
-
Is there a way to apply layer blending within the smart material editor? I am trying to make a wasp skin texture which I am using a rust image for and apply a new layer of yellow on top, however lowing the opacity is not enough. If I apply the rust to a normal layer then the yellow on top I can use layer blending to get the desired effect. Is there a way of doing this in the smart material editor directly?
-
 Hi Guys, I am urgently trying to finish some work and yet as you can see the textures where there is grey metal export as solid black. Does anyone know why this may be? As you can see from the UV layout from within Coat they are displayed correctly. I have also included my export settings. Many thanks.
 -
Hello everybody. I have a problem with making something really important for me and I can't find any tutorial for my idea. I don't have much experience with 3D-Coat or any other 3D software (so yeah, noob questions alert). I would be delighted if there was anyone who could help me. My goal- I would like to make a textured cylider with a seamless texture (real geometry), using Alphas or Stencils, without any stretching etc. I wonder if there is any good and fast way to achieve it. I'm really sory if it's a silly or way-too-noobish question.
-
Hi everyone, I am under a year new to 3DCoat and I love it so far. I purchased it right away knowing what it was capable of and specifically it seemed like the only 3D painting program that can work with Displacement textures and see it in realtime! Anyway, there was no tutorial for me, I asked questions and saw bits of info that came from various places and was a bit of a nightmare after buying a new piece of software and not knowing how to use it the way you need. So recently I put together a couple tutorials, a short version and more of a complete version. This video -the long one, was not intended to show off my art skills, I'm just dabbing areas with various textures while explaining how to and trouble shooting etc. I'd still like to improve the ability to have displacement work faster and maybe display better while painting. Perhaps if the lower poly model can be subdivided once or twice and while you paint a a front facing & distance based tessellation shader is used to help bring out the details that way you could potentially have subdivision on its highest level and have the same performance and maybe memory conservation with 100% fidelity but with the speed as if you were working on a lower poly model. So here is the tutorial if any one here has mastered working with Displacement with 3DCoat please let me know how I can improve the workflow or let me know if I explained something incorrectly. I was working with 8K Photo Scanned textures from RDT
- 26 replies
-
- 1
-

-
- displacement
- painting
- (and 3 more)
-
8 Classic Lamps All the sculpting I did in 3D-Coat in voxel mode, and Render in Unreal Engine 4. I did not use any post processing.
- 4 replies
-
- 1
-
-
- classic lamps
- unreal engine
- (and 8 more)
-

Keep the original texture after unwrapping edited model
Jose Acosta posted a topic in General 3DCoat
So I imported a low poly model and cut off a small portion of it. But when I unwrap it the UV Map is completely different from the original one and when I import the texture it had before it's all messed up because it doesn't fit the new uv map. So is there a way to make changes to a model and still have the original texture wrapped around where it was before? It's really frustrating not being able to keep the models original texture after unwrapping. -
Hi! I am making a texture for a gun and encountered this problem. The texture in 3d-coat texture editor looks nowhere same as the exported one. This is from 3d-coat texture editor: And this is what is being exported: First of all the look is really different. And more importantly the exported texture has random stuff around the edges of texture. It looks like it just filled the free space of texture for some reason. Any way I can fix those problems and get the look I see in texture editor? Thanks in advance!
-
I don't know if this not implemented yet or it's a bug. But looks like Steady Stroke option works only in viewport but not in the Texture (UV) Editor. 4.7.24 (and 4.7.37)
-
Hi I'm having a bit of a problem with 3D Coat. I created a texture for a model I had made and was saving incrementally as I usually do. Anyway I finished it, saved the file and left it until I needed to export it. I have just went back to it and the texture I created is completely gone and the whole object is grey... So I figured I'd just go to my previous save. It's texture is gone too and so are all other previous saves. I checked an unrelated file and it's textures are still there. Did I do something wrong? When I look at the thumbnail for the file the texture can still be seen. Here are pics of the file and also of the thumbnails. Any help would be much appreciated. Thanks.
-
Hi all, I would like to ask you about using real-scale textures for paint. If i got e.g arroway texture i know real scale coverage (eg.1mx1m) So i would like to "fix" brush size. Is it possible? Thanks, Michal
-
Mid way through texturing, I decided to export my textures to see how it would look in marmoset. Upon export, and many alternative attempts to export later, it has become apparent that something wrong has happened. My model, which is comprised of 6 different meshes, is being hand painted (no pbr textures), and only has a few layers. When I try to export them however, all I get is a black texture with some squiggles. If anyone could help, that would be very nice. I am using version 4.7.06(DX64)(educational) on windows 10 Link to the file on my drive since it is too large to post here: https://drive.google.com/open?id=0BwWtNA0OwLazdThWcVkwWnhFR1E
-
Hi! As it is not possible to sculpt (using a stencil) and projection-paint (using the same texture as for the stencil) at a time I am wondering if there is good way to match a sculpting with stencil and later project painting with a colored version of the stencil. Any good workflow for this or is it just a matter of aligning (positioning) the sculpted model as good as possible with the bitmap for painting? Thanks! David
-
 Hi Everybody, so I am painting a texture in 3d coat and am happy with it. Then I export to Pepakura and everytime certain parts are distorted. Do I need to make the UV map symmetric? If yes I have no clue how to do that and i think its unnecessary extra steps. I attached screenshots to show. Any ideas?
 -
Hi! I'm not absolute newbie to 3Dcoat (using it mostly for Retopo and UV mapping since 2015) but not an expert either so i need help :). Currently i can't find solution for one problem. I have 800k polys mesh (5 mil polys photogametry scan decimated in zbrush and exported with UV map) which I'm doing retopo on in 3DCoat 4.7.x (i need to do it manually since no automatic mode gives me good enough results) and all is going nice and smooth (i love Quads tool :)) except the fact i can't find way to display my main mesh (retopo background mesh) with it's TEXTURE ? I have hi poly mesh (that 800k polys) which has 8k UV map for color/normal/spec i need to see that texture in OpenGL while i'm doing retopo because some parts of mesh need polyflow based on texture colors. Is that possible somehow in 3DCoat? All i can get in Retopo room is modes from 1-9 and neither of them shows Texture on background mesh visible but different modes of grey/specular/wireframe? Thanks
-
I'm having a bit of trouble getting UV's to blend at the edges. This is my best attempt - making a base mesh in C4D and auto-UV-ing in 3DCoat. I'd like some advice for making the edges blend better, or perhaps a video link. I'm on the lookout for manual UV-ing tutorials so any advice that points in that direction is appreciated. Also, I'd like to understand why the material was blank when exported - ie: the textures didn't export with the OBJ. I had to export them separately and reconstruct the material from individual maps in C4D. pillarRockTest-1-bad-UVs.tif
-
Hi friends, I imported a scaned model (from photogrammetry), I painted it with several layers, and now I would like to export model to OBJ and a simple texture 8K resolution (JPEG or PNG...) to use in a scene for animation with Cinema 4D. I tryied different option to export color textures and I have only a 256x256 pix PSD with all color layers but empty. 3D-Coat is so complex and with so so many options that do a simple task like this it's no easy for ocasional users like me. Thanks in advance!
-
With the release of Renderman 21 Non-Commercial, it would be great if there were export presets. The shaders have changed a bit since the release of 20, and he old presets don't quite match up. It would be great if there were some new presets added for Renderman 21. https://renderman.pixar.com/view/non-commercial-renderman Thanks!
-

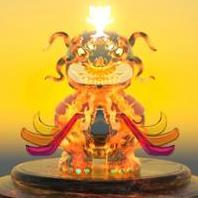
From the album: Monster Bash
This illustration is part of a bigger project called Monster Bash. Actually this is the first one: The Great Evil Witch from the Dark Forest. Hope to share more with you soon!- 4 comments
-
- 4
-
-
- character
- character design
- (and 5 more)