Search the Community
Showing results for tags 'textures'.
-
Hey guys and gals, is there any source for quality textures( preferably seamless) or smart materials for texturing creatures, monsters, etc.? Something like skin, flesh and other creepy stuff. There is quite a lot of stuff for Substance Painter in spsm format, but nothing for 3dcoat. Maybe there is a way to extract textures from spsm package or export from Substance?
-
Here's another video on Sculpting with Volumetric Materials.
-
Hi All, This is just a sneak peek at how I've been approaching sculpting with Dynamic Materials. It feels like a natural way to sculpt. Not all models, but it's been great for naturalistic props with natural or organic materials. I plan to make a more Indepth video. -Alex
-
 painting - first layer, smart material with texture; second layer, smart material with no/smooth texture Problem: I want the second layer to not have the texture of the first layer. Currently is just paints over the old texture but using the new color. I want the new layer to remove the texture from the base coat and just be smooth Thank you
 -
 Is there a way in the paint room to have multiple materials, each with their own layers and textures, similar to how Substance Painter handles importing a mesh that has multiple materials assigned? I have a character model with one material assigned to the hair, one material assigned to the head, and another material assigned to the rest of the body. Each material has its own texture. I started basic colors and painting in Substance Painter and Photoshop, and I want to do the rest in 3D Coat. Here is my process and how 3D Coat handles it: I export an FBX from Maya, with "embed media" toggled on. I make a new file in 3D Coat and choose "Paint UV Mapped Mesh (Per-Pixel)." I tried multiple times with different import settings (see step 4). All the textures in 3D Coat are gray. I use the ctrl+P "send to Photoshop" function to add my previous textures back into the 3D Coat textures. I get a prompt saying "select UV set to export." If I have toggled on "import tiles as UV sets" when I created the file, then the materials/UV sets are renamed to 1001, 1002, and 1012. If I have toggled off "import tiles as UV sets" when I created the file, then the materials/UV sets retained their original name. If I have toggled off "import tiles as UV sets" when I created the file and toggled off "treat materials as separate textures," then whatever I paint on one part of the mesh also gets painted onto a different part of the mesh. So obviously this one is the wrong choice. I pick the material/UV set in 3D Coat, then In Photoshop I paste my original textures into my "Layers.psd" generated by 3D Coat, then save and close Layers.psd. Back in 3D Coat, the texture reloads and layers for the first material shows up fine. I repeat the process for my second material. If I give the second material a different number of layers than the first material, then in 3D Coat all the objects that received the first material disappear. They do still have visibility toggled on in the "paint objects" panel. If I give the second material the same number of layers than the first material, then in 3D Coat the objects that receive both materials stay present. In the "texture editor" panel, I can still toggle between materials in the dropdown, and the texture editor shows the proper texture for these. But they all share the same layers. So it appears that 3D Coat allows multiple materials, but they all must use the same textures and layers for those textures. This is not ideal - I'd love to be able to only use the layers I need for each material, and to name each layer appropriately. Is there a way to do this that I'm missing? Thanks!
 -
I'm still getting use to 3DCoat, I wanted to know if there was a way to keep multi-part textures together when using the copy tool. It's for repeatable textures with a albedo map, normal map, specular (even metallic) map together so I can keep the details like leather texture or skin texture together and don't have to recreate it.
-
my first glass attempts in 3D-Coat: ClearGlass.3dcpack IMPORTANT: Make sure Layer 0 opacity - 25% or lower! then on layer one (or any other layer above 0) use the glass material. make sure the material is on 100% opacity but the layer opacity is on a low % (me = typically choose 15% or less) --- message me if you = need any help sorting it out :]
- 15 replies
-
- 4
-

-

-
- glass
- transparent
- (and 10 more)
-
 Hi, can anyone help?! So I've been working on a character for a while and I've just finished texturing it in 3DCoat. I have had to work on it in 3 different 3Dcoat files (Body, Armour and Boot) so my machine can handle it. I've wanted to move it in to blender to start rigging and add hair particles, so I've been using the 3DCoat Blender app link. For the most part it works perfectly accept for some certain objects. As you can see from the photos I've uploaded below in blender, the knuckle guards parts of the skin and the belt have weird texture errors. However when you look at them in 3dCoat there doesn't seem to be any errors. I've uploaded images of my export to blender settings to see if that could be the issue. Can anyone see what's causing this error and how to fix?! Much Appreciated
 -
Доброго дня! Очень нужна ваша помощь. Как можно избежать таких размытий цвета при накладывании рисунка на проекцию с режимом "Проецировать насквозь". Возможно ли сделать, чтобы на стыках рисунок соединялся, а не размывался? Есть ли способы сравнять рисунок не прибегаю к рисованию с нуля по всем граням. Прилагаю скриншоты конечной работы в Photoshop. Помогите пожалуйста.
-
Hello - I'm using machine translation. I love the 3dcoat texture paint! But, the current texture paint is lacking in smoothness.(Shift+right click) And then I'd like a thumbnail of the layer. Hopefully 3dcoat2021 will have paint and UV updates!
-
Hi Is it possible to export a model's textures into one single sheet? I have a model all textured and ready to go back into 3ds Max, but when I try to export the textures, they're done individually. When the model was first brought into 3D Coat, all the UV islands were on the same sheet, but they could be isolated within Coat based on its material IDs. Thanks
-
 I recently can across a issue where I heavy need to import a obj file with textures already applied. For context I have a model that had multiple texture sheets and UV'd pieces that have existing textures I need to edit. Problem is that when importing any type of geometry file the program does not apply textures automatically. Ordinarily this wouldn't be a issue as having only one or two texture sheets wouldn't take much time to import the textures manually. Thing is that this project has upwards of 12 separate UV'd pieces, each with around 4 textures. Meaning that I would need to manually apply 48 textures for this one model. If there are any tricks or ways around this problem please reply back, as I will even try external plugins a try for fixing this issue. This is urgent as the window on this project is closing quickly. Thank you for reading and hope to hear back soon.
 -
Hi there. Here is a basic summary, I'm working on a hand-painted texture. Nothing else. But when I export the 'diffuse' map it comes out very very wonky when put back onto the original Autodesk Maya mesh it came from. Can anyone explain the reason for this?
-
Hi all, So today I experienced a whole section of my models textures just randomly disappearing, this seemed to happen after I added some more objects to the 3Dcoat scene, I went into the texture UV editor and the UV's for the objects that lost their textures are all completely grey, like they were never textured. I have tried erasing the grey to see if my textures were underneath, but unfortunately no. I also was not working on Layer 0. I am honestly baffled and I saved over my save so there is no way of going back to an old one and just getting my work back that way... Has anyone else had a problem with textures disappearing after adding objects, and is there absolutely any way of getting them back? Thank you.
-
Hi, I've recently been working on some 3D models for use in Unity, and I would like to paint textures with Smart Materials. For each texture that I wish to paint with, I have the albedo texture + a normal map. These normal maps work great in Unity, however I am unable to use them as a "depth" map in 3D-Coat. Is there a way to utilize these normal maps as depth maps?
-
 Hey everyone! My intention in creating this topic is to be able to contribute to the improvement of the Brushes, Alphas, Stencils and Textures system for 3D-Coat. Since @Andrew Shpagin commented that he was developing a new system of Brushes, then who knows, this topic could help in some way and at the same time you can comment, enrich and further strengthen this subject that is of the extrem importance for all of us who are users of 3D-Coat. I have sculpted a lot in 3D-Coat which is a fantastic program, especially in Surface mode and I can tell you all in all sincerity that I really missed a lot of important tools and functions during my work and I believe most of you too. Please do not misunderstand me, but on several occasions, I was a bit discouraged by the lack of tools and functions in 3D-Coat and thus making me take my work to other programs to be able to move on with my work. I know it's healthy to have a workflow that involves other programs, but honestly taking your work to ZBrush to be able to perform certain functions is very frustrating. In my head it does not make sense to have to get a ZBrush license just to complete my work that I do with a lot of affection inside 3D-Coat. So with this feeling, I would like to suggest and share some suggestions that could make a big difference in our work related to this area. Actually, it would be a lot of suggestions, but I'm going to get caught up in what seems to me to be the essential and really make a difference in our work. --------------------- So, shall we start? ----- 1) Alpha and Textures for 16 Bits: --> VERY IMPORTANT! I believe one of the major important steps for 3D-Coat would be the program to accept to work with alphas, stencils and textures with 16 bits. This will help greatly in the process of sculpting and painting taking the program to a level of excellence and would prevent the surface of the mesh from becoming strange through alphas and textures of 8 bits. Please see a quick comparison of the same Cube created in ZBrush with 500 thousand polygons and then this cube was imported to 3D-Coat for the application of the same alphas that were used in ZBrush. In this test, you can see that in all examples in 3D-Coat (located to the right), the surface of the mesh showed more noises, pixallated effect and generated some imperfections in the geometry of the mesh (bad geometry). The reason for this is because 3D-Coat only works with alphas and 8 bit textures that limits the program in the definition and quality when applied to the surface of the mesh, since 8-bit grayscale images which contain 256 gray levels. In ZBrush examples (located on the left) you can see that the surface of the mesh has a better quality, it has an excellent smoothing definition (not having the pixelated effect) and does not generate a geometry with problems on its surface, since 16- bit images which contain over 65,000 gray levels. In my opinion, 3D-Coat switching from 8-bit to 16-bit would give users an incredible and spectacular detailing power (whether in the area of sculpture or in the painting area) similar or even better than what we find in ZBrush. ----- 2) New Alpha Pallete: (These functions, if implemented, could be part of the Paint Room as well. ) I think 3D-Coat could improve a lot in the area of alphas. This suggestion for a new Alpha-related palette would bring the user important and useful functions as well as an instant preview for the user to observe the changes that would be made to the alpha being manipulated. -- Features and Functions: . Flip H: It would flips the alpha left-to-right, making it a mirror-image of itself. . Flip V: It would flips the alpha top-to-bottom, making it a mirror-image of itself. . Tiles H: The H Tiles would tile the selected alpha along the horizontal access. The H Tiles could have a different value then the V Tiles to would create unique tileable alphas. . Tiles V: The V Tiles would tile the selected alpha along the vertical access. The V Tiles could have a different value then the H Tiles to would create unique tileable alphas. . Offset H: The Offset H would offset the image horizontally. . Offset V: The Offset V would offset the image vertically. . Distort Image: The distort image would be the same found in the Preview Options of Stencils and Smart Material. This would works similar to liquify brush of photoshop. . MidValue: (Very IMPORTANT feature) - Mid Value would set the zero displacement value. If would set to 1, then white would be considered zero displacement and all sculpting would push in on the model. If would set to 0, then black would be considered zero displacement and all sculpting would push out of the model. Setting Mid Value between 0 and 1 could allows you to sculpting in and out at the same time. . Surface: (Very IMPORTANT feature) - The Surface button mode would automatically defines the best middle gray value for your alpha. It would allows you to add details from the alpha to your sculpt without destroying details already on the surface. . Filters: Curves, Levels, Dodge, Burn, Threshold, Invert, Gaussian Blur, Motion Blur, Unsharp Mask, Noise e etc... The idea of the filters would be to completely refine the Alpha. You could choose how many filters were needed and these filters would appear in the order you choose in the list on the side. The user through the Eye button icon could or could not see the Filter, thus the filter would become active or not. The user could delete, duplicate and change the order of the filters in the list. Just as you could save and load the list with the filters and their respective properties that were previously configured. The user could create a new alpha from the list that would appear in the Alphas palette. And best of all is that this filter would be non-destructive, all properties and values would be permanent and would be changed at the time users wanted. ----- 3) Alpha Capture from sculpt: Capture Depth information in 16 Bits to create Alphas with ease. To make life easier for the user and further improve the creation of alphas within 3D-Coat, this new tool through a function similar to that of programs that capture the computer screen by dragging a rectangle, would be able to capture the information of the Depth of the geometry surface and could efficiently generate a 16 Bit Alpha of that surface of the sculpted mesh. This generated Alpha would automatically appear in the alphas palette. ---> Important New features for better Brushes control: ----- 4) Imbed and Gravity: - Imbed: (very IMPORTANT feature) The Brush Imbed would control the embed of selected brush. Brush Imbed would gives a brush a definite control on how a brush would interact with a surface. This would allow a slight deformation on the surface or a more extreme deformation on the surface. - Gravity: It would allows you to add gravity to your brush strokes, giving it a draping effect. Through an Orientation function, gravity could be oriented to the Z axis and thus change the direction of gravity. ----- 5) Topological area of influence function for the Move Tool and Pose Tool: (Very Important feature) When the user activates this option, the surface of the mesh would have a restricted degree of influence to perform the deformation of the mesh surface. Example: Close or open the eyelids (when moving the upper eyelid, the lower eyelid would not be moved) or the mouth (when moving the lower lip, the upper lip would not be moved) according to the area of influence of the brush configured through properties that would aid in the refinement of this function. Since 3D-Coat is not attached to a topology, I had thought the following solution to this problem would be the possibility of 3D-Coat using the Calculation of Curvature used in the Smart material system to be able to identify the surface of the model and thus 3D-Coat could have concrete information on how the program could restrict an area, even if that area is in contact with another area. ----- 6) Changes made to Proxy Slider could have compatibility in Sculpt Layers: At the moment, when the user works with models at any resolution in the Proxy Slider and returns to the normal model, all layers in the Sculpt Layers are lost. ----- 7) Clip Mask Layers on Sculpt Layers. (Very Important feature) This would be really important for detail control on the surface of the mesh in a non-destructive way. ----- 8. The Snake, Spike, ToothPaste and Muscles objects could have better compatibility in Surface Mode (so there are no problems stopping the program or at times not accepting the operation) and a very important thing, they could be compatible with Sculpt Layers. I've already emailed @Andrew Shpagin about all of these suggestions. There are many other functions and tools I could list here, but in my opinion, these suggestions explained above, would already give all artists who use 3D-Coat a huge improvement in the work. What do you think? Please help make it happen! Thank you
- 6 replies
-
- 3
-
-
- improvement
- brushes
- (and 6 more)
-
I recently bought 3D Coat and I've been having fun with it. The fun lasted until I exported the textures to Blender. The results I'm getting in 3D Coat are not the same I'm getting in Blender. The textures look stretched and the details are not there in Blender. I tried using Eevee, unwrapping in different ways and tried different export setups. Soo this is how it look on 3Coat and this is on Blender UVs and nodes and here is the export setup I hope is something I'm doing wrong and someone can help me out because its been frustrating
-
Hi folks, I am using poliigon.com as a source for my textures. They have support for Blender, Maya, 3Ds etc, but no offical notes on 3D Coat usage. Their textures are generally a folder with 2x color maps, 1 greyscale displacement map, one normal map, a gloss map and a reflection map. See example below. My understanding is that 3D Coat smart materials do not use normal maps - correct me if I am wrong. My general usage has been: Either color in color slot, displacement in the depth position, gloss in metalness, and nothing in roughness (example has color 2 in roughness - probably does not make sense). I had a quick chat with one of their support guys who gave me the following comment: You can pretty reliably convert our maps over to the metalness format which 3d Coat wants, by simply taking our Gloss map, inverting it in Photoshop and plugging it into the roughness channel. Assuming it's not a metal material then just use a pure black color for the metalness input and it should be setup correctly. Now for normals you may need to flip the Y channel depending on what 3d coat is setup to read; opengl normals will stay the same as they are now, but directx normals will require the Y flipped. You can do this in Photoshop by selecting just the green channel of the normals and inverting it and saving. Hope that helps! Based on my understanding, I should not be using the normal map at all. I have also seen others on youtube that uses gloss in metalness, but based on his recommandation this is incorrect. He also has a comment regarding using opengl vs directx - since 3D Coat has two ways of running (gl - I assume opengl) vs dx (I assume direct x), does it actually make any difference in terms of smart material texture usage? And what is your recommended usage of the textures for the different slots? Should I use a different provider? Your help is much appreciated! Thanks, Terje
-
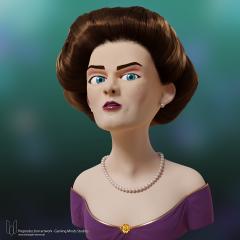
From the album: Artworks
For my collegues of Gaming Minds Studios I have created a 3D character prototype while the preproduction of their last hit Railway Empire. In the preproduction of Railway Empire we experimented with several types of Charakter styles. The Western Lady were sculpted in 3D-Coat., the textures and retopology were also done there. I transferred the model into Blender and set a very simple face rig, based on shape keys. The hair was created with Blenders hair system. The final is rendered with Blender Cycles. There was an arm rig too, but we rejected it. Even if the char went not into the final game, I like the Lady a lot and like to present it to you today. I have made some improvements in the hair style and used my CW Eye Material for her eyes. Drop me a line if you have any questions. -
Hi folks, I have a question with regard to UVs. I have read other threads on a similar subject but found now solution. - I am using only 3DC and I have a Scene I have done in the sculpt room. Its made of 3 separate Meshes. - I make a Low-res decimated version of the the scene and export that as an .obj. - Move over to Retopo room and import that Low red version via the 'import retopo mesh' - Once that is done I do all the seems on each mesh, unwrap each mesh. all on separate UVs (or at least I think it is. they are not overlaped in the 'UV preview' - Then Bake the normal to tranfer over the detail from my High Res to the Low Res Version. and here is where I have my issue - I move over to the paint room and even though on the Bake process it asked me about the three UVs I wanted to bake. in the paint room they are just stacked on top of each other...why? (Note, I looked in the UV room and they are stacked in there too and cant seem to find a way to separate them.) I am miffed :S Cheers.
-
I do not know how to fix this , i have been at it for hours. I can provide the save for anyone interest in trying to fix or maybe someone can tell me. Every time i bake i get either a super weird normal map and very weird AO that has weird artifacts in it or is just white and black splotches. The normal map looks like it is covered in small bumps or the eye lids are screwed up with other parts doing the same. I am not sure what to do after 4 hours of trying to get it to work. Even if i just try to AO the sculpt and not the retopo with sculpt it does it. here are some pictures. I just want to paint it , export it all to blender and add hair there ( i think it would be easiest to do with some of the tools in blender for hair ). this is only my 3rd sculpt in here. 3d coat is the first program i have sculpted in and it is a awesome program so far. this is also my first time retopoing so im sure some of it is messed up to. those are just 3 times of issues i had even other ones where inside breast had very dark spots on AO and i do not know how to fix, i smoothed to hoping that would fix.
-

From the album: 8 Classic Lamps
8 Classic Lamps All the sculpting I did in 3D-Coat in voxel mode, and Render in Unreal Engine 4. I did not use any post processing. -
Freelance concept artist Miloš Belanec shared a free high-resolution texture pack. The artist has been dealing with a problem of low-quality texture packs, so he decided to make his own set. The artist is planning to share more textures in the future, so stay tuned! Download Textures in Full Resolution Get the Pack on Gumroad
- 1 reply
-
- 1
-
-
- miloš belanec
- textures
- (and 2 more)
-
Hi, I'm looking for a way to create a color map texture in 3d coat for the game character I'm making. The color map texture consists of only 3 colors (red, green, blue) and can't have aliasing. The game shader will use this color map to alter color of players character as desired. What is the correct way to approach this using 3d coat? Also, I'm looking to create masks for dust, rust, burnt, blood, ice/snow. From what I understand so far, each of these would need to be complete texture set exports. Thanks
-

From the album: 8 Classic Lamps
All the sculpting I did in 3D-Coat in voxel mode, and Render in Unreal Engine 4. I did not use any post processing.