 中文 (台灣)
  English
 Українська
 Español
 Deutsch
 Français
 日本語
日本語 Русский
 한국어
한국어 Polski
 中文 (中国)
 Português
 Italiano
 Suomi
Suomi Svenska
 Dansk
Dansk Slovenčina
 Türkçe
 Nederlands
 Magyar
 ไทย
ไทย हिन्दी
 Ελληνικά
 Tiếng Việt
 Lietuviškai
 Latviešu valoda
 Eesti
Eesti Čeština
 Română
 Norsk Bokmål
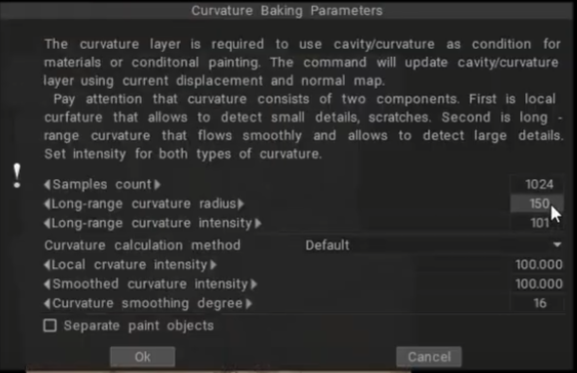
The curvature layer is required to use cavity/curvature as a condition for materials or conditional painting. The command will update the cavity/curvature layer using the current displacement and normal map.
Pay attention that B&W curvature consists of two components.
- First is local curvature that allows to detect small details and scratches.
- Second is long-range curvature that flows smoothly and allows to detect large details.
Set intensity for both types of curvature.
When creating a Curvature map in 3DCoat, you are primarily referencing the objects in the Sculpt Tree (specifically the high-poly voxel or surface layers).
Here is the breakdown of how 3DCoat handles this:
- Sculpt Tree Source: Curvature maps are computed based on the geometry (polygons or voxels) visible in the Sculpt Tree. This allows 3DCoat to identify the concave (valleys) and convex (ridges) areas of the mesh.
- Painting Object Role: The “Painting Object” (in the Paint Room) generally holds the low-poly, UV-mapped mesh. While you can calculate curvature from an existing normal map in the paint room, it is standard practice to compute it based on the Sculpt Tree geometry during the “Bake” process, which maps the high-poly details onto the low-poly object.
- Best Practice: Ensure the high-poly sculpt layers you want to bake are visible in the Sculpt Tree. You can disable “Separate Paint Objects” in the curvature dialog if you want to bake all visible sculpt objects together as one map.
In summary, the Sculpt Tree is the source of the high-poly information, while the Painting Object receives that information as a map.
Cavity Black & White
This is the old method of calculation of Curvature maps.
You can deactivate the new simplified curvature RGB baker in Preferences and get that old school window with settings.
Go to Edit Menu > Preferences, on the Tools section select use RGB cavity as the default cavity calculation method.
After that you will have that full window in Edit > Calculate Curvature.
If you open an old project with B&W Curvature, but Preferences is set to RGB Curvature a warning panel popups.

When you uncheck the RGB curvature baking you will instead use the legacy curvature baking tool which bakes another type of map called the cavity map.
Basically which like the name suggests focuses instead on cavities and smaller details which are very useful for texturing characters and stuff with features like skin or those reptilian scales which have those tiny crown sections between each individual scale which you might want to color black or something to give it more realism.
Another good thing about the legacy baker is that it lets you just remove all the huge details (Long-range intensity) altogether and just focus on the small ones.

Cavity RGB
The RGB cavity was introduced as the default calculation method in Texturing.
This is a very significant feature for the PBR Painting over the Texture/Mesh.
This video demonstrates how the improved cavity technology works.
This is an improved technology already called the RGB cavity.
- First, you need to make sure that the RGB cavity version is enabled, to do this, go to the Edit Menu > Preferences, go to the Tools section, and select use RGB cavity as the default cavity calculation method.
- After enabling the function, delete your old Curvature layer first if any.
- Go to the Texture Menu and then select the Calculate Curvature option. In order for the Calculation to be made you need to wait a bit.
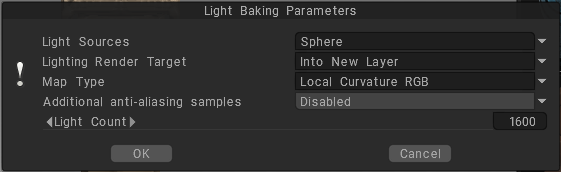
- When you first run the Curvature using RGB Cavity, the Light Baking Panel comes up. Do not change (Local Curvature RGB). Next it will run the Curvature Calculation.
- Now we can see how a Cavity map (RGB) appeared in the layers.
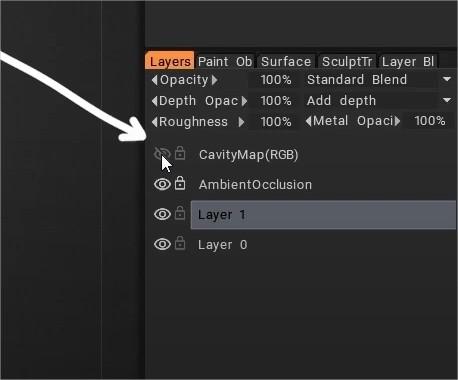
We see that with the new technology, the map looks like a lot of colors.
The map must be closed by default now.
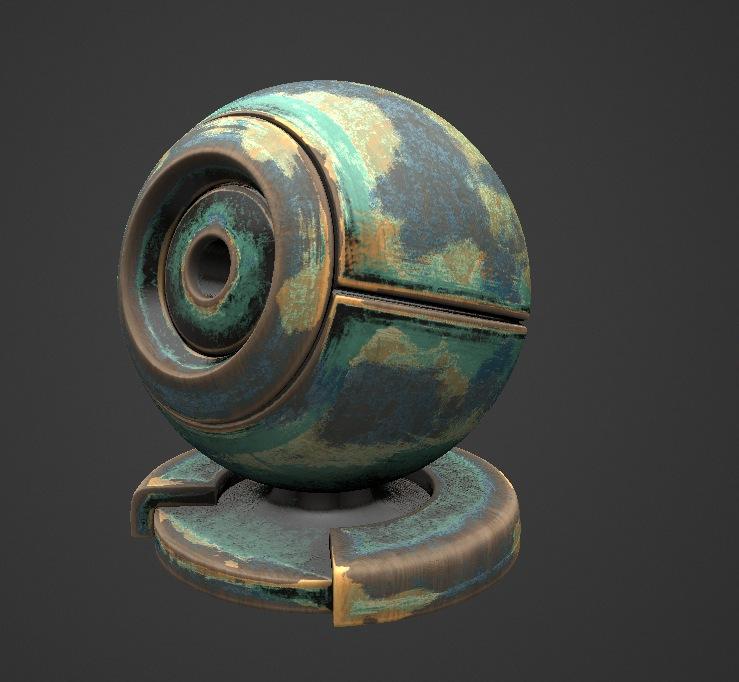
Let’s create Smart material to see how it works
First you need to add Conditions to Degree value (more on convex like example) to see “vase” options.
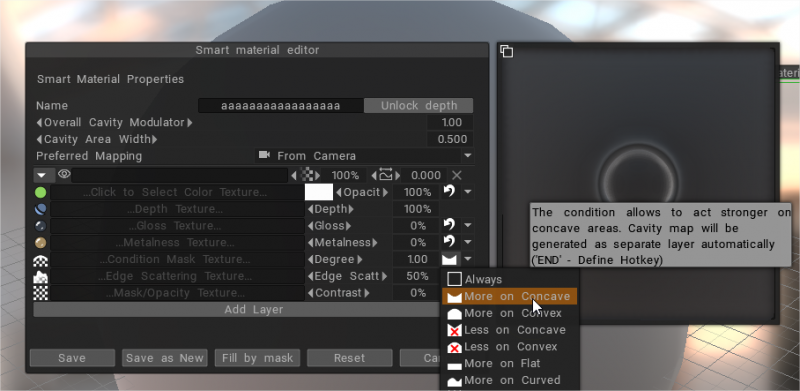
Focus on a new edit icon -it looks like a vase-, this was added and did not exist before and it is with the spin edges that the update function is configured.
The new parameter is responsible for the radius cavity. It is also affected by degree and contrast adjustments.
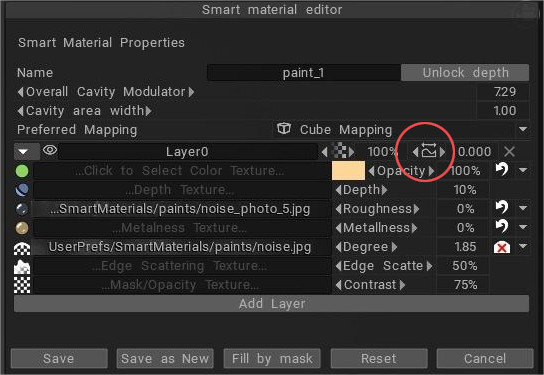
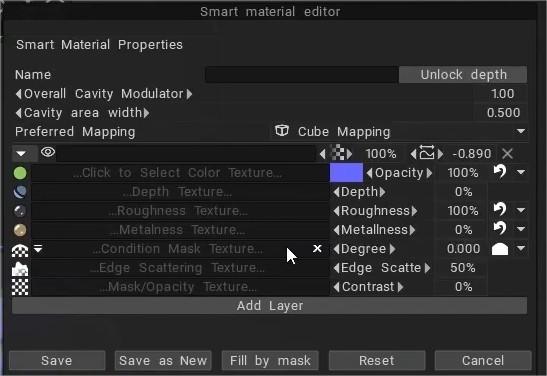
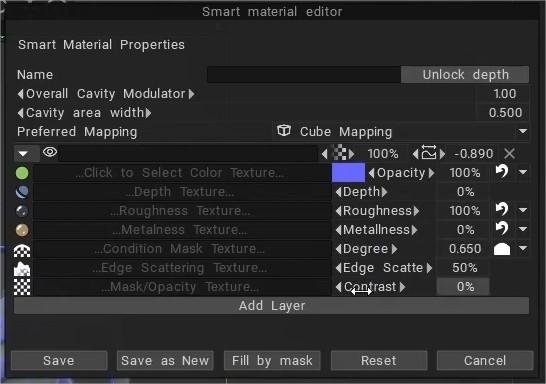
Adjusting Cavity Area Width and Overall Cavity Modulator can give you some nice effects like several layers of old paint on top of each other.
It is the additional cavity width values
- The 0 value means that the cavity is taken from the materials settings as-is.
- Values less mean sharper cavity, more than 0.5 – widening of the cavity.
- Off course you need a RGB cavity layer in the scene to vary the cavity width.
It works only on such conditions:
More on concave, more on convex, less on concave, less on convex, more or flat, and more on curved (you can use any of these modes).
The new parameter is responsible for the radius cavity. It is also affected by degree and contrast adjustments.
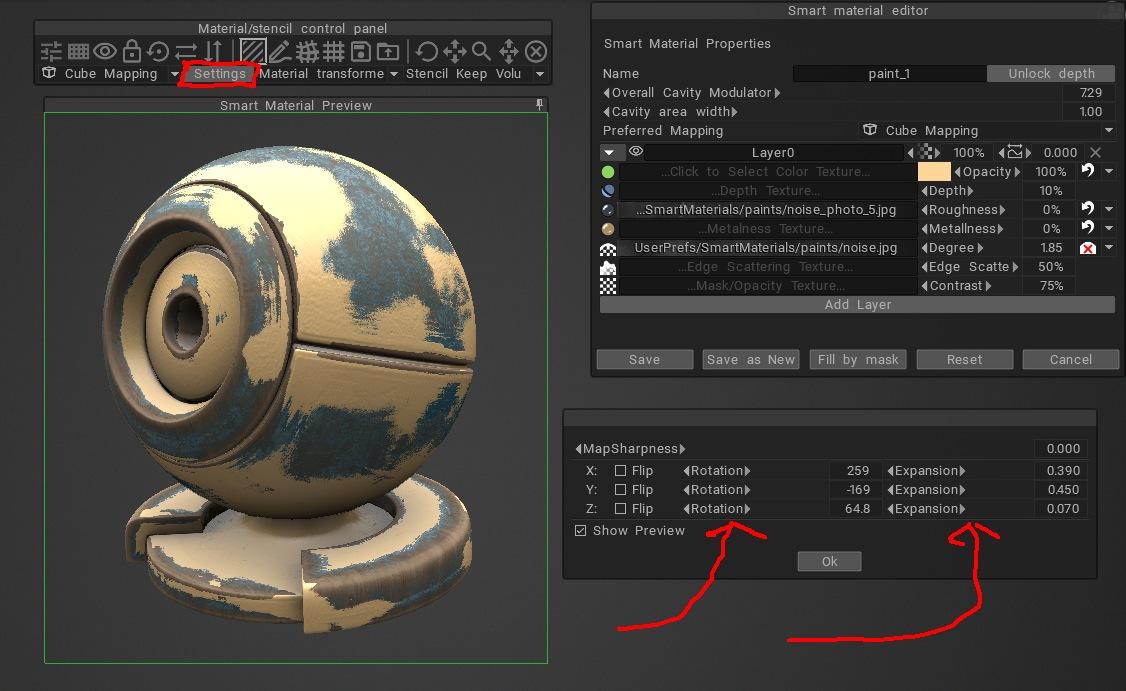
How it works applied on Smart Materials
On this test, all Smart Materials was applied with Cube Mapping.
Open the real time preview window, placing it over the model.
This is the most important because you get the real time view of the smart material and how it will be applied.
We do not go by as seen on the Smart Material Editor’s ball because we want real time feedback in this case.
Go to Material Stencil Control Panel -> Settings.
Change the rotation of the cube map on the XYZ axis ( per axis) and the expansion per axis as well is
shown in Picture.
You can preview in real time as the texture moves over the surface.
Last picture shown, to further increase variation, how to use a layer blend mode.
Was used the Overlay blend mode on the top layer.
You can adjust the strength of the blend mode by using the Opacity adjustment.
It was the second layer in the stack.

Start Adjusting the Cavity Modulator and Cavity Area Width till you get the effect you want.
It is included a picture of the blue paint settings, it was the blue metal but looks like blue paint.
The new RGB cavity curvature calculation and Cavity Area Width plus Cavity Modulator is great. Lots to explore here. Have fun exploring!
Three parameters to tweak curvature
Once you’ve calculated your curvature map, from the Edit menu–> Calculate curvature, you can use these three parameters to tweak it.
Tutorials
Using multiple curvature maps in 3DCoat: Did you know that you can regenerate your curvature maps in 3DCoat, and use whichever one you want later on.