From ZBrush
For this step we use ZBrush demo soldier showing polygroups.

Before export the body mesh, on ZBrush Preferences > Import/Export > Turn ON Export Sub groups.

Go to 3DCoat Modeling Room > Mesh > Import (I have set color reference manually pressing RMB over Polygroup layer)

Usually ZBrush models are small at import.
Use Scale master (Edit > Scale master) to upsize on viewport without loose original model size.

Using UV > UVpath you can mark seams easily on every polygroup.

Export the model (Mesh > Export)

Importing into ZBrush:
- no error popup .
- The model keep Polygroups and also Morph UV is working fine.

Import into DAZ
In this step, we imported the model to which we added the UVs in 3DCoat into DAZ.
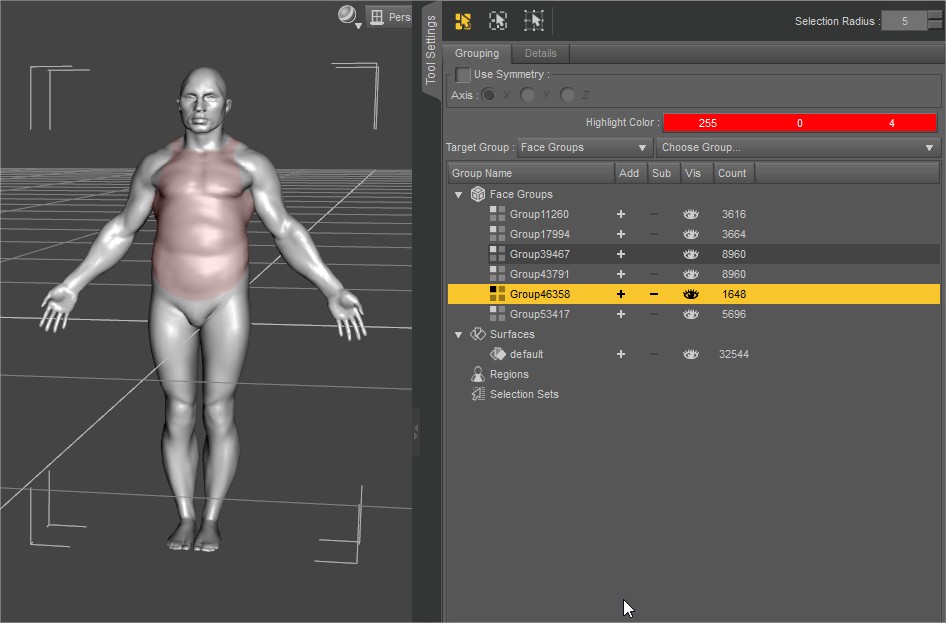
Polygroups (or as DAZ calls them Face Groups) only show up in one place, under ‘Tools Settings’ Tab with ‘Geometry Editor’ Selected.

The two main things about ‘Face Groups’ in DAZ
- it is required when rigging, we assign bones to them, which in turns helps with weight mapping.
- they can be used to create Surface Materials.
With a Face Group Selected (by pressing the + symbol) and then Right Clicking in Scene opens up functions for that selection.
In this case, if I wanted to I could assign a surface region to one Face Group.
Right Click over, on Geometry Assignment select Create Surface from Selected.
 Ελληνικά
  English
 Українська
 Español
 Deutsch
 Français
 日本語
日本語 Русский
 한국어
한국어 Polski
 中文 (中国)
 Português
 Italiano
 Suomi
Suomi Svenska
 中文 (台灣)
 Dansk
Dansk Slovenčina
 Türkçe
 Nederlands
 Magyar
 ไทย
ไทย हिन्दी
 Tiếng Việt
 Lietuviškai
 Latviešu valoda
 Eesti
Eesti Čeština
 Română
 Norsk Bokmål