 English
  Українська
 Español
 Deutsch
 Français
 日本語
日本語 Русский
 한국어
한국어 Polski
 中文 (中国)
 Português
 Italiano
 Suomi
Suomi Svenska
 中文 (台灣)
 Dansk
Dansk Slovenčina
 Türkçe
 Nederlands
 Magyar
 ไทย
ไทย हिन्दी
 Ελληνικά
 Tiếng Việt
 Lietuviškai
 Latviešu valoda
 Eesti
Eesti Čeština
 Română
 Norsk Bokmål
In 3DCoat, the Kitbash Room is a dedicated workspace designed for quickly assembling scenes and detailing hard-surface models using pre-made 3D assets, known as kitbash (or Greebles) parts.
This feature streamlines the process of rapidly blocking out or refining concepts like vehicles, machinery, and architecture.
Here’s how the Kitbash Room works:
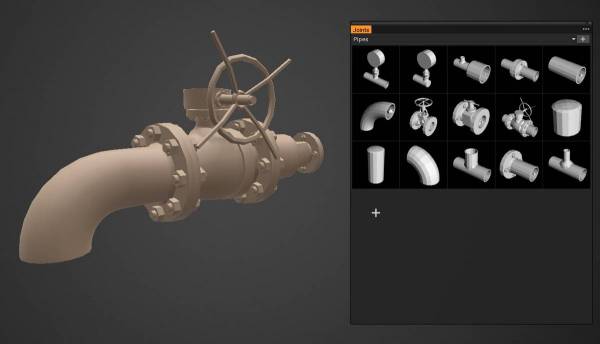
- Asset library: You can import and organize your own pre-made 3D models (OBJ files) into a visual library. 3DCoat automatically generates thumbnails for easy browsing.
- Rapid placement: You can quickly add, move, rotate, and scale these kitbash pieces onto your primary model. This feature is particularly useful for adding complex geometric details, or “greebles,” to your surfaces.
- Negative volumes: For more advanced detailing, you can use “subtract mode” on Tool Options before applying it.
- Voxel integration: Because 3DCoat’s sculpting has a voxel-based mode, you can merge kitbash parts directly into your main model without worrying about topological issues.
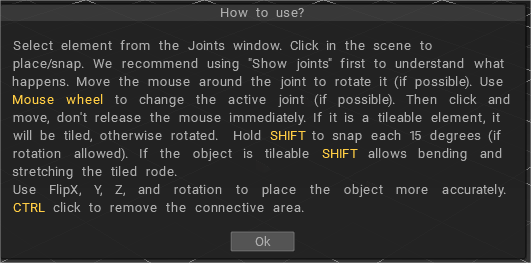
How to use the Kitbash Room
- Access the room: Switch to the Kitbash Room in 3DCoat.
- Import your assets: Import your
.OBJkitbash parts to Sculpt Models, Joints or Splines Panels. - Place parts on your model: Select and place parts, using gizmos for transformation.
- Use negative volumes (advanced): Prepare negative volume versions of parts (e.g.,
_negativein filename). - Merge into voxels: Merge placed parts into your main sculpt.
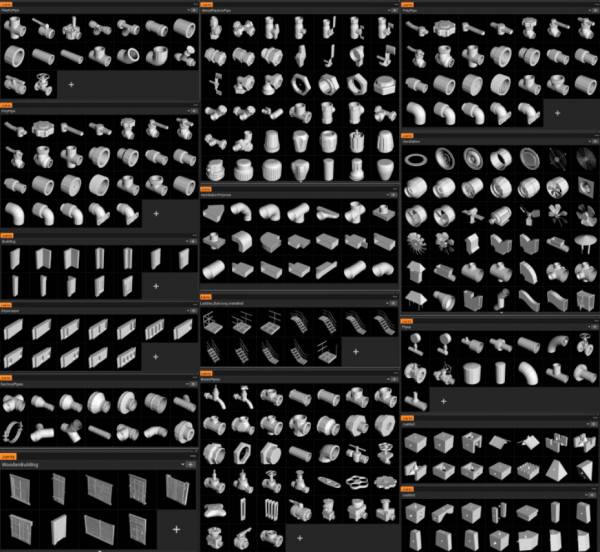
Primitives Library from Tinker

Joints
It is a set of various parts that can be attached and linked with each other, like ‘lego’.
Splines
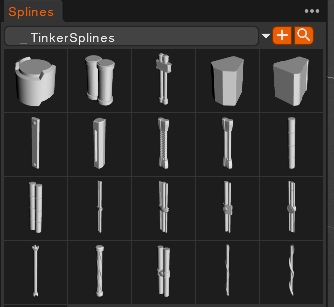
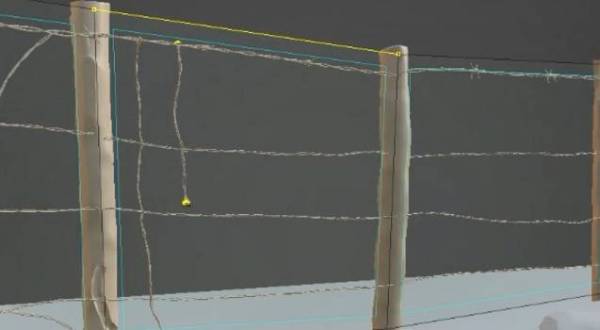
Library of Splines: Splines is a set of flexible objects that can be stretched with the Curves or Snake tool:

Joint Specifications
There are two ways to make elementary bricks for the Joints tool.
– Make joints in 3D-Coat. Read this document.
– Make joints in some external editors. Read the specifications.
Technical requirements for models with Joints
The model should be created taking into account the scale of the grid. For example, if it is a cube, then 10*10*10, a brick – 20*10*10.
The blocks could be larger. However, they should be made to apply neatly onto the grid of 10*10*10.
The vertical axis is Y. If the model is a tube, the diameter should be five if the tube’s corner, any parameter taking into account the corner is applied to the tube of 5 in diameter.
You may add joints to the model right in 3DCoat. For this purpose, please make the model in the retopo room (sculpt and retopo or model in the retopo room from scratch).
Then go to Retopo room->Make joints and add as many joints as you need.
It looks like this:
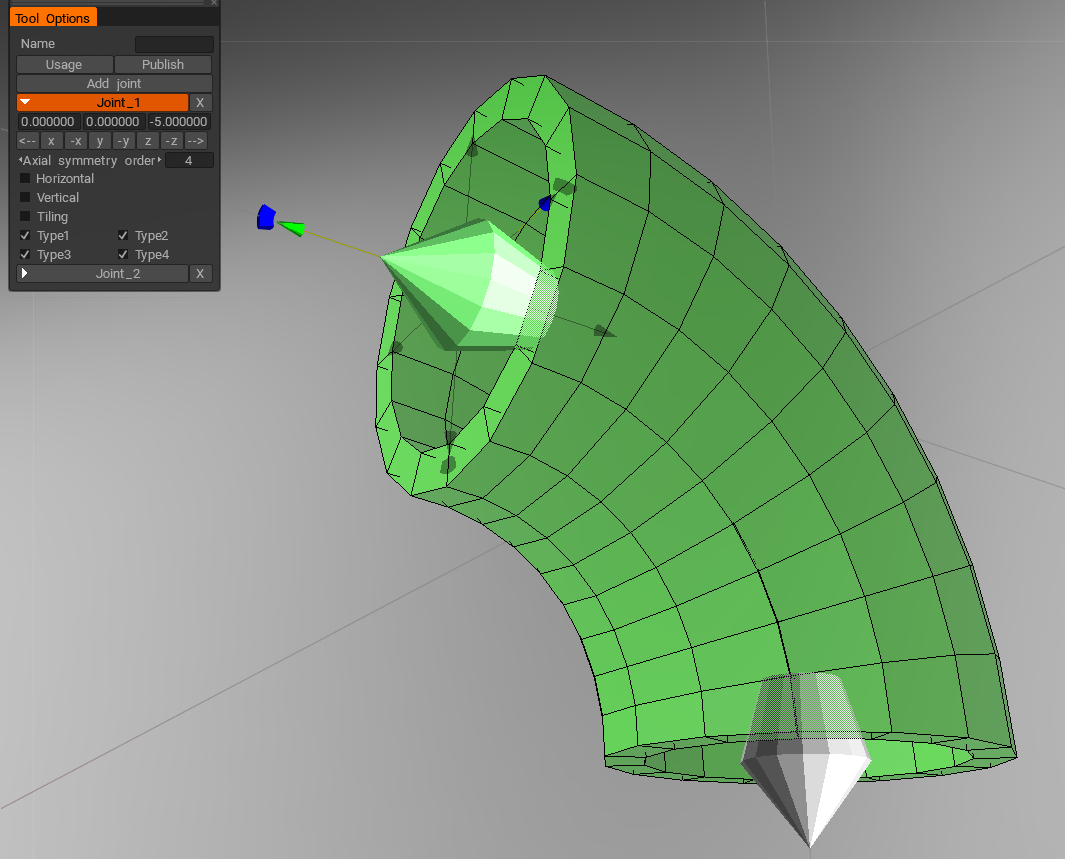
Press Add joint to add a new joint. There are several options for each joint – axial symmetry, vertical/horizontal alignment, and compatibility with other joints.
Please fill in the name of the model and press Publish as soon as the model with joints is ready. The model will be placed in the Joints palette, and you will get to the Joints tool to test the model with joints. Pay attention that the model with the same name will be overwritten.
Model requirements.
The models are low-poly ones – up to 5К polygons per model. If there is a tube designed – 16 segments should be created.
A model could be a composite one. If there is a sub-object (retopo group) with the name of Shader_Gold, there will be created a volume named Shader_Gold, where the subobjects of this type will be gathered. That volume will be assigned a shader whose name fits best with the word Gold.
Joint Model Examples
On this links you can find examples of models used for kitbash on 3DCoat.
How to import kitbash models in multiple parts

To store models in Sculpt models/Poly models panels, you can group and organize them however you like. You can make complex assemblies with 100 elements in it, or you can store each nut and bolt as separate item.
If you downloaded a kitbash as fbx/obj and there is one huge assembly with 1000 elements, you can import and explode it, and save each element you need as separate model.

Here is an example of huge kitbash OBJ file imported into Sculpt room without voxelization.
You can see this import settings, and in Sculpt Tree panel you can see 100+ objects, all imported with same structure and names as I had in the OBJ. So if you store kitbashes in external OBJ/FBX they will import the same way as you organized it.
Kitbashes are usually made and stored as polygonal meshes, not super dense sculpt objects.
If you will try to make a kitbash file with 100 sculpt meshes, it will weight gigabytes. If you want to store some elements in Coat sculpt space, better use Sculpt models panel.
Just drag and drop there objects you want to save, as in the 1st screenshot. Each element there is a separate assembly, so if you drop 15 objects, they will be combined into 1 file, and it will offer to decimate it all.
But if you want them to be separate, just drag them one by one, and each will stored separately.
Tutorials
KITBASH Modeling in 3DCoat: The video demonstrates KITBASH Modeling possibilities in 3DCoat.
Kitbashing Tools : This video demonstrates the Kitbashing Tools in 3D Coat, which allow for fast and efficient storage or retrieval of Voxel Layer content or standard OBJ format files. 3DCoat creates thumbnail images for each and displays them within a dockable pallet for easy access.
3DCoat and Blender for Concept Art | Kitbashing Tutorial: by OmarDraws.
3DCoat Kitbash Set: This is a demo on how to use any kitbash parts in 3DCoat for designing vehicles/hard surface stuff. Mostly aimed at concept people, this is very useful to generate ideas and explore design in 3D.