 English
  Українська
 Español
 Deutsch
 Français
 日本語
日本語 Русский
 한국어
한국어 Polski
 中文 (中国)
 Português
 Italiano
 Suomi
Suomi Svenska
 中文 (台灣)
 Dansk
Dansk Slovenčina
 Türkçe
 Nederlands
 Magyar
 ไทย
ไทย हिन्दी
 Ελληνικά
 Tiếng Việt
 Lietuviškai
 Latviešu valoda
 Eesti
Eesti Čeština
 Română
 Norsk Bokmål
File Export
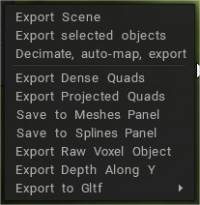
From the “File/Export” menu, there are the following options for exporting your sculpture:
Export scene: Exports all Voxel Layers as a triangular mesh in the following available formats – .obj, .lwo, .fbx, .stl, and .ply
Export selected object: Exports the current Sculpt Layer as a triangular mesh in the following available formats .obj, .lwo, .fbx, .stl, and .ply
Simplified Export
File→Export→Decimate, auto-map, export: Sculpt objects may be exported as low poly + texture using the special script that automates this job: Decimate the current sculpt object or all visible objects, auto-unwrap, bake, and export decimated object and textures.
Auto-export improved essentially:
– Auto-export settings are stored into the scene file (3B), it is convenient if you use it often for different scenes.
– Option to merge all into single object/texture.
– Option to remove redundant layers.
– Same decimation quality for autoexport and regular export.
– Fixed problems when symmetry enabled
– Up to 99.9% decimation support.
– possibility to export assets directly to Blender with PBR.
– centering assets if needed.
– export multiple assets.
– optional possibility to export each asset to its folder.
– better compatibility with UE5 (but still not perfect because FBX does not support full PBR).
– possibility to set custom scan depth. As a result, auto-export becomes a good and convenient asset-creation tool.
There is option “Accurate triangles” in auto-export dialog to choose the triangulation style.
Also, you may choose the exact export polycount there (as well as in the retopo via decimation).

The power here lies within the fact that you can completely PBR paint/texture your high poly sculpt, and then, export your Asset completely auto decimated, auto uv mapped and baked down to expected Channel Packed Textures into Unreal (Or any engine really) with a single click of a button. It is not about the USD format, it is about bypassing the whole pipeline for Static Assets/Props, which especially for Nanite, is a hugely empowering, time saving workflow. If a user needs a per pixel fine texture control afterwards, they can still do that.
However, needs to be said that this workflow is not friendly for anything that needs a specific/dedicated UV layout on Environment Assets, like working with Tiling Materials or Trims.
But as with Nanite Geometry becoming king anyways, and geo becoming cheaper and cheaper to render in any real time application, I think Tiling Meshes and Real Geo Trims will become or already are much more predominantly used on higher end platforms, and this workflow is hugely empowering for that, too.
It does a solid job as well, giving you control over Material Count, Tex Res and Triangle Count.
It is a tad dirty, but it it is very efficient when just creating content is the goal v.s. spending half the time of a project on technicalities no player is ever gonna notice.
For Concept Art Meshes directly targeting Game Engines, it is essentially a no brainer (and that worklfow can quite start to fuse due to nanite nowadays anyways).
Moral of the story: you can not do anything like this using Zbrush or Blender. It is very “hands on”, as many things in 3D Coat, and exceptionally powerful for iteration during asset creation to check your in game mesh directly in engine for scale, shapes, coloring/PBR values etc. from the very beginning, without having to wait until later in the pipeline for it.
Export Dense Quads: Exports a dense, quadrangulated mesh that may not always be manifold.
Export Projected Quads: Exports an optimized quadrangular mesh using projection.
Save to Meshes Panel: If you wish to keep your Voxel model in the “Models” Panel – for future and repeated use, this option saves it with an iconic representation of the object. You can export the current object as a preset in the Meshes panel.
Save to Splines Panel: Export the current object as a profile for the Spline panel.
Export Raw Voxel Object: Export the current Voxel-based Sculpt Object as a data array. Exports raw voxel data in the form of a table that describes the object in 3 dimensions indicating its volume.
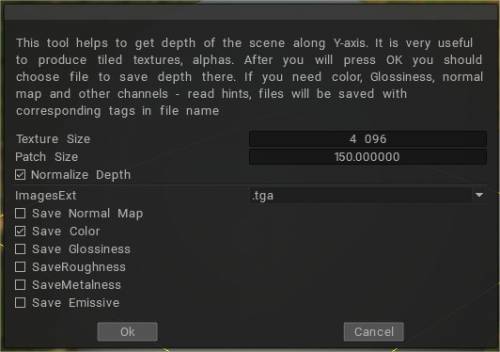
Export Depth Along Y: Export depth rendered along the Y axis. It is useful for producing alphas and tiled textures. For creating height maps, you can sculpt the basic shape for your terrain and then simply export a height map.
Export to Gltf: You can export using two options:
- Gltf Separate (.gltf + .bin + textures): export to separate files.
- Gltf Embedded (.gltf): use this option with embedded textures.
Various functions for Exporting reside in this menu.
Export Depth Along Y Steps
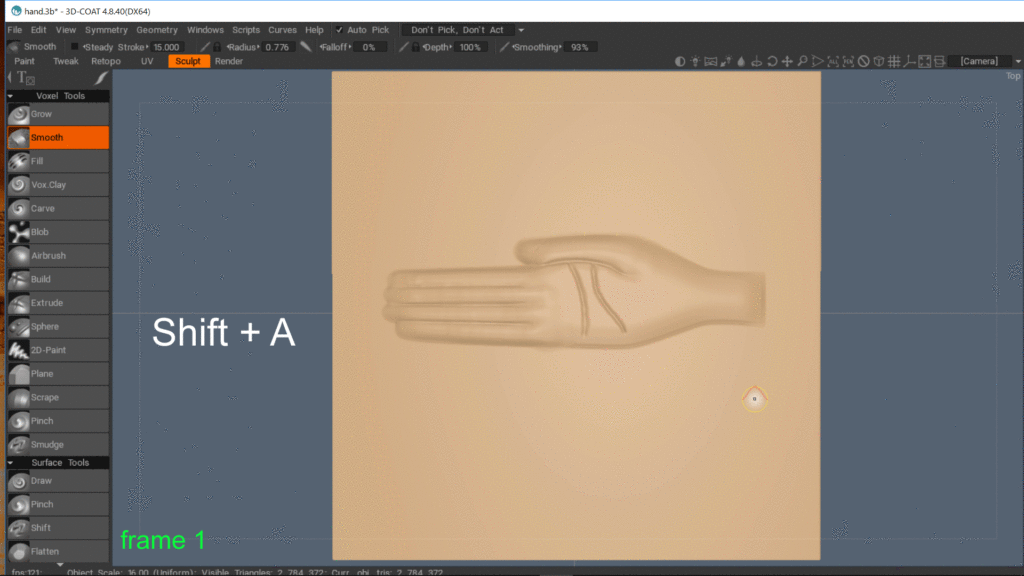
- In sculpt, room rotate the model to look on top
- Go to render room, choose depth pass
- Turn on the fog and adjust a bit to see it in the viewport
- Return to sculpt room, file→export→export depth along Y, choose .tiff or .exr format, make sure to mark the checkbox
- File format resolution: .tiff will be in 16bit, .exr in 32bit
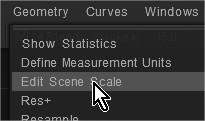
How to deal with when the model exported from 3DCoat deviates from the origin in Blender, etc
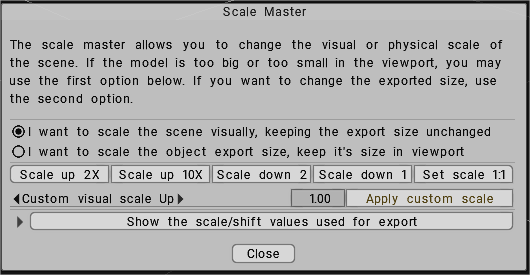
Check if the coordinate offset value is entered by editing the “Edit > Scene Scale Master”.
Edit scene scale that was defined when you imported the mesh in Sculpt room and pressed “Yes”.
File 3D Printing
From the “File/3D-printing” menu, there are the following options for exporting your sculpture:
Export for 3D printing:
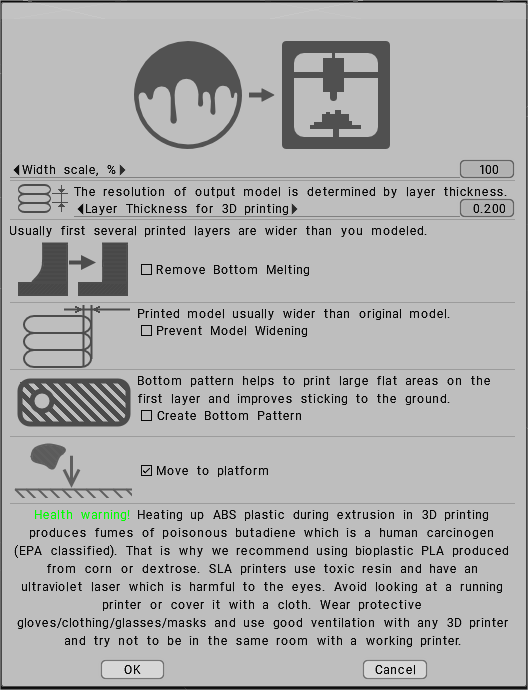
Prepare to publish: Export the object and render it from different views for a better presentation in the services like Thingiverse.
Tutorials
Bake Your Rock Brush Using 3DCoat Y Export by Anton Tenitsky