 中文 (中国)
When you import a “model for pixel painting ” with 3DCoat, the setting window for import opens.
Among them, there is an item called “Smooth UV set”.
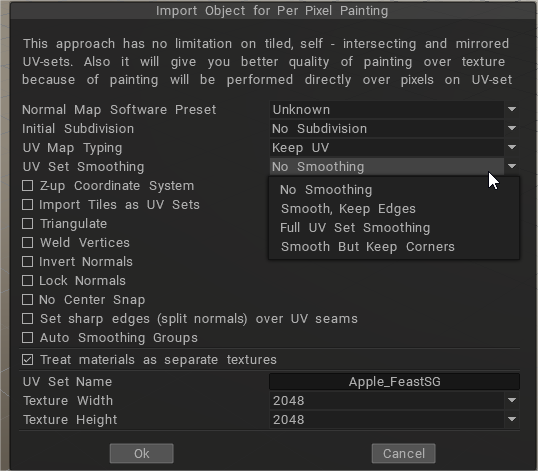
It is cut off in the image above, but when you try to select this item, the following warning will be displayed.

So if you select “Not subdivided” in the “Initial subdivision (number of polygons)” of the item above 2, you can choose “No smoothing” here.
Do you “subdivide” this?
Is it assumed that the CG model you are trying to import into 3D-COAT uses a subdivision surface (SDS)?.
And if you paste UV texture in SDS model, you will use “Smoothing interpolation of UV” function.
See also this article for “Initial subdivision (Number of polygons)“.
See also this article about “Smoothing Interpolation of UVs”
“Smoothing UV set” is asking what kind of “UV smoothing interpolation” is performed in the rendering software that uses it after creating a texture with 3DCoat.
So, before importing to 3DCoat, it is necessary to check the distortion using a checker map texture in the rendering software, and create an optimal interpolation method. You must decide what to do.
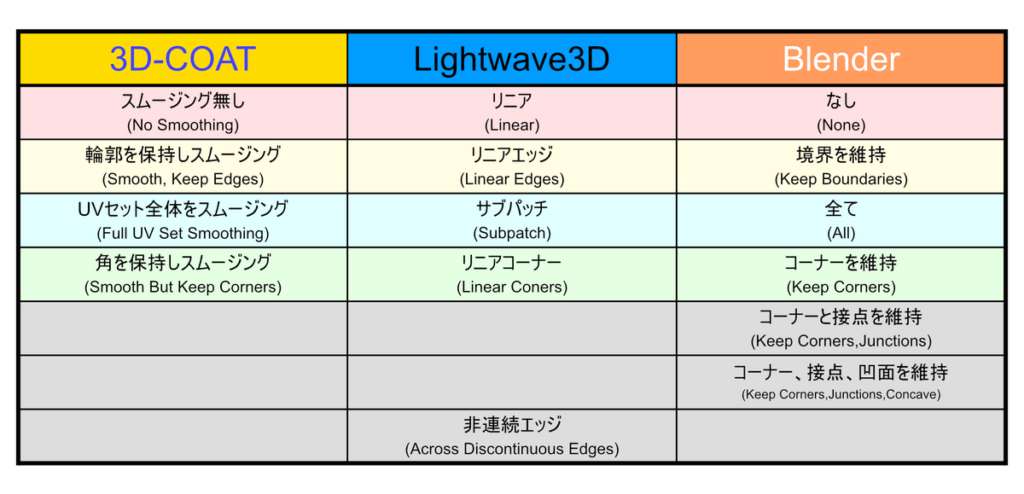
This is a correspondence option in between softwares.
there is a similar function in other software, so it would be good to check in advance.
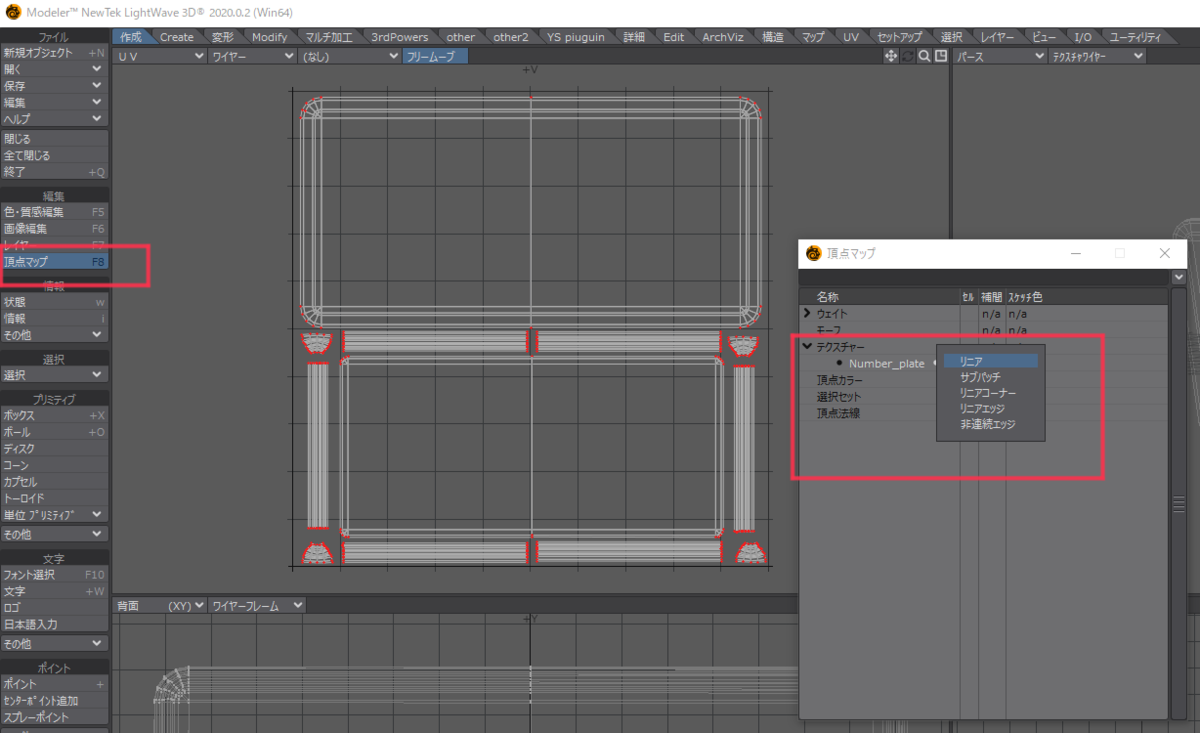
In the case of Lightwave, the setting location is the item “Interpolation” of the texture name you are using in the “Texture” open in the “Vertex map” panel.
Select “Subdivision Surface” in the “Advanced Settings” in the “Modeler” field and open the “Subdivision Surface” Modeler in the “Modeler” field.UV smooth”
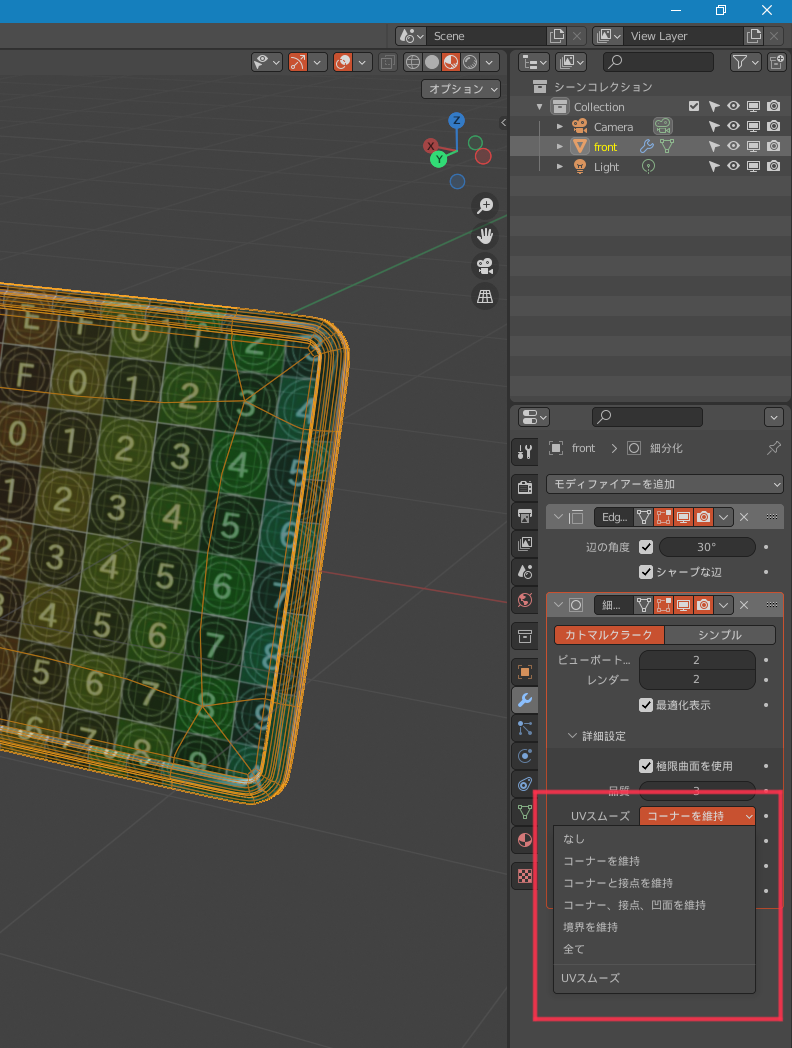
In the case of Blender, select “UV Smooth” in “Detailed Settings” with the ” Subdivision Surface ” modifier applied from the modifier item:
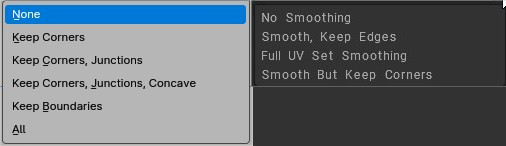
None / No Smoothing: UVs remain unchanged. UVs are not smoothed, boundaries are keep sharp.
Keep Corners / Smooth but keep corners: UV islands are smoothed, but their boundary (limits) remain unchanged.
Keep Corners, Junctions: UVs are smoothed, corners on discontinuous boundary and junctions of three or more regions are kept sharp.
Keep Corners, Junctions, Concave: UVs are smoothed, corners on discontinuous boundary, junctions of three or more regions and darts and concave corners are kept sharp.
Keep Boundaries / Smooth, Keep Edges: UVs are smoothed, boundaries (UV limits) are kept sharp.
All / Full UV Set Smoothing: UVs and their boundaries (UV limits) are smoothed.
Import for PPP using Uv Set Smoothing options
- The initial subdivision (number of polygons) is “2604” (second from the top, equivalent to CC division level 2).
- Smooth UV Set is “Preserve Corners and Smooth”
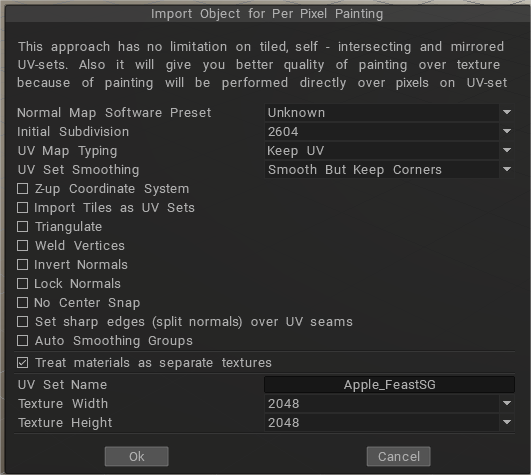
Then, the model of the mesh to which the SDS was applied is displayed first.
If you check the item “Low Resolution model” from the “View” menu, the model of the mesh before the model is replaced and the SDS is applied is displayed.If you do not have an account, you will be prompted to log in to your account.
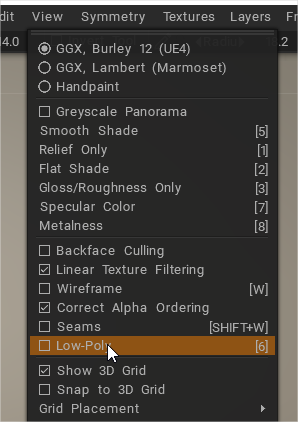
This function is assigned “6” on the character key side as the default shortcut, and the model is replaced every time you press it.
It is just like pressing the tab key in Lightwave.
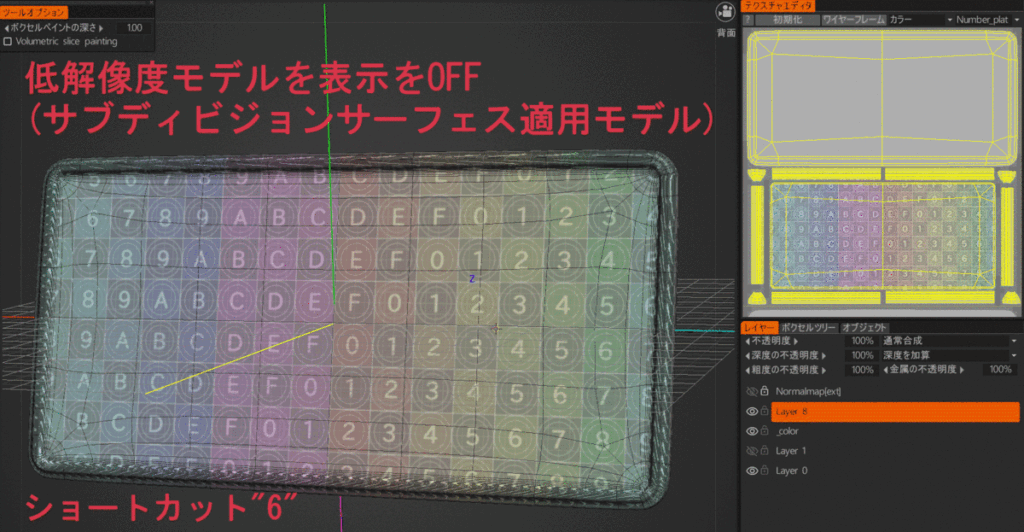
3DCoat seems to treat the former as “medium resolution mesh” and the latter as “low resolution mesh”.
This is indicated in the settings when exporting the model.
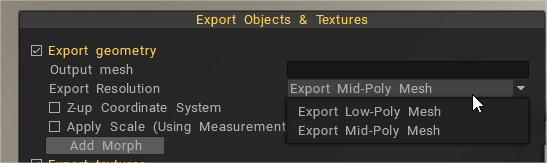
Painting is done with a medium resolution mesh displayed.
The export will be the flow of selecting the low resolution mesh.
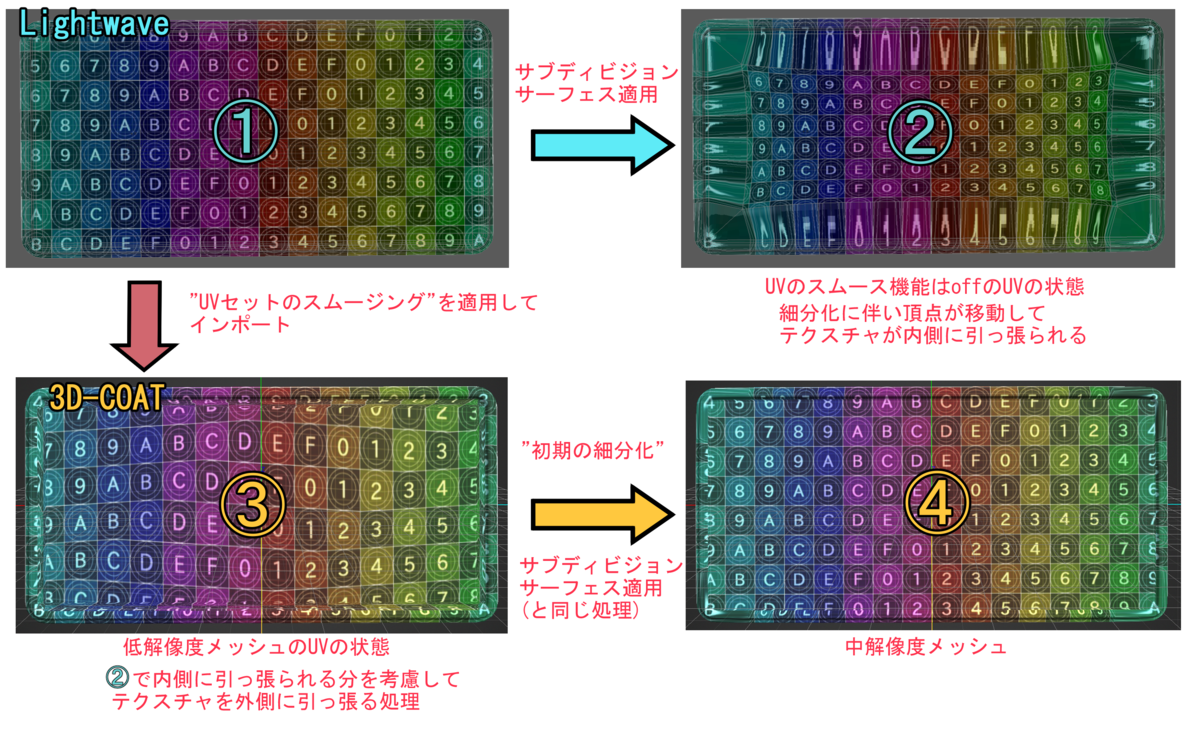
What is UV set smoothing doing?
It is speculation that I saw the processing result to the last.The vertex moves along with the subdivision of the SDS and the texture is distorted, but when it is distorted in the opposite direction to the distortion at the import stage and SDS is applied, the distortion will not occur.I think that it is such a theory that it is corrected.
UV Stitching problem between 3DCoat and Blender
If you have an UV Stitching problem between 3DCoat and Blender, I mean, if in 3DCoat texture looks correctly, but when exporting to Blender, Textures looks stitched or distorted, the solution is to Triangulate the faces of the model before importing it from Blender to 3DCoat.
You can triangulate the whole model inside Blender selecting all faces and pressing CTRL + T or you can triangulate it in the import panel inside 3DCoat checking “Triangulate” option.
Also you can triangulate the model after you have done your texturing work, when you bring the model again into Blender from 3DCoat you can do CTRL + T inside Blender, and the Textures will look fine, as seen inside 3DCoat.
It seems that 3DCoat internally triangulates Blender´s Model, so that if you do (6) to look Low Poly Mesh inside 3DCoat it will appear the model before it is subdivided or triangulate inside 3DCoat so the UV Stitching will appear, but it looks fine when the Mid Poly Mesh is seen because it shows the triangulated model
So it seems that paint work in 3DCoat need tris, and to look it correctly inside Blender you also need Tris.
I hope this saves you lots of headaches as I had suffered with this Issue.