Initial subdivision
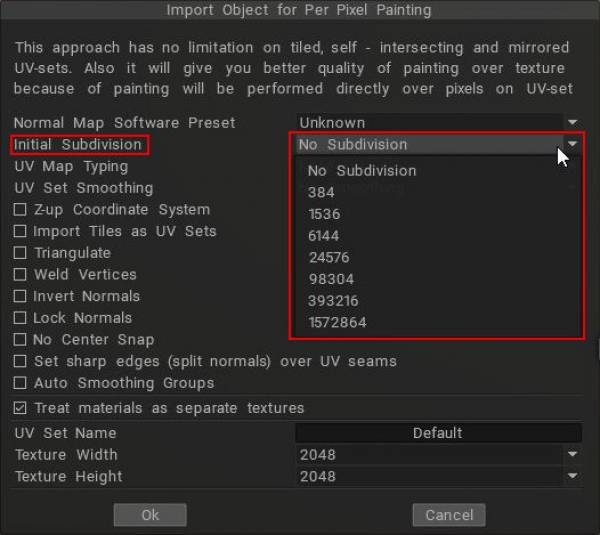
When you import “model for pixel painting” with 3DCoat, you can select initial subdivision.
(text below by lunarbor).
Software used
• 3DCoat
• Blender
In 3DCoat, when you “import a model for pixel painting”, you can select “Initial subdivision (number of polygons)” in the import settings screen, which seems to correspond to the subdivision ratio when using Catmull-Clark subdivision (CC).
In other software, the division level is specified as the number of polygons, so it is hard to tell which one to choose at a glance.

Verification
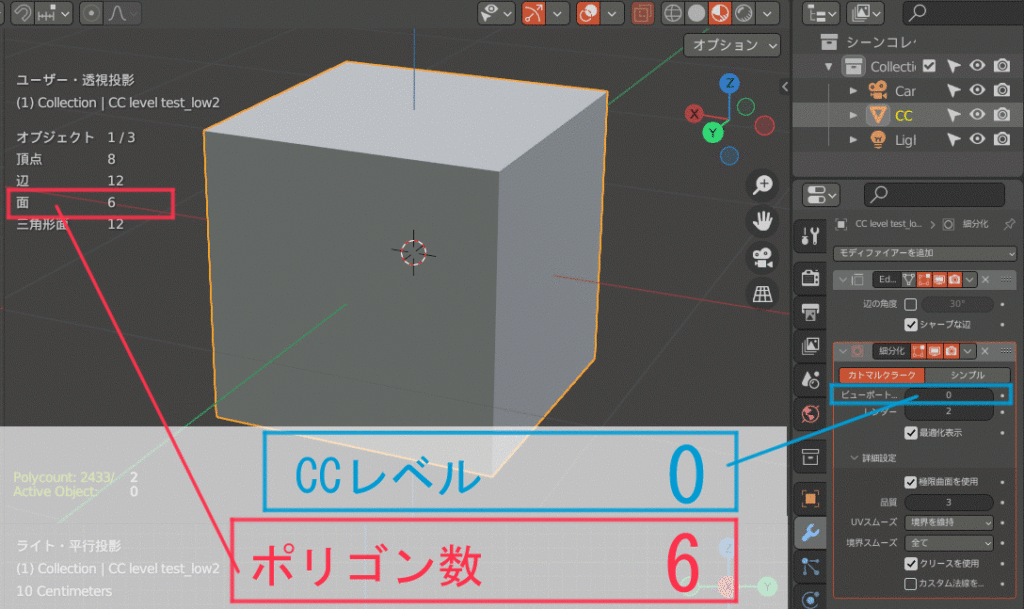
Create a primitive cube in Blender. The number of polygons is “6,” of course.
The cube is subdivided by applying CC, but the number of polygons that can be counted is still “6”. (red frame)

Then, press the “Modifiers > Apply” button to finalize the subdivision.
Then the division is fixed with CC applied, and the polygon count of this object is counted. In this case, we used CC division level 2. The polygon count is “96”.
Do this for each CC division level and check the polygon count according to the level.

And I made an animated gif to make the results easier to understand.

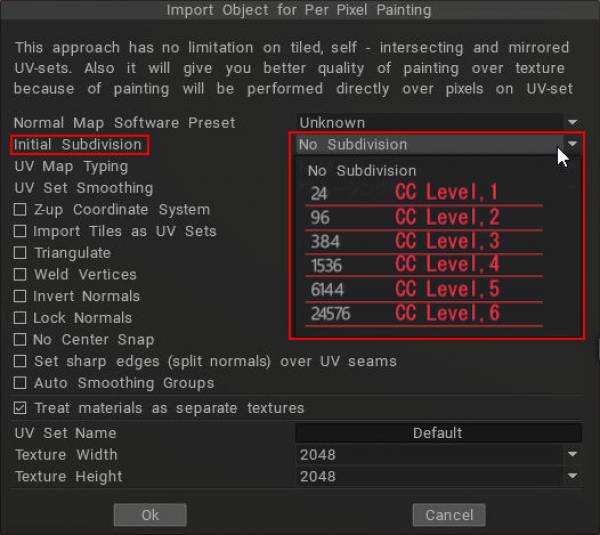
The polygon count matches the number in the 3DCoat panel pasted at the beginning of this article. Therefore, that number seems correct for the number of polygons subdivided by each division level of CC. Simply remember it is level 1, 2, 3~ from the top.
That clears things up.

This panel is displayed when the same cube model used in the verification is imported into 3DCoat as a “model for pixel painting”.
This value varies depending on the object to be imported, so if you do not understand this, you will not know which one to choose.
3DCoat has setting items here and there with only numerical values like this.
 Ελληνικά
  English
 Українська
 Español
 Deutsch
 Français
 日本語
日本語 Русский
 한국어
한국어 Polski
 中文 (中国)
 Português
 Italiano
 Suomi
Suomi Svenska
 中文 (台灣)
 Dansk
Dansk Slovenčina
 Türkçe
 Nederlands
 Magyar
 ไทย
ไทย हिन्दी
 Tiếng Việt
 Lietuviškai
 Latviešu valoda
 Eesti
Eesti Čeština
 Română
 Norsk Bokmål