 Ελληνικά
  English
 Українська
 Español
 Deutsch
 Français
 日本語
日本語 Русский
 한국어
한국어 Polski
 中文 (中国)
 Português
 Italiano
 Suomi
Suomi Svenska
 中文 (台灣)
 Dansk
Dansk Slovenčina
 Türkçe
 Nederlands
 Magyar
 ไทย
ไทย हिन्दी
 Tiếng Việt
 Lietuviškai
 Latviešu valoda
 Eesti
Eesti Čeština
 Română
 Norsk Bokmål
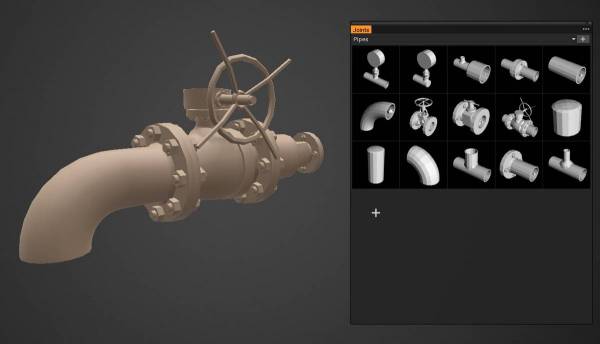
Μπορείτε να δημιουργήσετε γρήγορα τρισδιάστατα μοντέλα με τη βοήθεια των εργαλείων Kitbash .
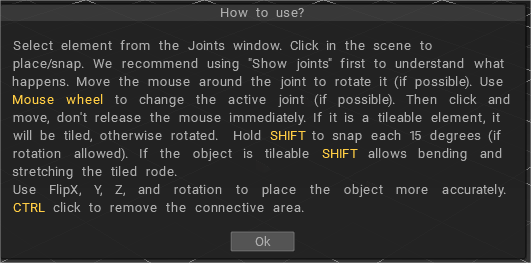
Αρθρώσεις : προστέθηκε ένα νέο εργαλείο. Είναι ένα σύνολο από διάφορα μέρη που μπορούν να προσαρτηθούν και να συνδεθούν μεταξύ τους, όπως «lego»:
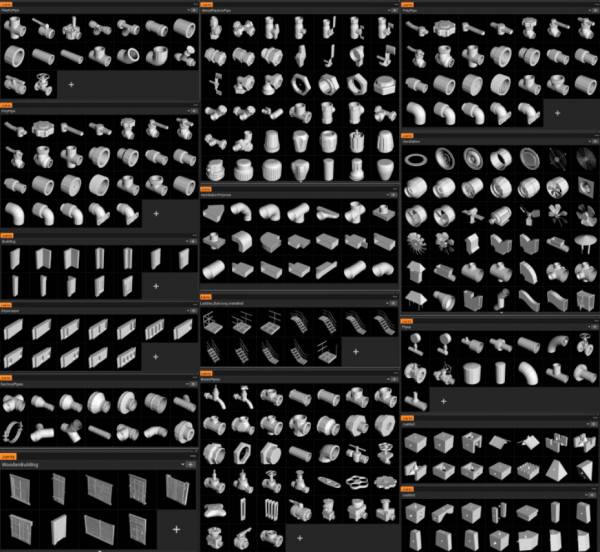
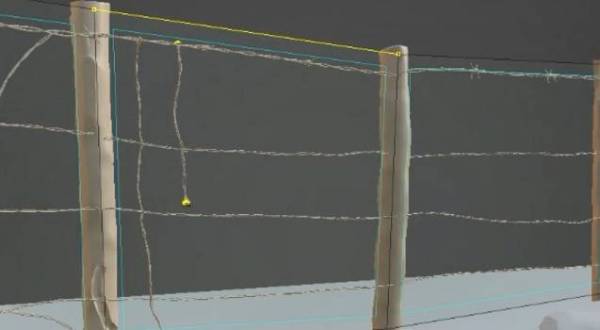
Προστέθηκε μια νέα βιβλιοθήκη Splines : Splines είναι ένα σύνολο ευέλικτων αντικειμένων που μπορούν να τεντωθούν με το εργαλείο Curves ή Snake:

Κοινές προδιαγραφές
Υπάρχουν δύο τρόποι για να φτιάξετε στοιχειώδη τούβλα για το εργαλείο Joints.
– Κάντε αρμούς σε 3D-Coat. Διαβάστε αυτό το έγγραφο .
– Κάντε αρμούς σε ορισμένους εξωτερικούς συντάκτες. Διαβάστε τις προδιαγραφές .
Technical requirements for models with Joints
Το μοντέλο θα πρέπει να δημιουργηθεί λαμβάνοντας υπόψη την κλίμακα του πλέγματος. Για παράδειγμα, αν είναι κύβος, τότε 10 * 10 * 10, ένα τούβλο – 20 * 10 * 10.
Τα μπλοκ θα μπορούσαν να είναι μεγαλύτερα. Ωστόσο, θα πρέπει να εφαρμόζονται προσεκτικά στο πλέγμα 10*10*10.
Ο κατακόρυφος άξονας είναι Υ. Εάν το μοντέλο είναι σωλήνας, η διάμετρος πρέπει να είναι πέντε εάν η γωνία του σωλήνα, οποιαδήποτε παράμετρος λαμβάνοντας υπόψη τη γωνία εφαρμόζεται στον σωλήνα διαμέτρου 5.
Μπορείτε να προσθέσετε αρθρώσεις στο μοντέλο απευθείας στο 3DCoat. Για το σκοπό αυτό, κάντε το μοντέλο στο δωμάτιο retopo (γλυπτό και retopo ή μοντέλο στο δωμάτιο retopo από την αρχή).
Μετά πηγαίνετε στο δωμάτιο Retopo >Κάντε αρμούς και προσθέστε όσες ενώσεις χρειάζεστε.
Μοιάζει με αυτό:
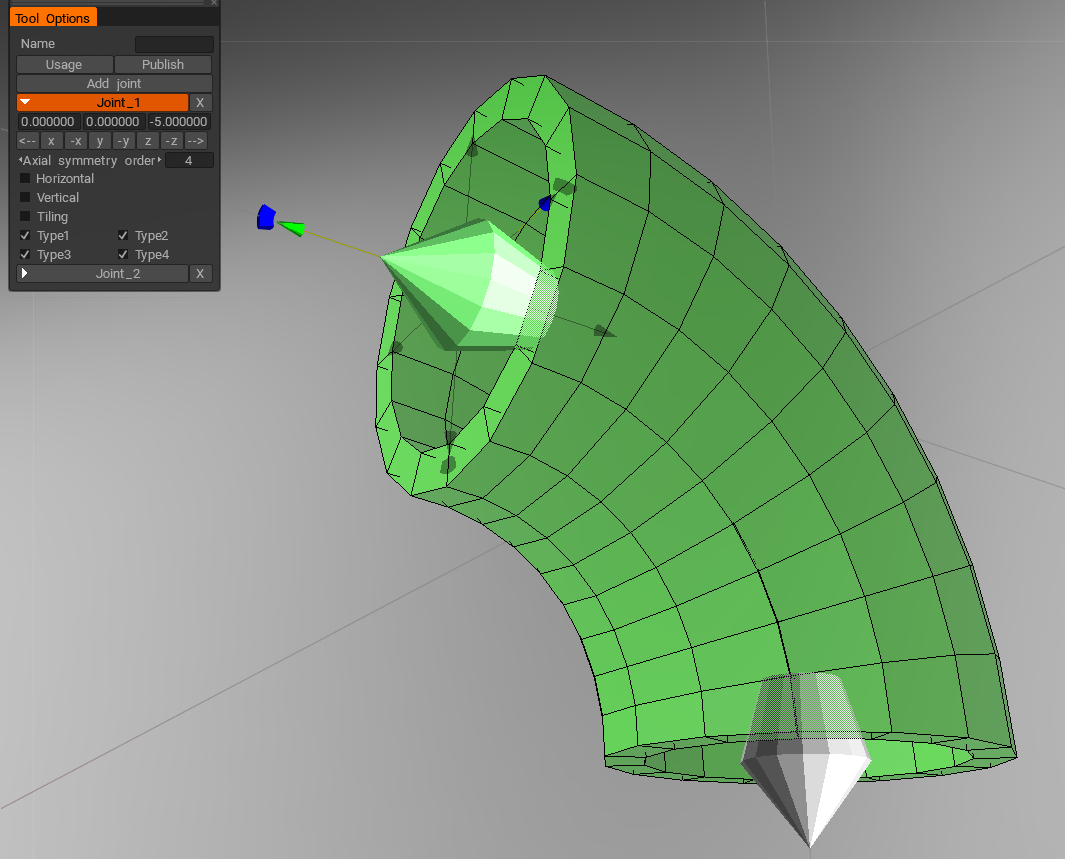
Πατήστε Προσθήκη άρθρωσης για να προσθέσετε μια νέα άρθρωση. Υπάρχουν πολλές επιλογές για κάθε άρθρωση – αξονική συμμετρία, κατακόρυφη/οριζόντια ευθυγράμμιση και συμβατότητα με άλλες αρθρώσεις.
Παρακαλούμε συμπληρώστε το όνομα του μοντέλου και πατήστε Δημοσίευση μόλις το μοντέλο με ενώσεις είναι έτοιμο. Το μοντέλο θα τοποθετηθεί στην παλέτα Joints και θα μεταβείτε στο εργαλείο Joints για να δοκιμάσετε το μοντέλο με αρθρώσεις. Προσέξτε ότι το μοντέλο με το ίδιο όνομα θα αντικατασταθεί.
Απαιτήσεις μοντέλου.
Τα μοντέλα είναι low-poly – έως 5Κ πολύγωνα ανά μοντέλο. Εάν υπάρχει σχεδιασμένος σωλήνας – θα πρέπει να δημιουργηθούν 16 τμήματα.
Ένα μοντέλο θα μπορούσε να είναι σύνθετο. Εάν υπάρχει ένα υπο-αντικείμενο ( ομάδα retopo ) με το όνομα Shader_Gold, θα δημιουργηθεί ένας τόμος με το όνομα Shader_Gold, όπου θα συγκεντρωθούν τα υποαντικείμενα αυτού του τύπου. Σε αυτόν τον τόμο θα εκχωρηθεί ένα shader του οποίου το όνομα ταιριάζει καλύτερα με τη λέξη Gold.
Παραδείγματα μοντέλων με τις αρθρώσεις βάλτε Εδώ
Τα έτοιμα μοντέλα θα πρέπει να τοποθετηθούν εδώ
Αριστερός πίνακας εργαλείων
Το Left Tool μοιάζει πολύ με άλλα δωμάτια, με μια συγκεκριμένη κατανομή των απαραίτητων εργαλείων για να κάνετε ένα γρήγορο κιτ-bashing με greebles.