 Lietuviškai
  English
 Українська
 Español
 Deutsch
 Français
 日本語
日本語 Русский
 한국어
한국어 Polski
 中文 (中国)
 Português
 Italiano
 Suomi
Suomi Svenska
 中文 (台灣)
 Dansk
Dansk Slovenčina
 Türkçe
 Nederlands
 Magyar
 ไทย
ไทย हिन्दी
 Ελληνικά
 Tiếng Việt
 Latviešu valoda
 Eesti
Eesti Čeština
 Română
 Norsk Bokmål
Color management in 3DCoat is handled indirectly, focusing on texture editing and synchronization with external applications like Photoshop rather than on deep, application-wide color profiles. While it lacks a dedicated, robust color management system comparable to software like Blender or Maya, artists can use established workflows to maintain color consistency.
3DCoat gets its color information from your monitor’s display color settings.
As you know, in Photoshop, we can choose from a variety of color settings.
However, this is not the case in 3D Coat. If you set your monitor’s color settings to sRGB, the same as in Photoshop, it will be fixed in 3D Coat.
On 3DCoat all export/import textures are in sRGB space, it is non-linear, gamma corrected space (output_color=linear_color ^2.2
3DCoat does export 32 bit linear textures in the Exr format.
sRGB is a standard that was agreed upon for CRT monitors and Flat screen monitors use the same standard.
Does that mean that the makers of monitors develop their monitors to be a certified SRGB? The answer is no.
Most monitors today use Srgb color space for viewing, HDTV’s use Rec-709 (HDTVs use in most cases the REC-709), though the gamma here can go to 2.4. A few browsers are color space aware but that has been more recent.
3DC exports untagged RGB which lacks a color space, except what your monitor displays.
There is no real interpretation of the red, green and blue numbers set by a color space. This would be the main reason to work in a color space and of course the 2.2 gamma.
Rec. 709 uses a specific non-linear encoding function (OETF) called “camera gamma,” which is not a simple power law but a combination of a linear segment for dark areas and a power function (with an exponent of about (0.45)) for the rest of the range.
It does not specify a single display gamma (EOTF), but a common end-to-end recommendation is a gamma of (2.4) for viewing in dark, controlled environments like color grading suites, while a gamma of (2.2) is often used for brighter, everyday viewing conditions.
A program that creates in Srgb and one that can read Srgb color space keeps the colors consistent.
Working with color in 3DCoat
Color selection and adjustment
3DCoat provides built-in tools for manipulating color directly on your model.
- Color Picker: The primary color selector is in the left toolbar in the Paint room. You can choose colors from a swatch, use the image color picker to sample colors from anywhere on your screen, or use the hotkey
Bfor a quick pop-up color picker. - Color Operations tool: This is a versatile brush tool with functions for adjusting saturation, hue, and brightness on your painted layers. It can be found on the left toolbar.
Smart materials and PBR workflow
When using Physically Based Rendering (PBR), 3DCoat manages different texture channels (such as color, glossiness, and metalness) in a unified workflow.

- Smart Materials: These materials are a powerful way to apply textures and their PBR properties to your model. You can edit the properties of a smart material and update all surfaces using it.
- Channel separation: While you paint, you can toggle between viewing different channels, such as just the color, glossiness, or metalness, to isolate and check each one individually.
Considerations
- Native OCIO support: 3DCoat have native OpenColorIO (OCIO) support as application-wide color management for a production pipeline that requires a linear workflow on “Edit > Preferences > Viewport Tab”.
- Viewport lighting: The appearance of your colors in the viewport is heavily influenced by the lighting and environment map you use. You can change these to get a better representation, but they are not a true color-managed view.
Use ACES Tone Mapping

Aces Tone Mapping is used widely in the Film & Game industry, and this mode will help the look in the viewport match more closely to the viewport in Game Engines or applications that employ it.
It is known for creating a more film-like, realistic look with a smooth “highlight rolloff” and increased color saturation in highlights, though it can also lead to harsher transitions between hues compared to other methods. ACES (Academy Color Encoding System) tone mapping is widely used in digital production and can be enabled in various software, such as rendering engines and game engines.
The ACES tone mapping in 3DCoat is only for the viewport. It is not baked into the exported texture. This means that while you can view your model with ACES tone mapping applied in the viewport, the exported textures will not have this tone mapping baked into them.
Gamma correction
Gamma correction in 3DCoat is used to fix lighting and ensure correct color representation by compensating for how our eyes perceive brightness and how monitors display images.
It can be applied through the Preferences menu for the viewport’s display or on individual paint layers using the Textures > Adjustments menu to fine-tune texture colors.
For viewport and rendering:
- Purpose: Ensures the rendered image appears correctly by matching the non-linear display of monitors to the linear data from the 3D engine.
- Location: Go to “
Edit > Preferences"and navigate to theGeneraltab. - Settings: You can adjust the gamma for the Red, Green, and Blue channels independently. A default value of
1.01.01.0 is a good starting point, but you can change it based on your needs.
- Note: Gamma correction in the viewport helps prevent issues like incorrect light falloff and ensures the final image has proper contrast and brightness.
For textures and materials:
- Purpose: To correct the colors of individual textures so they appear correctly when applied to a model and viewed in the viewport.
- Location: In the Textures menu, find
Adjustments. - Settings: Choose
Gamma Correctionfrom the list of adjustment types, similar to tools in Photoshop. - Usage: This allows for non-destructive adjustments to paint layers. For example, you can apply a texture and then use gamma correction to fine-tune its brightness and color balance without permanently altering the base texture file.
Color management in windows
Managing color in Windows is important for both accurate image reproduction and personalizing your display settings. For creative professionals, this involves precise calibration and using custom ICC profiles, while casual users can adjust settings for comfort or preference.
For casual users: Use the built-in Display Color Calibration tool.
Windows offers a wizard to help you manually adjust basic display settings.
- In the Start menu search bar, type
Calibrate display colorand select the app from the results. - Click Next through the introductory screens.
- The tool will guide you through adjusting the gamma, brightness, and contrast. For these steps, you will use the physical buttons on your monitor, not your computer.
- Adjust the color balance using the sliders for red, green, and blue until the gray bars appear neutral.
- Click Finish to save your new profile.
Adjust brightness and night light:
For everyday comfort and better sleep, Windows has built-in features to control screen brightness and reduce blue light.
- Brightness: Go to Settings > System > Display and use the slider to adjust brightness. On many laptops, the brightness can also be changed from the Quick Settings panel on the taskbar.
- Night Light: Turn on Night Light in Settings > System > Display to apply a warmer color tone that reduces eye strain at night. You can schedule it or adjust its intensity.
For creative professionals: Advanced ICC profile management.
For a multi-monitor setup or for more precise control, use the legacy Color Management control panel.
- Open the Control Panel by searching for it in the Start menu.
- In the Control Panel search bar, type
Color Managementand open the app. - In the Devices tab, check the box for Use my settings for this device.
- Select your desired monitor from the dropdown menu.
- Click the Add button to install a new ICC profile from a file or from the list of available profiles. You can download manufacturer-specific profiles from their support website.
- Select the profile you want to use and click Set as Default Profile.
Monitor Hardware calibration: For the most accurate and reliable color management, use a hardware colorimeter (such as a Spyder or X-Rite).
It is important for correct color correction but most of us do not calibrate own monitors.
It is better to have a proper monitor calibration but in the online world what I see and you see can be quite different. In a company with various artist, their’s monitors would be calibrated.
For general use, gamers, friends or family sharing pictures in most cases will have not bought the equipment for proper monitor calibration. Some might use the built in tools or web tools for monitor calibration.
- Benefits: Hardware calibrators measure your monitor’s exact color output and ambient lighting to create a highly accurate custom ICC profile.
- Process:
- Install the software that came with your colorimeter.
- Attach the device to your screen and follow the on-screen instructions to run the calibration.
- The software will automatically create and install a new ICC profile for your display.
Automatic Color Management (ACM) on Windows 11: This feature is for PCs with a compatible display and GPU. It aims to provide consistent and accurate color across all apps, including those that are not color-managed.
- Activation: Go to Settings > System > Display > Color profile and turn on Automatically manage color for apps.
- Note: Some users, especially creative professionals, have found this feature can interfere with existing ICC profiles. You may want to turn it off if you use a custom calibration.
How to install or back up an ICC profile:
- Install: You can install a new ICC profile by right-clicking the
.iccor.icmfile and selecting Install Profile. - Back up: All ICC profiles are stored in the
C:\Windows\System32\spool\drivers\colorfolder. To back up a custom profile, navigate to this folder and save the file to another location.
Primary color management workflows
External editing with Photoshop
This is the most direct and widely-used method for achieving advanced color management in 3DCoat.
- Export to Photoshop: In the Paint room, press
Ctrl+Pto send your current texture layer out of 3DC (untagged RGB) to Photoshop. - Manage color space: Within Photoshop, you have access to a full range of color management features. You can work in a linear color space, use ICC profiles, and make precise adjustments with professional tools.
- Import back to 3DCoat: Once you save the file in Photoshop, the changes are updated live on the model in 3DCoat.
When import into Photoshop use the Color setting shown in picture
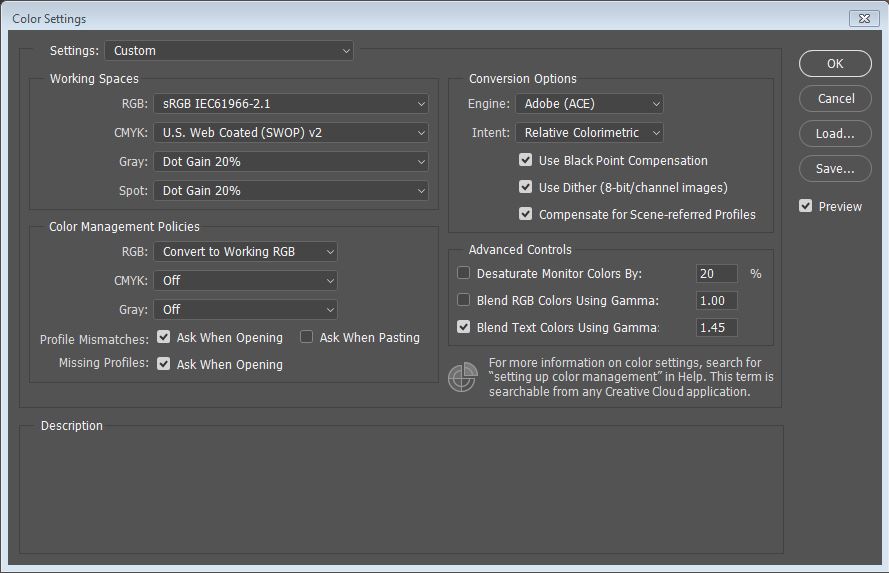
I will be ask to assign working profile or assign profile. Both are set to the same in this case.
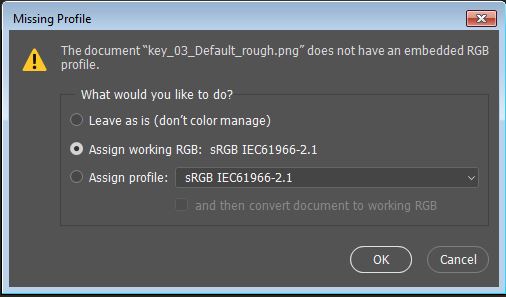
There is no color shifting as the untagged 3DC texture was created using the monitor’s default srgb but now since it is in srgb space plus profile the rgb numbers have meaning. When exporting the texture with the srgb profile this will enable a program that reads srgb color space and I still get the same colors as I got in 3DC. The above is at least my understanding and could have errors of course.
If 3DC has support for Srgb color space as a profile, the ability to choose it, the Photoshop part would be unnecessary.
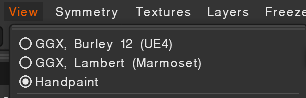
Unlit viewport mode (Flat Shade)
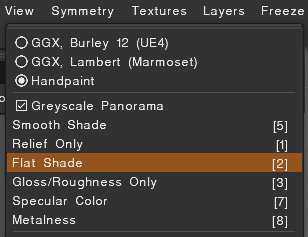
For a cleaner, more accurate representation of your texture’s base color, use the “Flat shade” viewport mode.
Tutorials
Gamma Correction and V Sync: This video shows a few small additions to 3DCoat; Gamma Correction and Vertical Sync.
Adjustments to Paint Layers: This video demonstrates how to use the gamma correction tool in 3DCoat’s paint layers.