• Lietuviškai
  • 3DCoat dokumentacija
  • Chapters
    • Įvadas į 3DCoat
    • Darbo pradžia
    • Sąsaja ir navigacija
    • Brush komponentai
    • Darbo erdvės kambariai
    • Scripting ir Core API
    • Klausimai/Atsakymai
    • licensing
    • Mokymo vadovėliai
  • Pilgway
  • Products
    • 3DCoat
    • 3DCoatTextura
    • 3DCoatPrint
    • PBRLibrary
  • Blog Posts
  • Store
  • Lietuviškai Lietuviškai
    • English English
    • Українська Українська
    • Español Español
    • Deutsch Deutsch
    • Français Français
    • 日本語 日本語
    • Русский Русский
    • 한국어 한국어
    • Polski Polski
    • 中文 (中国) 中文 (中国)
    • Português Português
    • Italiano Italiano
    • Suomi Suomi
    • Svenska Svenska
    • 中文 (台灣) 中文 (台灣)
    • Dansk Dansk
    • Slovenčina Slovenčina
    • Türkçe Türkçe
    • Nederlands Nederlands
    • Magyar Magyar
    • ไทย ไทย
    • हिन्दी हिन्दी
    • Ελληνικά Ελληνικά
    • Tiếng Việt Tiếng Việt
    • Latviešu valoda Latviešu valoda
    • Eesti Eesti
    • Čeština Čeština
    • Română Română
    • Norsk Bokmål Norsk Bokmål
  • Creating 3D Character Using 3DCoat
Expand All Collapse All
  • Įvadas į 3DCoat
  • Darbo pradžia
    • System requirements
    • Why 3DCoat is Unique?
    • 3DCoat aktyvinimas
    • Paleidimo klaida
      • Startup error Mac
    • Color management
    • Upgrading permanent license
    • Linux Setup
      • Linux initial setup per-user installation
      • Linux initial setup for system
      • Tablet setup
      • To GTK3 from GTK2
    • Aplankų struktūra
      • Custom documents folder
    • Įvairios „sprendimo“ formos
    • Tablet on Window
    • Import ir Export
    • Applinks 3DCoat
      • Blender programos nuoroda
        • Blender with the Applink in Linux
      • Blender 4.2/3/4/5 applink
      • Max Applink
      • Houdini applink
      • Lightwave uplink
  • Navigation
    • Dialogo lango atidarymas (greito pradžios meniu)
    • Naršymo skydelis
    • Kamera ir navigacija
      • Customize Navigation as Blender
    • Viewport Navigation Gizmo
    • Left tool panel
    •  Activity Bar
    • Navigacija naudojant 3DConnexion įrenginius
      • How to compile Spacenavd on non Ubuntu distro
    • Stylus doesn’t work in sculpting
    • Spartieji klavišai
  • Sąsaja ir navigacija
    • Failo meniu
    • Redagavimo meniu
      • Calculate Curvature
      • Calculate Occlusion
      • Light Baking Tool
      • Parinktys
    • Peržiūros meniu
    • Simetrija
    • Textures
    • Calculate
    • Sluoksnių meniu
    • Užšaldymo meniu
    • Hide
    • Bake
    • Kreivės 2022 m
      • Kreivės meniu
      • Curves Properties RMB
      • Užpildykite tinklelio sluoksniu
      • Scale of imported curves
    • „Windows“ meniu
      • „Windows“ iššokantys skydeliai su skirtukais
      • Slankikliai
    • Scripts
    • Addons
    • Capture
    • Pagalbos meniu
    • Tinkinimas
    • Pakeiskite arba sukurkite naują kambarį
  • Brush komponentai
    • Brush Top Bar
    • Šepečiai bendram naudojimui
      • Sukurkite šepečius ir lipdukus
      • Alfa gamyba iš dabartinės skulptūros
      • Sukurkite Brush iš 3D objekto
      • Create brushes based on Curves
      • Load photoshop .abr brushes
    • Insultai
      • Kreivės iššokantis meniu
    • Brush parinktys
    • Sąlygų ribotuvas
    • Juostelių skydelis
    • Trafaretų skydelis
    • Išmaniosios medžiagos
      • Pridėkite naujų vaizdų ar medžiagų
      • Pritvirtinkite išmaniąją medžiagą prie sluoksnio
      • Import Quixel Material
    • Kaip sukurti išankstinius Brush nustatymus
  • Darbo erdvės kambariai
    • Painting
      • Tekstūros Painting ir režimai
        • Painting Per-Pixel
        • Poslinkio Painting (mikro viršūnė)
        • Ptex Painting
        • Paviršiaus Painting (polidažymas)
      • Įvežimas į Painting kambarį
        • Initial CC subdivision
        • UV Set smoothing
        • Sharp (hard) edge
        • Užraktas normaliai
        • Įkelti naują UV maketą po modelio pakeitimų
        • DAZ Genesis models into 3DCoat
      • Painting darbo srities meniu
        • Edit menu
        • Tekstūros meniu
          • Tekstūriniai Baking įrankiai
        • Slėpti
        • Bake Paint meniu
        • Spalvų rinkiklis
      • Viršutinė Painting juosta
      • Sluoksnių skydelis
        • Maišymo skydelis
        • Layer and Clipping Masks
      • Painting kambario įrankiai
      • Nepermatomumas – skaidrumas
      • Pakoreguokite darbo vietą
        • Tweak Toolset
        • Eksportavimas iš Tweak Room
      • Kaukės / medžiagos peržiūros skydelis
      • Eksportas iš Painting kambario
    • UV darbo vieta
      • UV viršutinė juosta
      • UV Kairysis įrankių skydelis
      • UV peržiūros skydelis
      • UV darbo eigos pavyzdys
      • Importas į UV kambarį
      • Eksportas iš UV kambario
    • Retopologija
      • Importavimas į Retopo kambarį
      • Retopo tinklelio meniu ir kepimo meniu
        • Virtualus veidrodžio režimas
      • Bake menu
        • Treat Poly Groups as Paint Objects
        • Baking guide
      • Viršutinė juosta
        • Pasirinkite geometriją
      • Kairysis įrankių skydelis Retopologijos kambaryje
        • Bendra paskirtis ir funkcija
        • Pridėti geometriją
          • Strokes įrankis retopologijoje
        • „Retopo Tweak“ įrankiai
        • UV įrankiai
        • Retopologijos kambario komandos
      • AUTORETOPO
        • Autopo guide
      • Poli grupės
    • Skulptūra
      • Sculpt Layer
      • Skulptorius medis
      • „Sculpt Brush“ parinktys
      • Top Bar
      • Brush variklis
      • Geometrijos submeniu
      • Sukurkite meniu „Dešiniuoju pelės mygtuku spustelėkite“.
      • Shaders
      • Voxel režimas
        • Pure Voxel Sculpting
        • Tankis ir skiriamoji geba
        • Molio variklis
        • Voxel įrankiai
        • „Voxels“ paviršiaus įrankiai
        • Voxel Adjustment Tools
        • Tūrinis Painting
        • Voxel Objects Tools
      • Paviršiaus režimas
        • Paviršiaus įrankiai
        • Paviršiaus pasirinktiniai įrankiai
        • Paviršiaus reguliavimo įrankiai
        • Paviršiaus Painting
        • Paviršiaus objektų įrankiai
        • Kelių lygių raiška
          • Multires tools
          • Multires adjust
          • Multires commands
      • Smulkinti kreivės
        • Spline kreivės
        • Splines model creation
      • Vektorių poslinkis
      • Paviršiaus transformavimo įrankiai
        • Voxel Transform Tools
        • Instancer
        • Move
        • Pose
        • Fit
        • Reproject
        • Surface Array
      • Voxel primitives & Import Tools
      • Gyvi booleans
      • Skulptūros kambario komandos
      • Import į Sculpt Room
      • Eksportas iš skulptūrų kambario
    • Pateikti
      • Comparison of different roughness values
      • Atvaizdavimo skydelio funkcijos
      • Patefonas
      • Netikras apšvietimas – ne PBR–
    • Factures
      • Darbo eiga
    • Paprasčiausias
    • Modeliavimas
      • Mesh Menu
      • Kairysis įrankių skydelis modeliavimo kambaryje
        • Pridėti geometriją
          • Pasirinkta
        • Keisti
        • Smart Hybrid
        • UV
          • Komandos
        • Visas tinklelis
      • Fluffy palėpės paviršiaus pavyzdys
      • Poeboi blokavo
      • Import Zbrush Polygroups for UV mapping
    • Kitbash – greitas 3D modelių kūrimas
      • Create kitbash
      • Left tool panel Kitbash
    • 3DPrint
    • Photogrammetry
      • How to install Reality Capture
      • Reality Capture doesn’t show up ?
    • Tinklelis į NURBS kambarį
    • Nodes
      • Skulptūruoti šešėliai Nodes Library
  • Scripting ir Core API
    • Scripting
    • Core API
    • Python API
  • Nemokamas 3DCoatPrint

Create kitbash

145 views 0

Written by Carlos
October 21, 2025

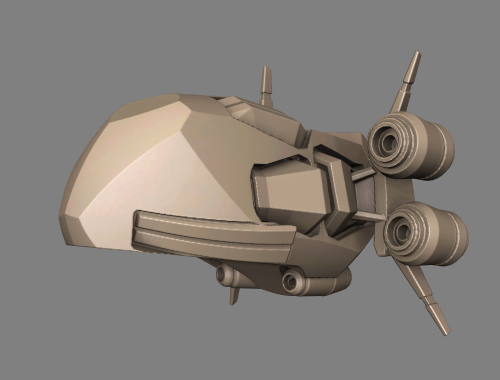
Let’s take a more detailed look at this feature. (Thanks to our users Tinker and Daniel Yarmak for the descriptions).
Greebles or Nurnies can be created in any 3D modeling application, usually with arbitrary extrusions.
This method was referred to as “kit-bashing”.

This short tutorial demonstrates features of the version of Import tool


As far as we’ll work with Import tool we’ll need greebles (small details that helps models to look more ‘technical’).
It can be created in any application for 3D modeling, usually with a series of arbitrary extrusions. You can download greebles using link at the bottom of this tutorial.

To make your models look more interesting and unique you would probably want to create your own greebles.

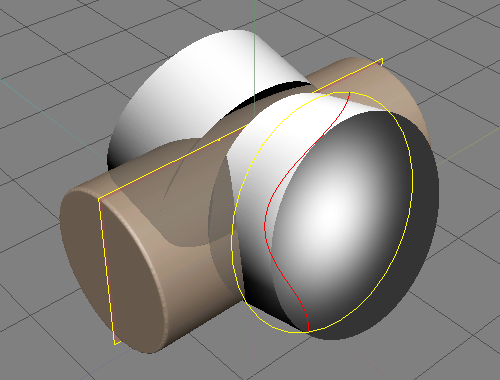
Details with angled surface look better than with parallel to horizon:

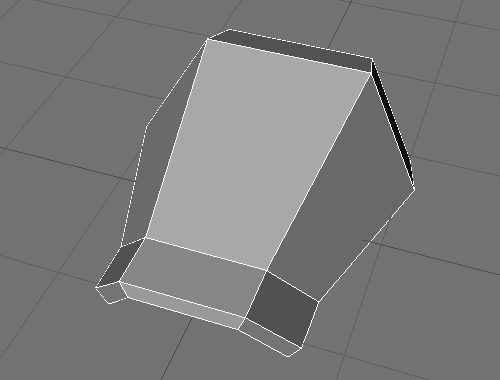
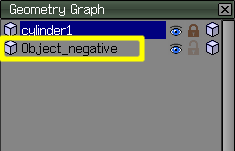
For easier placing of details on a model create a contour for the detail (that’s an object with a name “_negative” which excludes from the model automatically and leaves a slot for the detail.)

Details with angled surfaces look better than surfaces that are all parallel.
For easier placement of details on a model, create a contour for the detail, an object with the name “_negative,” which subtracts automatically from the model and leaves a slot for the detail.

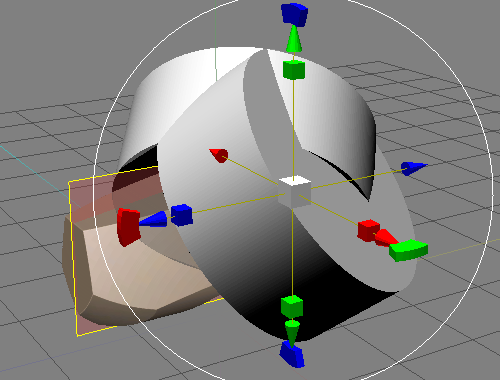
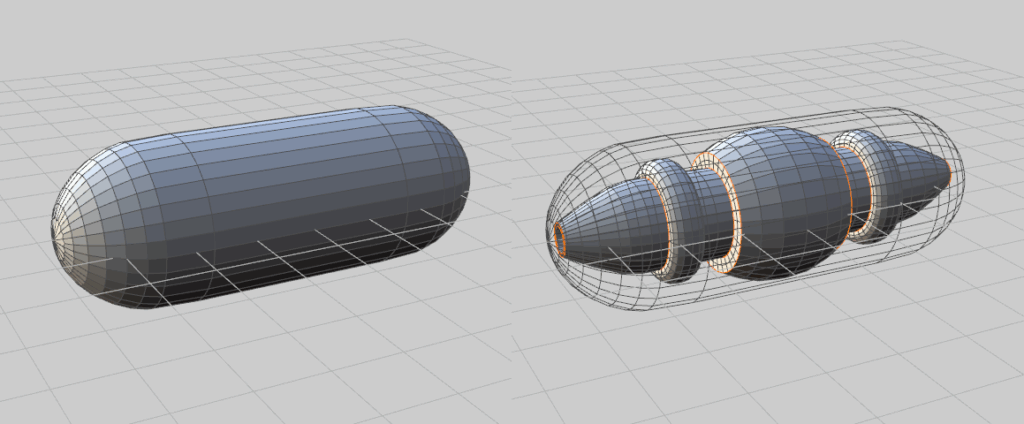
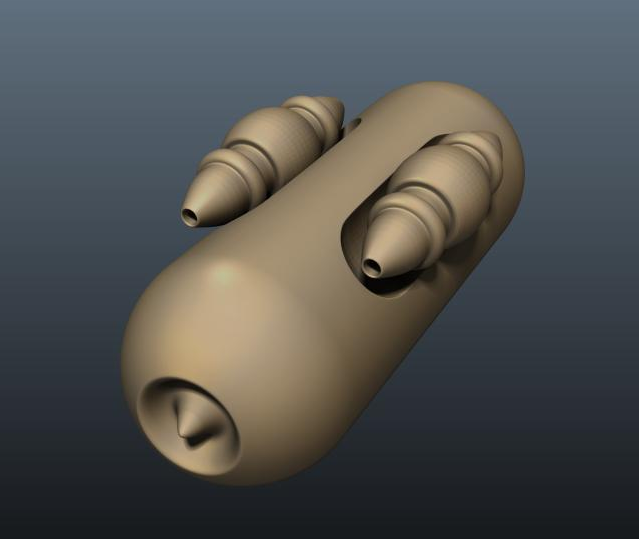
Turning on “Respect negative volume” in the Import Tool Panel is important to permit contour exclusion. Because the “negative volume” width is larger than the width of the detail, we get an interesting effect.

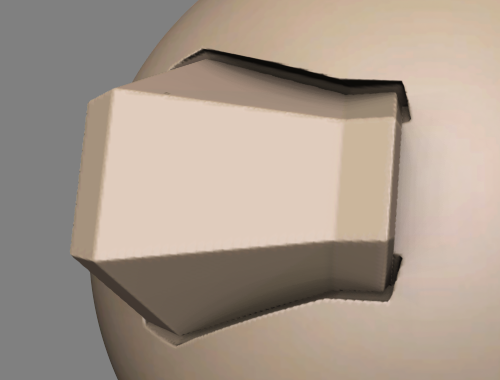
There is a joint between the body and the object. The detail looks as if it stands right on its place, and the body looks as if it has a special slot for the detail. Such joints look good with ambient occlusion.

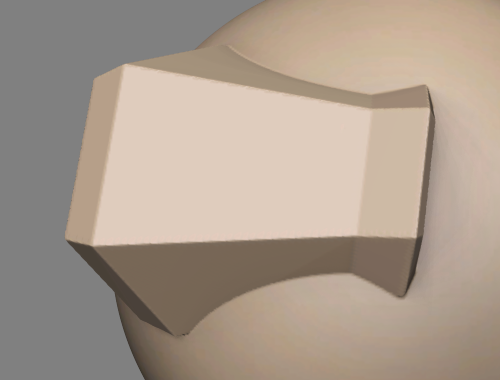
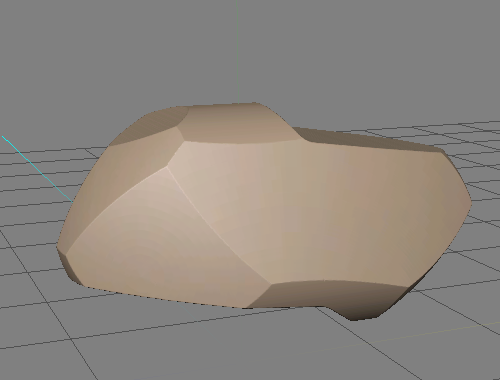
Here is an example of how would it look without that effect. Looks not so interesting, and also there is a problem that was caused by different curvatures of the body and the detail – the detail looks tumbled down (it wouldn’t happen with negative volume).

Negative volume shouldn’t have the exact form of the body. You may change its form to get various effects.

It’s time to detail the object. For this tutorial I’ve made a small set of details, they all have “negative volume” (it can’t be seen on a screenshot).

We’ll also need a base to which we will attach all the details, of course if you don’t want to attach it to a default sphere :-). The Import tool will also help us here.
With such a concave surface you can make facets on objects.

Load the Greebles using the “Import” tool.

In transform regime cut any shape from a primitive.

You can also use frame for cutting but cuts made with Import tool looks more interesting than those made with a frame.

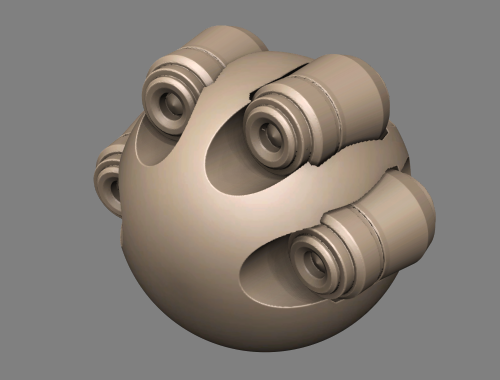
It’s time to detail the object. Load the greebles using Import tool. Use ‘on pen’ mode. Use ‘9’ and ‘0’ keys to rotate the brush.

That’s all

Primitives Library from Tinker

How to make ‘negative volume’


Steps:

1) On Modeling Room or your 3D app make a greeble.

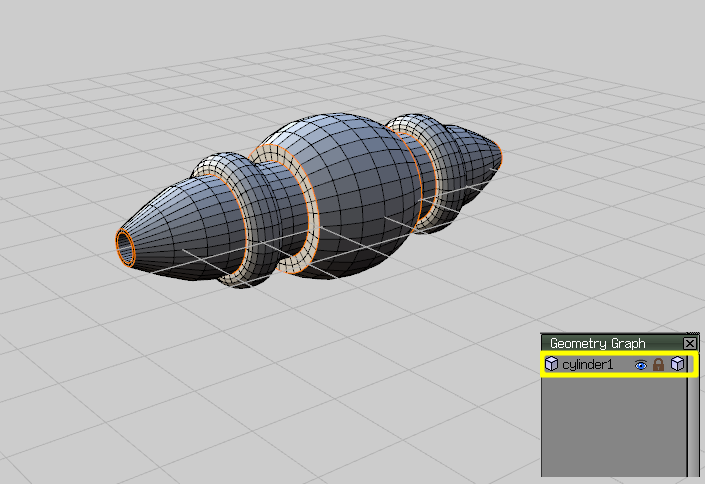
Create another object in the same scene (that object will be ‘negative volume’)

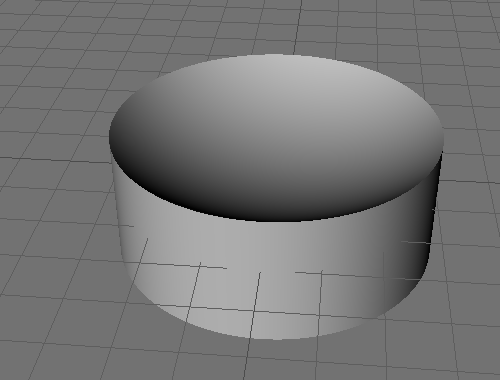
As you can see the detail locates inside the capsule (’cause I’m gonna use capsule as ‘negative volume’):

Rename the second object (capsule in this case) as you like BUT (!!!) add “_negative” in the end. Like this:

Export in Wavefront (.obj) format.

Do everything as below is explained. And… enjoy the results:

If you export the model from Blender. Rename one object with _negative, but then you have to make sure you select “groups” in the export settings.

Was this helpful?

Yes  No
Related Articles
  • Surface Array
  • Top Bar
  • Curves Properties RMB
  • Left tool panel Kitbash
  • Color management
  • Treat Poly Groups as Paint Objects
Previously
Kitbash – greitas 3D modelių kūrimas
Up Next
Left tool panel Kitbash
AI:
Hi! How can I help you?
Attention: This is a beta version of AI chat. Some answers may be wrong. See full version of AI chat