 Türkçe
  English
 Українська
 Español
 Deutsch
 Français
 日本語
日本語 Русский
 한국어
한국어 Polski
 中文 (中国)
 Português
 Italiano
 Suomi
Suomi Svenska
 中文 (台灣)
 Dansk
Dansk Slovenčina
 Nederlands
 Magyar
 ไทย
ไทย हिन्दी
 Ελληνικά
 Tiếng Việt
 Lietuviškai
 Latviešu valoda
 Eesti
Eesti Čeština
 Română
 Norsk Bokmål
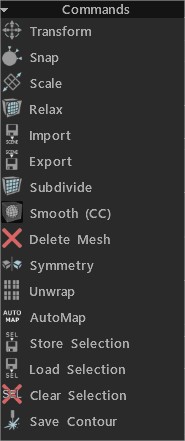
Dönüştür: Seçili yüzleri/köşeleri dönüştürün. Hiçbir şey yoksa seçilen ağın tamamı dönüştürülecektir.
Snap: retopo mesh köşelerini yüzeye yaslayın. Sahnedeki nesnenin durumunu değiştirdiyseniz ve retopo ağını yeniden tutturmak istiyorsanız yardımcı olur. Köşe modunda “Seç” aracındaysanız yalnızca seçilen köşeler etkilenecektir.
Ölçekle: Seçileni veya ağın tamamını ölçeklendirin. Her bağlayıcı küme ayrı ayrı dönüştürülecektir.
Rahatlayın: Tüm retopo ağını veya alt kümesini gevşetin. Köşe modunda “Seç” aracındaysanız yalnızca seçilen köşeler etkilenecektir.
Import : retopo ağını Import .
Export: Poli ağları Export .
Alt bölümlere ayırın .
Düzgünleştir (CC): Mevcut grubu Catmull-Clark alt bölümüyle alt bölümlere ayırın ve düzeltin.
Mesh’i silin .
Simetri: Ağa simetri uygulayın.
Çözgü: Tüm adaları UV haritasına sığdırın.
Mağaza Seçimi .
Seçimi Yükle .
Seçimi Temizle .
Konturu Kaydet: Bu komut, daha fazla lazer kesim için konturu gerçek ölçekte EPS veya DXF olarak kaydetmenize olanak tanır. Çizgilerin uzunluğu geometrik uzunluğa karşılık gelir. Bir lazer kesici kullanarak şekilleri kesmek ve parçaları birbirine yapıştırmak istiyorsanız bu yararlı olacaktır.
Seçildi
Genişlet: Seçili öğelerin alanını genişletin.
Sözleşme: Seçilen elemanların alanını daraltın.
Dönüştür: Seçili yüzleri/köşeleri dönüştürün. Hiçbir şey seçilmezse ağın tamamı dönüştürülecektir.
Normal Ekstrüzyon: Ortalama normal yön boyunca ekstrüzyon yapın. Yeni köşe noktalarının otomatik olarak yakalanmayacağını, ancak Otomatik yakalamayı kapatmazsanız ileriki işlemlerde yakalanacaklarını unutmayın.
Yüzleri Ekstrüzyon: Her yüz mümkün olduğunca aynı mesafede taşınacak şekilde yüzleri çıkarın. Bazı durumlarda tam olarak paralel yüzlerin yer değiştirmesinin imkansız olduğunu, ancak 3DCoat mümkün olduğu kadar tam olarak yer değiştirmeye çalıştığını unutmayın.
Köşeleri Ekstrüzyon: Her köşenin aynı mesafede yer değiştirmesi için yüzleri dışarı çıkarın.
İzinsiz Gir: Seçili yüzlere izinsiz giriş yapın.
Kabuk: Seçilen yüzlerden bir kabuk oluşturun. Fluffy şunları söyledi: Öncelikle “katılaştırmak” istediğiniz yüzleri seçin, ardından Kabuk aracını etkinleştirin…
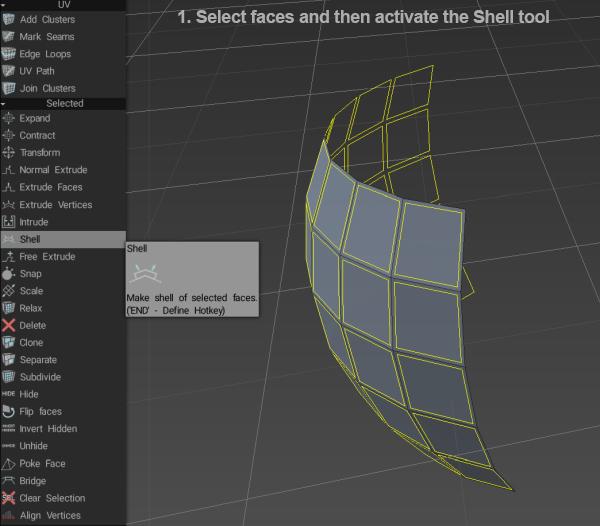
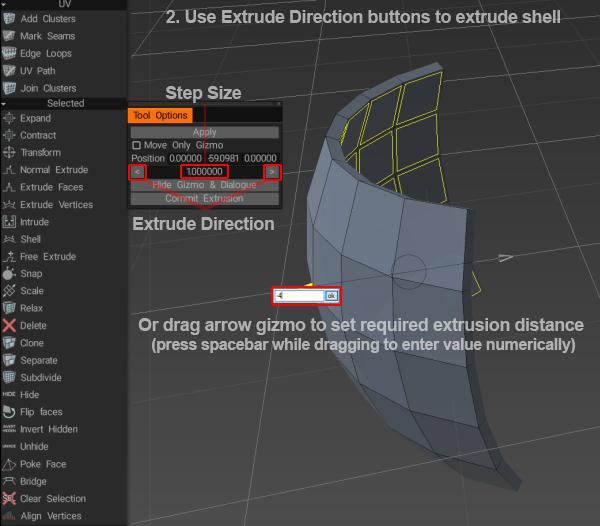
daha sonra ekstrüzyon miktarını ayarlamak için Araç Seçenekleri penceresindeki düğmeleri veya gizmo okunu kullanın…
Serbest Ekstrüzyon: Herhangi bir yönde ekstrüzyon yapın. Yeni köşe noktalarının otomatik olarak yakalanmayacağını, ancak Otomatik yakalamayı kapatmazsanız ileriki işlemlerde yakalanacaklarını unutmayın.
Kenarları Kes: Kenarları eşit parçalara kesin. Kullanıcı seçilen kenar(lar) boyunca bölüm sayısını önceden belirleyecektir.
Snap: retopo mesh köşelerini yüzeye yaslayın. Sahnedeki nesnenin durumunu değiştirdiyseniz ve retopo ağını yeniden tutturmak istiyorsanız yardımcı olur. Köşe modunda “Seç” aracındaysanız yalnızca seçilen köşeler etkilenecektir.
Ölçekle: Seçileni veya ağın tamamını ölçeklendirin. Her bağlayıcı küme ayrı ayrı dönüştürülecektir.
Rahatlayın: Tüm retopo ağını veya alt kümesini gevşetin. Köşe modunda “Seç” aracındaysanız yalnızca seçilen köşeler etkilenecektir.
CW Döndür: Seçili kenarları saat yönünde döndürür.
CCW’yi Döndür: Seçili kenarları saat yönünün tersine döndürür.
Extrude: Seçili kenarları extrude edin.
Böl: Birkaç kenar seçin ve ardından Böl’ü tıklayın. Bölme konumunu belirtmek için fareyi kenarların üzerinde hareket ettirin, ardından bölmek için tıklayın. INSERT tuşunu kullanarak bu aracı tetikleyebilir ve seçilen kenarları bölebilirsiniz.
Daralt: Seçilen kenarları daraltmak için BKSP’yi kullanın.
Sil: Seçilen kenarları silmek için DELETE tuşunu kullanın.
Kenar Döngüsü: Bir kenar döngüsü seçmek için L tuşuna basın. Efekti sınırlamak için bir kenar döngüsünde iki kenar seçin.
Kenar Halkası: Bir kenar halkası seçmek için R tuşuna basın. Efekti sınırlamak için bir kenar halkasındaki iki kenarı seçin.
Sel.Sharp: Keskin kenarları seçin.
Kenarı Böl: Seçilen Kenarları bölün.
Köprü: İki kenarı seçerek bir yüz oluşturabilirsiniz.
Dikişleri Ayarla: Seçilen kenarları dikiş olarak işaretleyin ( UV Önizleme Penceresinde).
UV Dikişlerini Sil: Seçilen kenarlar üzerindeki dikişleri silin ( UV Önizleme Penceresinde).
Keskin Olarak İşaretle: Seçili kenarları keskin olarak işaretleyin. Normaller bu kenarlar boyunca bölünecek.
Net Keskin: Net, keskin kenarlar. Normaller bölünmeyecek.
Mağaza Seçimi: Mağaza Seçimi.
Yük Seçimi: LoadSelection.
Seçimi Temizle: Seçimi Temizle.
Köşeleri Hizala: Tepe Noktasını Düzlemle Hizala. Köşelerin hareket yönünü görebilirsiniz. Yüzler seçilirse, Hizalama daire (dairenin merkezini ve yarıçapını düzenleyebilirsiniz), silindir veya küre ile gerçekleşebilir.
Düzlem Ortogonalinden Normale Hizalama uygulanır.
Tüm Mesh
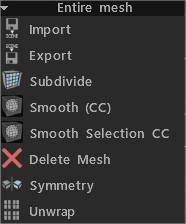
Import : retopo ağını Import .
Export : retopo ağını Export .
Alt Böl: Poli ağları alt bölümlere ayırın.
Düzgünleştir (CC): Mevcut grubu Catmull-Clark alt bölümüyle alt bölümlere ayırın ve düzeltin.
Pürüzsüz Seçim CC: Catmull-Clark algoritmasını kullanarak seçilen yüzleri alt bölümlere ayırın ve yumuşatın.
Mesh Sil: Poli mesh’i silin.
Simetri: Ağa simetri uygulayın.
Paketi Aç: Tüm adaları UV haritasına sığdırın.