 Türkçe
  English
 Українська
 Español
 Deutsch
 Français
 日本語
日本語 Русский
 한국어
한국어 Polski
 中文 (中国)
 Português
 Italiano
 Suomi
Suomi Svenska
 中文 (台灣)
 Dansk
Dansk Slovenčina
 Nederlands
 Magyar
 ไทย
ไทย हिन्दी
 Ελληνικά
 Tiếng Việt
 Lietuviškai
 Latviešu valoda
 Eesti
Eesti Čeština
 Română
 Norsk Bokmål
Digman tarafından
Akıllı malzemenin katmanında küçük bir simge gösterecektir. Şimdi, başka bir katman seçip Akıllı Malzemenin eklendiği katmanı yeniden seçerseniz, Gölgelendiriciler Panelinde vurgulanacaktır.
Katman başına yalnızca bir Gölgelendirici ekleyebilirsiniz.
Farenizi katmandaki simgenin üzerine getirdiğinizde daha büyük bir önizleme görünecektir. Verilen bir isim yok, ancak önizleme oldukça büyük.
Katmana bir Akıllı Malzeme eklendiğinde, onu Akıllı Malzeme düzenleyicisiyle düzenleyebilirsiniz ve düzenlenen Akıllı Malzemenizi kaydettikten sonra ağda otomatik olarak güncellenir. Bu yöntemi kullanarak bir Akıllı Malzemeyi görünüm portuna manuel olarak yeniden uygulayamazsınız ancak yeniden uygulamanız gerekirse Akıllı malzemeyi çıkarıp yeniden takabilirsiniz.
Ekli malzemeye sahip bir katmanı manuel olarak boyayamazsınız.
Elbette bu daha fazla katman gerektirecektir ancak Akıllı Materyallerinizi uygulandıktan sonra ve düzenlemeye ihtiyaç duyup duymadıklarını takip etmenin bir yoludur.
Yukarıdakiler Akıllı Malzemeleri test etmenin ve düzenlemenin iyi bir yoludur.
Çözünürlük dokularını görüntüleme ve çözünürlük haritalarını export
Daha düşük boya çözünürlüğüyle boyamak için Akıllı Malzemeler eklemeyi kullanın ve ardından tüm haritaları daha yüksek çözünürlüğe export .
Örnek
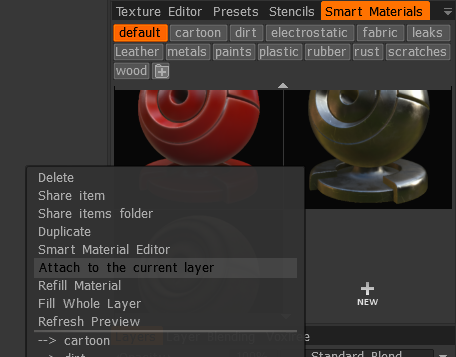
Paneldeki bir Gölgelendiriciye sağ tıklayın. Geçerli katmana eklemeyi seçin. Aynı yöntemi kullanarak bir Akıllı Malzemeyi ayırın veya ayırma seçeneği için katmanın kendisine sağ tıklayın.
Katmanları, modelin hangi kısmına uygulandıklarını bilecek şekilde adlandırabilirsiniz.
Böylece modelin hangi parçası üzerinde çalıştığınızı ve ona eklenen Akıllı malzemeyi tam olarak bilebilirsiniz.
Katmanlar panelindeki katmanların üzerindeki Opaklık, Derinlik opaklığı ve Pürüzlülük opaklığının tümü hâlâ çalışmaktadır.
Smart Material’ın ‘Geçerli katmana ekle’
tarafından
Nasıl kullanılır
1. Kullanmak istediğiniz Akıllı Malzemeye sağ tıklayın
2. ‘Geçerli katmana ekle’yi tıklayın
3. Akıllı Malzemenin seçilen katmana eklendiğini görebilirsiniz.
* Ekli Akıllı Malzemeler ayrı ayrı çalışır.
4. Düzenlemeniz gerekiyorsa katmana sağ tıklayın ve onu Akıllı Malzeme Düzenleyicisi’nde düzenleyin.
5. Farklı bir malzemeye geçmeniz gerekiyorsa, sağ tıklayın ve aynı Geçerli katmana ekle seçeneğini kullanın.
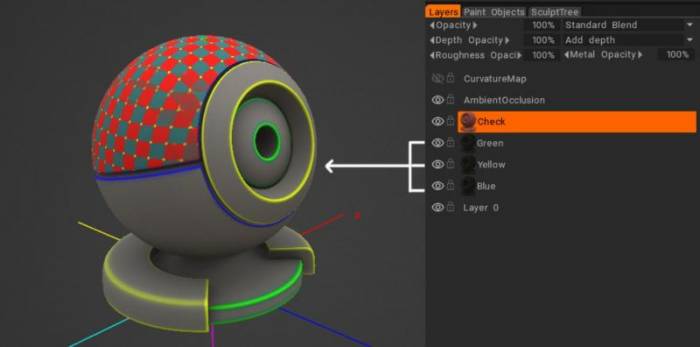
Bunların hepsine aynı Akıllı Malzeme eklenmiş ancak katmanın rengi değiştirilmiş.
Katman üzerinde malzeme kullanımının geçmişi.
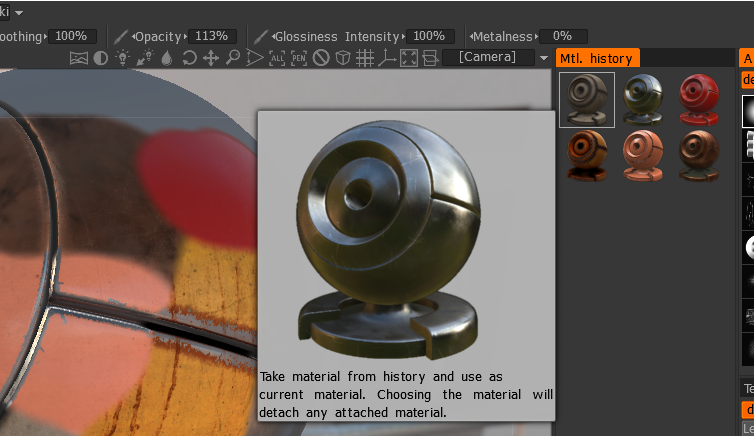
Katmana uygulanan tüm malzemeler, tüm ayarlarla birlikte geçmişe kaydedilir.