 Português
  English
 Українська
 Español
 Deutsch
 Français
 日本語
日本語 Русский
 한국어
한국어 Polski
 中文 (中国)
 Italiano
 Suomi
Suomi Svenska
 中文 (台灣)
 Dansk
Dansk Slovenčina
 Türkçe
 Nederlands
 Magyar
 ไทย
ไทย हिन्दी
 Ελληνικά
 Tiếng Việt
 Lietuviškai
 Latviešu valoda
 Eesti
Eesti Čeština
 Română
 Norsk Bokmål
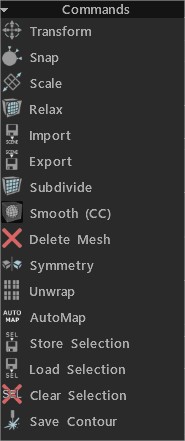
Transformar: transforma faces/vértices selecionados. Se nada estiver, toda a malha selecionada será transformada.
Snap: Snap os vértices da malha retopo à superfície. Ajuda se você alterou o estado do objeto na cena e deseja encaixar novamente a malha retopo . Somente os vértices selecionados serão afetados se você estiver na ferramenta “Selecionar” no modo vértice.
Escala: Dimensiona a malha selecionada ou inteira. Cada cluster conectivo será transformado separadamente.
Relaxar: relaxe toda a malha ou subconjunto retopo . Se você estiver na ferramenta “Selecionar” no modo vértice, apenas os vértices selecionados serão afetados.
Import: Import malha retopo .
Export: Export malha poli.
Subdividir .
Suavizar (CC): Subdivide e suaviza o grupo atual com a subdivisão Catmull-Clark.
Excluir malha .
Simetria: aplique simetria à malha.
Unwarp: Coloque todas as ilhas no mapa UV .
Seleção de Loja .
Seleção de carga .
Limpar seleção .
Salvar contorno: Este comando permite salvar o contorno em escala real como EPS ou DXF para posterior corte a laser. O comprimento das linhas corresponde ao comprimento geométrico. É útil se você quiser cortar formas usando um cortador a laser e colar as peças.
Selecionado
Expandir: expande a área dos elementos selecionados.
Contrato: Contrai a área dos elementos selecionados.
Transformar: transforma faces/vértices selecionados. Se nada for selecionado, toda a malha será transformada.
Extrusão Normal: Extrusão ao longo da direção normal média. Lembre-se de que novos vértices não serão ajustados automaticamente, mas serão ajustados em operações posteriores se você não desativar o snap automático.
Extrudar Faces: Extrude faces para que cada face seja movida na mesma distância sempre que possível. Preste atenção que em alguns casos, o deslocamento de faces exatamente paralelas é impossível, mas o 3DCoat tenta deslocar o mais exatamente possível.
Extrudar vértices: extrude faces para que cada vértice seja deslocado na mesma distância.
Intrusão: Intrusão nas faces selecionadas.
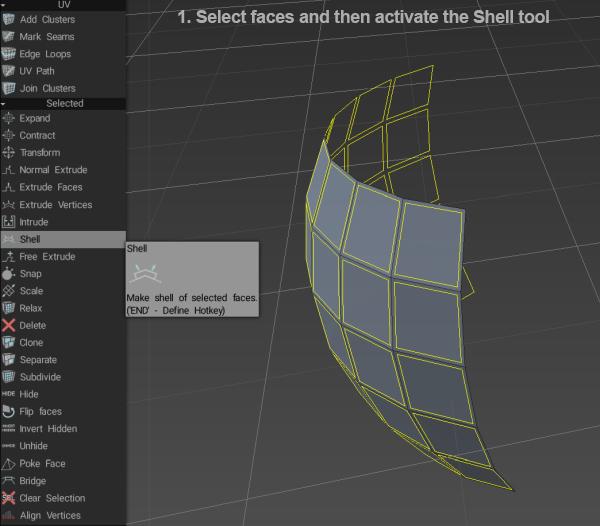
Shell: Faça uma concha com as faces selecionadas. Fluffy disse: Primeiro, selecione as faces que deseja “solidificar”, depois ative a ferramenta Shell …
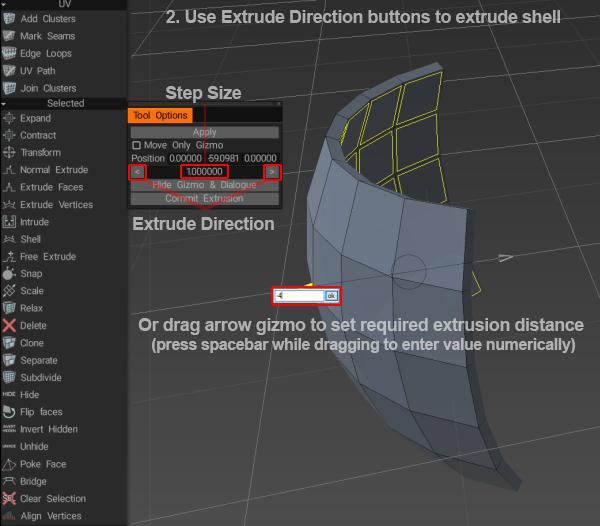
em seguida, use os botões na janela Opções de ferramentas ou o dispositivo de seta para definir a quantidade de extrusão…
Extrusão Livre: Extrusão em qualquer direção. Lembre-se de que novos vértices não serão ajustados automaticamente, mas serão ajustados em operações posteriores se você não desativar o snap automático.
Cortar bordas: corte as bordas em segmentos iguais. O usuário irá pré-determinar o número de segmentos ao longo da(s) aresta(s) selecionada(s).
Snap: Snap os vértices da malha retopo à superfície. Ajuda se você alterou o estado do objeto na cena e deseja encaixar novamente a malha retopo . Somente os vértices selecionados serão afetados se você estiver na ferramenta “Selecionar” no modo vértice.
Escala: Dimensiona a malha selecionada ou inteira. Cada cluster conectivo será transformado separadamente.
Relaxar: relaxe toda a malha ou subconjunto retopo . Somente os vértices selecionados serão afetados se você estiver na ferramenta “Selecionar” no modo vértice.
Girar CW: Gira as arestas selecionadas no sentido horário.
Girar CCW: Gira as bordas selecionadas no sentido anti-horário.
Extrusão: Extrusão das arestas selecionadas.
Dividir: selecione várias arestas e clique em Dividir. Mova o mouse sobre as bordas para especificar a posição de divisão e clique para dividir. Você pode acionar esta ferramenta e dividir as arestas selecionadas usando a tecla INSERT.
Recolher: Use BKSP para recolher as arestas selecionadas.
Excluir: Use a tecla DELETE para excluir arestas selecionadas.
Edge Loop: Pressione L para selecionar um Edge Loop. Selecione duas arestas em um loop de arestas para limitar o efeito.
Anel de borda: pressione R para selecionar um anel de borda. Selecione duas arestas em um anel de aresta para limitar o efeito.
Sel.Sharp: Selecione arestas vivas.
Split Edge: Divida as bordas selecionadas.
Ponte: Ao selecionar duas arestas, você pode criar uma face.
Definir costuras: marque as arestas selecionadas como costuras (na janela de visualização UV ).
Excluir junções UV : Exclua junções sobre arestas selecionadas (na janela de visualização UV ).
Marcar como nítido: marca as arestas selecionadas como nítidas. As normais serão divididas ao longo dessas bordas.
Clear Sharp: Bordas claras e nítidas. Os normais não serão divididos.
Seleção de Loja: Seleção de Loja.
Seleção de carga: LoadSelection.
Limpar Seleção: Limpar Seleção.
Alinhar vértices: Alinhamento de vértices por plano. Você pode ver a direção do movimento dos vértices. Se Faces selecionadas, o alinhamento poderá ocorrer por círculo (você pode editar o centro do círculo e o raio), cilindro ou esfera.
O alinhamento por plano ortogonal ao normal é implementado.
Malha inteira
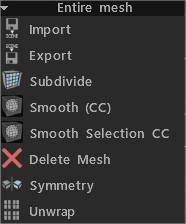
Import: Import malha retopo .
Export: Export malha retopo .
Subdividir: Subdividir malha poli.
Suavizar (CC): Subdivide e suaviza o grupo atual com a subdivisão Catmull-Clark.
Smooth Selection CC: subdivide e suavize as faces selecionadas usando o algoritmo Catmull-Clark.
Excluir malha: exclui malha poli.
Simetria: aplique simetria à malha.
Desembrulhar: Coloque todas as ilhas no mapa UV .