• Norsk Bokmål
  • 3DCoat dokumentasjon
  • Chapters
    • Introduksjon til 3DCoat
    • Starter
    • Grensesnitt og navigasjon
    • Brush
    • Arbeidsrom Rom
    • Scripting og Core API
    • Spørsmål og svar
    • licensing
    • Opplæringsveiledninger
  • Pilgway
  • Products
    • 3DCoat
    • 3DCoatTextura
    • 3DCoatPrint
    • PBRLibrary
  • Blog Posts
  • Store
  • Norsk Bokmål Norsk Bokmål
    • English English
    • Українська Українська
    • Español Español
    • Deutsch Deutsch
    • Français Français
    • 日本語 日本語
    • Русский Русский
    • 한국어 한국어
    • Polski Polski
    • 中文 (中国) 中文 (中国)
    • Português Português
    • Italiano Italiano
    • Suomi Suomi
    • Svenska Svenska
    • 中文 (台灣) 中文 (台灣)
    • Dansk Dansk
    • Slovenčina Slovenčina
    • Türkçe Türkçe
    • Nederlands Nederlands
    • Magyar Magyar
    • ไทย ไทย
    • हिन्दी हिन्दी
    • Ελληνικά Ελληνικά
    • Tiếng Việt Tiếng Việt
    • Lietuviškai Lietuviškai
    • Latviešu valoda Latviešu valoda
    • Eesti Eesti
    • Čeština Čeština
    • Română Română
  • Creating 3D Character Using 3DCoat
Expand All Collapse All
  • Introduksjon til 3DCoat
  • Starter
    • System requirements
    • Why 3DCoat is Unique?
    • Aktiverer 3DCoat
    • Oppstartsfeil
      • Startup error Mac
    • Color management
    • Upgrading permanent license
    • Linux Setup
      • Linux initial setup per-user installation
      • Linux initial setup for system
      • Tablet setup
      • To GTK3 from GTK2
    • Mappestruktur
      • Custom documents folder
    • Ulike former for "oppløsning"
    • Tablet on Window
    • Import og Export
    • Applinks i 3DCoat
      • Blender applink
        • Blender with the Applink in Linux
      • Blender 4.2/3/4/5 applink
      • Max Applink
      • Houdini applink
      • Lightwave uplink
  • Navigation
    • Åpningsdialog (hurtigstartmeny)
    • Navigasjonspanel
    • Kamera og navigasjon
      • Customize Navigation as Blender
    • Viewport Navigation Gizmo
    • Left tool panel
    •  Activity Bar
    • Navigering ved hjelp av 3DConnexion-enheter
      • How to compile Spacenavd on non Ubuntu distro
    • Stylus doesn’t work in sculpting
    • Hurtigtaster
  • Grensesnitt og navigasjon
    • Filmeny
    • Rediger meny
      • Calculate Curvature
      • Calculate Occlusion
      • Light Baking Tool
      • Preferanser
    • Vis meny
    • Symmetri
    • Textures
    • Calculate
    • Lagmeny
    • Frys meny
    • Hide
    • Bake
    • Kurver 2022
      • Kurvermeny
      • Curves Properties RMB
      • Fyll med mesh-lag
      • Scale of imported curves
    • Windows-menyen
      • Windows Popup-paneler med faner
      • Skyveknapper
    • Scripts
    • Addons
    • Capture
    • Hjelp-menyen
    • Tilpasning
    • Endre eller opprett nytt rom
  • Brush
    • Brush Top Bar
    • Børster til generell bruk
      • Lag børster og dekaler
      • Å lage alfa fra nåværende skulptur
      • Lag en Brush fra et 3D-objekt
      • Create brushes based on Curves
      • Load photoshop .abr brushes
    • Slag
      • Kurver popup-meny
    • Brush
    • Betingelsesbegrenser
    • Strips Panel
    • Sjablonger panel
    • Smarte materialer
      • Legg til nye bilder eller materialer
      • Fest et Smart-materiale til et lag
      • Import Quixel Material
    • Hvordan lage forhåndsinnstillinger for Brush
  • Arbeidsrom Rom
    • Painting
      • Painting og modi
        • Per-Pixel Painting
        • Painting (Micro-Vertex)
        • Ptex Painting
        • Painting (polymaling)
      • Importerer inn i Painting
        • Initial CC subdivision
        • UV Set smoothing
        • Sharp (hard) edge
        • Lås Normaler
        • Last inn ny UV layout etter modellendringer
        • DAZ Genesis models into 3DCoat
      • Menyer for Painting
        • Edit menu
        • Teksturmeny
          • Baking
        • Gjemme seg
        • Meny for Bake Paint
        • Fargevelgeren
      • Toppstang for Painting
      • Lagpanelet
        • Blandingspanelet
        • Layer and Clipping Masks
      • Painting
      • Opasitet - Gjennomsiktighet
      • Juster arbeidsområdet
        • Tweak verktøysett
        • Eksporterer fra Tweak Room
      • Forhåndsvisningspanel for maske/materiale
      • Eksporterer fra Painting
    • UV arbeidsplass
      • UV toppbar
      • UV Venstre verktøypanel
      • UV forhåndsvisningspanel
      • Eksempel på UV arbeidsflyt
      • Importerer inn i UV rommet
      • Eksporterer fra UV rommet
    • Retopologi
      • Importerer til Retopo rommet
      • Retopo Mesh Menu og Bake Menu
        • Virtuelt speilmodus
      • Bake menu
        • Treat Poly Groups as Paint Objects
        • Baking guide
      • Toppbar
        • Velg geometri
      • Venstre verktøypanel i Retopologirom
        • Overordnet formål og funksjon
        • Legg til geometri
          • Strokes-verktøy i Retopologi
        • Retopo Tweak-verktøy
        • UV verktøy
        • Kommandoer for Retopologirom
      • AUTORETOPO
        • Autopo guide
      • Polygrupper
    • Skulptere
      • Sculpt Layer
      • Skulptre
      • Sculpt Brush alternativer
      • Top Bar
      • Brush
      • Geometri Undermeny
      • Skulptér "høyreklikk"-menyen
      • Shaders
      • Voxel modus
        • Ren Voxel skulptur
        • Tetthet og oppløsning
        • Leiremotor
        • Voxel verktøy
        • Overflateverktøy på Voxels
        • Voxel justeringsverktøy
        • Volumetrisk Painting
        • Voxel Objects-verktøy
      • Overflatemodus
        • Overflateverktøy
        • Tilpassede overflateverktøy
        • Overflatejusteringsverktøy
        • Painting
        • Verktøy for overflateobjekter
        • Flernivåoppløsning
          • Multires tools
          • Multires adjust
          • Multires commands
      • Skulptere kurver
        • Splinekurver
        • Splines model creation
      • Vektor forskyvning
      • Verktøy for overflatetransformasjon
        • Voxel Transform Tools
        • Instancer
        • Move
        • Pose
        • Fit
        • Reproject
        • Surface Array
      • Voxel Primitives og Import
      • Levende booleanere
      • Kommandoer for Sculpt-rommet
      • Import til Sculpt Room
      • Eksporterer fra Sculpt Room
    • Gjengi
      • Comparison of different roughness values
      • Gjengi panelfunksjoner
      • Platespiller
      • Fakebake the lighting -ikke PBR-
    • Factures
      • Arbeidsflyt
    • Enkleste
    • Modellering
      • Mesh Menu
      • Venstre verktøypanel i modelleringsrommet
        • Legg til geometri
          • Valgt
        • Tweak
        • Smart Hybrid
        • UV
          • Kommandoer
        • Hele mesh
      • Loft overflate eksempel av Fluffy
      • Blockout av Poeboi
      • Import Zbrush Polygroups for UV mapping
    • Kitbash - Rask oppretting av 3D-modeller
      • Create kitbash
      • Left tool panel Kitbash
    • 3DPrint
    • Photogrammetry
      • How to install Reality Capture
      • Reality Capture doesn’t show up ?
    • Mesh til NURBS-rommet
    • Nodes
      • Sculpt shaders Nodes Library
  • Scripting og Core API
    • Scripting
    • Core API
    • Python API
  • Gratis 3DCoatPrint

Linux Setup

1127 views 0

Written by Carlos
June 21, 2024
  • Using Cinnamon crashed on File Open/Save As dialogs
  • 3DCoat freezes

On the site, there is a statement that “3DCoat 202x” requires “Ubuntu 20.04”

Using Cinnamon crashed on File Open/Save As dialogs


You don’t specify which Desktop Environment you are using.
It happened before in Cinnamon, which uses Nemo file browser. If using Nautilus, it wouldn’t happen.

It could be worth a try to install and set-up temporarily Nautilus (it’s branded “Files” in Gnome now, I think, if it helps) as your default file manager, so when prompted by 3DCoat it’s the one opening and saving files.

The Save dialog is surely from Nautilus.
So, the default file browser is realy Nautilus in this case.

# The contents of ~/.config/mimeapps.list: 
[Default Applications]
inode/directory=nautilus.desktop

If that works, you could keep using a more recent version of 3DCoat until the open and save dialog crash is fixed.

3DCoat freezes


I have the same issue. I have tried the suggested solution however when I input the correct name into the environment variable and launch 3dcoat, 3DCoat freezes. I have tried 3dcoat and textura and ubuntu22.04 and 20.04 executables all with the same results. Any ideas?

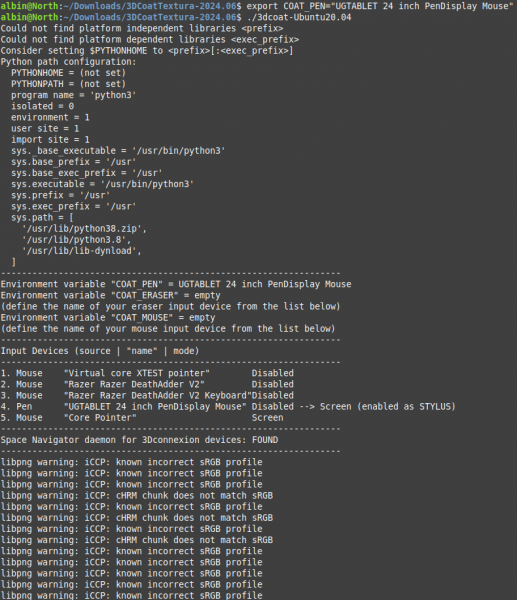
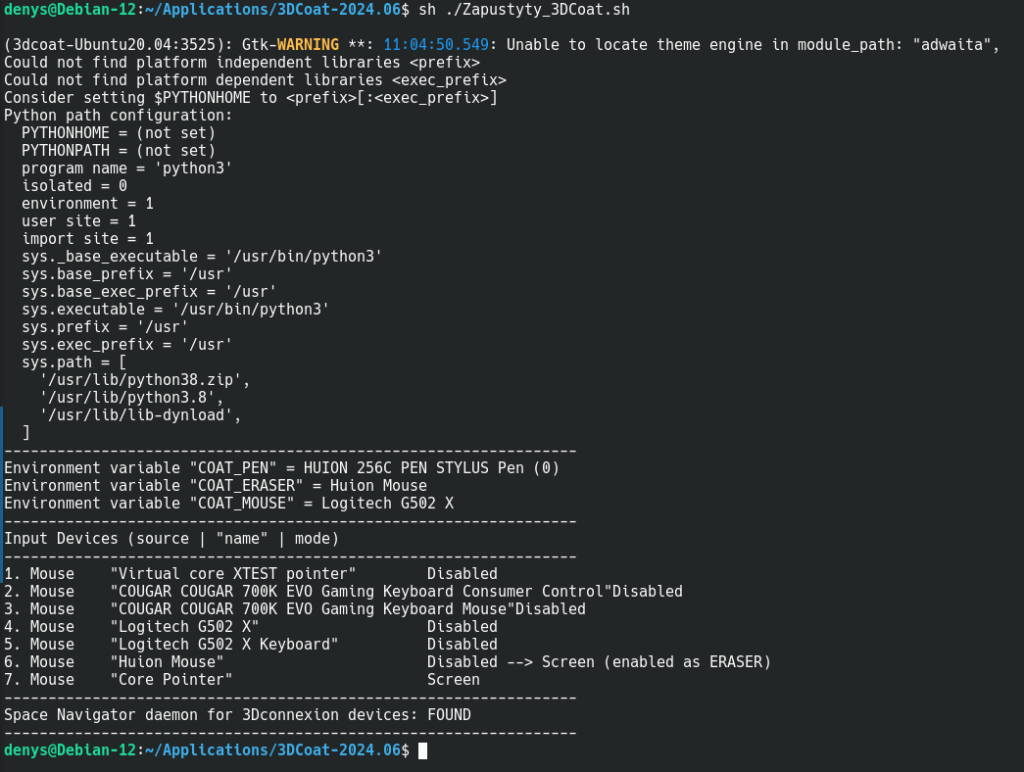
Your COAT_ERASER and COAT_MOUSE is empty, you need to set environment variable for them too. Also you need make sure your system uses files in 3DCoat -> LinuxLibs folder.
I had this problem in Debian 12, to solve it, i did next:
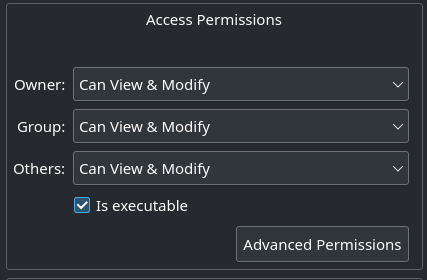
Create .sh file. We will use for execution with all additional commands. Don’t forget to make it executable.

I wrote next code, your paths and environment names will be different it’s an example:

#!/bin/bash
export LD_LIBRARY_PATH=’/home/denys/Applications/3DCoat-2024.06/LinuxLibs’ #Path for additional 3DCoat Linux libs.
export COAT_MOUSE=’Logitech G502 X’
export COAT_PEN=’HUION 256C PEN STYLUS Pen (0)’
export COAT_ERASER=’Huion Mouse’
/home/denys/Applications/3DCoat-2024.06/3dcoat-Ubuntu20.04 # Execution file

Test your .sh execution file to make sure is everything work fine. Do it from terminal.

sh ./YourFileName.sh

Create a .desktop file to run 3DCoat from desktop.

[Desktop Entry] Encoding=UTF-8 Name=3DCoat Comment=3DCoat Exec=sh /home/denys/Applications/3DCoat-2024.06/Zapustyty_3DCoat.sh %U #Execution path Icon=/home/denys/Applications/3DCoat-2024.06/data/Icon/3DCoat.png #Icon path Terminal=false Type=Application Categories=Graphics; StartupWMClass=3dcoat

That is, now you can run 3DCoat just clicking on .desktop icon. At least it worked for me for 3dcoat-ubuntu20.04, for 22.04 it didn’t. I hope it will be helpful for you.
After that my terminal looks like this.

Tags:linux

Was this helpful?

Yes  No
Related Articles
  • Surface Array
  • Top Bar
  • Curves Properties RMB
  • Left tool panel Kitbash
  • Create kitbash
  • Color management
Previously
Upgrading permanent license
Up Next
Linux initial setup per-user installation
AI:
Hi! How can I help you?
Attention: This is a beta version of AI chat. Some answers may be wrong. See full version of AI chat