 Norsk Bokmål
Pose: This tool is great for quickly changing the rotation, scale, and translation of a selection.
You can determine the selection in several ways.
You can use a line, ring, or sphere, and you can even paint on it with a Brush or an object.
Check the Airbrush mode when using “Select with a pen” to increase the selection area smoothly.
Finally, as with all tools in 3DCoat, the pose tool respects symmetry, as well as all selection modes, like drag rectangle, lasso, etc. Now, the Pose tool works on all visible objects (through all volumes).
You can also use Soft Selection feature for the Pose tool in the Sculpt workspace.
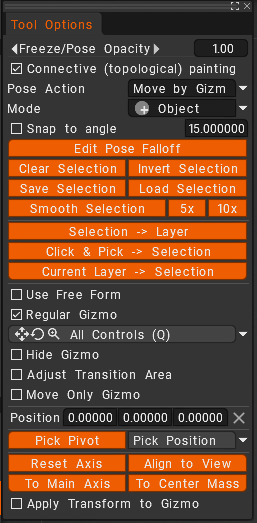
Pose Tool Panel
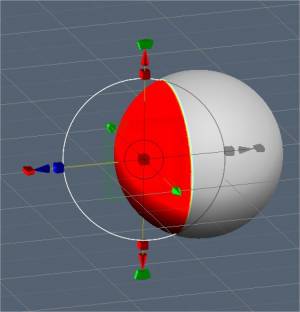
After a selection is made, a special posing gizmo will appear.
Let’s now take a look at some of the Pose Mode parameters:
- Freeze/Pose opacity: The opacity of the pose or freeze selection.
- Connective (topological) painting: Paint only in the topologically connective areas. Otherwise, paint tools act over the volumetric sphere.
Pose Action: you have two options:
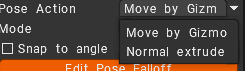
- Move by Gizmo.
- Normal Extrude.
Mode: The method of selection for the Pose tool.
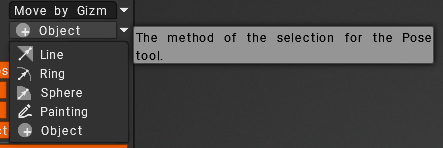
- Line: This mode lets you draw a line-based gradient for use with the pose tool gizmo. It starts with your initial LMB click and ends with the release of the LMB.
- Ring: This selects a ring-based gradient. It starts with your initial LMB click and ends with the release of the LMB.
- Sphere: This selects a spherical gradient. It starts with your initial LMB click and ends with the release of the LMB.
- Paint: Select by brushing over an element. Selecting with pen mode lets you directly brush on your selection. The pen size directly affects the selection area. Furthermore, you can also smooth your selected area by holding “Shift + LMB”. This is a great way to select things quickly if you just need tiny little details selected.
- Note: “Paint Select” mode is very useful. With the Pose tool, you can use almost any selection method in the “E” Panel, like drag rectangle, lasso, etc. You can also subtract your selection using the normal tool while holding the CTRL key.
- Airbrush mode: Activate airbrush mode. You can also smoothly select areas instead of having a hard-edged selection. It makes for tidy deformations around the edges of your selection.
- Select Object: If you have multiple objects in your Sculpt Tree, this mode can come in handy. Simply click on the object you want to deform using the Pose tool, which will place the entire volume as your selection.
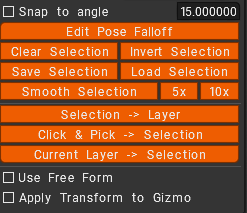
Snap to angle: Activate if you need the Snap to Angle selection.
- Edit Pose falloff:
- Clear Selection:
- Invert Selection: Invert pose selection.
- Save Selection: Save pose selection to the file. It is recommended to use this in surface mode. If the mesh structure is changed due to voxelization, you will not be able to apply the previous store selection.
- Load Selection: Load pose selection from the file. If the mesh structure changes, you cannot restore selection, so use it in surface mode whenever possible.
- Smooth Selection: Smooth Pose Selection. Smooth all-in pose tool – it smooths all volumes selection if “through all volumes” is selected. Also, there are buttons 5x and 10x near the Smooth command to smooth faster.
- Store selection to the Layer: Store Pose Selection As Layer.
- Pick selection from the Layer: Recall Selection By Click. Press the button, then click on the layer in the scene to recall the frozen state. Use SHIFT to add the selection, and CTRL to subtract.
- Current layer > Selection: Recall the selection from the current layer’s opacity. Use SHIFT/CTRL to add/subtract the selection.
Polygroups & Pose Object Selection: This Quick Tip video briefly demonstrates how a user would select a single object among a (Sculpt Tree) layer containing multiple objects, and using the Pose tool to create a Pose Selection and creating a Polygroup layer from it on Layers Panel.
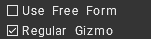
Use Free Form: This feature allows a lattice to deform the selected Pose area. Select from several lattice shapes to transform the Pose selection.
Use regular gizmo instead of line-based one: Switching off Regular Gizmo, the tool has three states: Rotate, Scale, and Translate.
You can switch modes by clicking on the long red rectangular bar at the base of the gizmo. In each state, the gizmo has a set of parameters in the Tool Options Panel.

Transform mode: Look Edit->Preferences->Tools->Use QWER … to turn on/off using the QWER for the gizmo modes switching.
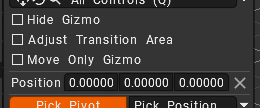
Hide Gizmo: Hide the gizmo to select an area more accurately.
Adjust Transition Area: Adjust area that joins un-selected and completely selected areas. It allows to make bending more accurate and natural.
Move Only Gizmo: Press Shift key to move the gizmo but don’t transform the object.
Apply Transform to Gizmo: Apply Transform to the entire Gizmo.
Position: Manually set the center postion of the object or the gizmo.
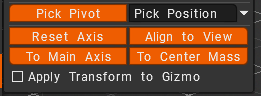
Pick Pivot: Click to pick the pivot point from the surface.
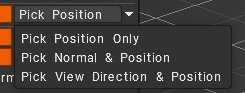
- Pick Position Only: Pick the position and Y-axis from the pen’s normal; and the position, X, and Z-axis from the pen’s orientation.
- Pick Normal & Position: Pick the position and Y-axis from the pen’s normal and position X and Z axis from the pen’s orientation.
- Pick View Direction & Position: Pick gizmo position from the pick point, Y axis from the forward direction, X – right, Z – upper.
- Reset Axis.
- Align to View:
- To Main Axis: Direct gizmo axis along the main geometrical axis of the object.
- To Center Mass: Move the gizmo to the center of mass.
Apply Transform to Gizmo: Apply to transform to the entire gizmo.
Free Form
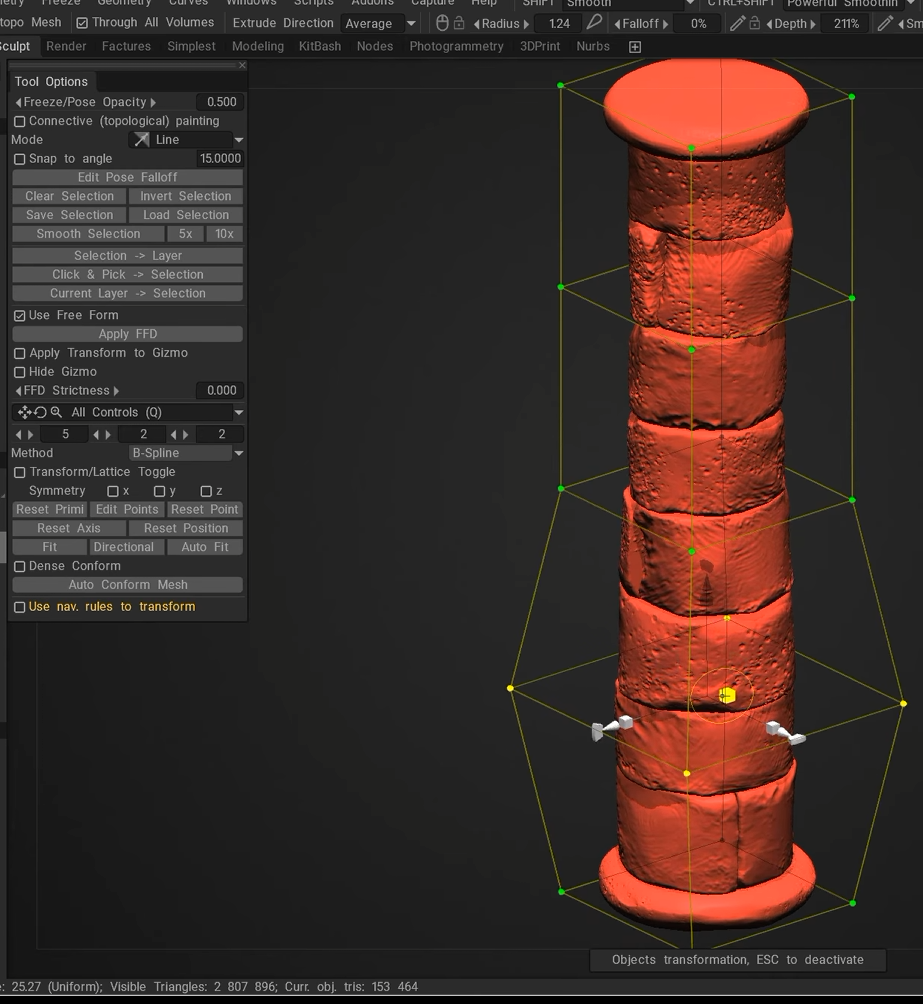
- Amount of Lattice division on X,Y, Z coords.
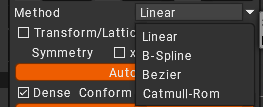
- Method: Select the interpolation method used for Free-Form Deformation.
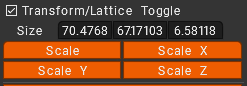
Transform/Lattice Toggle: Transform primitive as a whole (global transform).
Symmetry: on X, Y, Z Coords.
Auto Fit: Automatically fits the FFD cage to the bounding box of the unmasked area (or the entire object if nothing is masked).
Dense Conform:
Auto Conform Mesh: Automatically wraps the FFD grid around the currently unmasked area (or the entire object if nothing is masked) and snaps the control points to the underlying scene objects.
Tutorials
Pose Tool Poly Groups: This video demonstrates a few new feature additions to the Pose Tool in 3DCoat 4.9. One is angle snapping for precise linear selections. The other is Poly Group functionality built into the Pose tool.
Pose Tool Clip Tweaks: Conform object to geometry surface.