 Latviešu valoda
  English
 Українська
 Español
 Deutsch
 Français
 日本語
日本語 Русский
 한국어
한국어 Polski
 中文 (中国)
 Português
 Italiano
 Suomi
Suomi Svenska
 中文 (台灣)
 Dansk
Dansk Slovenčina
 Türkçe
 Nederlands
 Magyar
 ไทย
ไทย हिन्दी
 Ελληνικά
 Tiếng Việt
 Lietuviškai
 Eesti
Eesti Čeština
 Română
 Norsk Bokmål
Import Settings
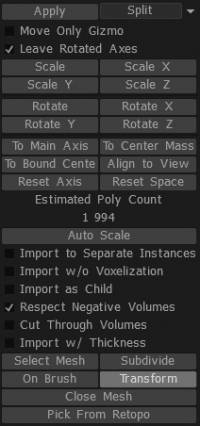
Import to Separate Instances: Creates a new VoxTree layer.
Import w/o Voxelization: Creates the mesh as a polygonal surface rather than voxels.
Import as Child: If a VoxTree layer is currently selected, and this option is turned on, then the mesh will be created in a new VoxTree layer as a child to the selected layer.
Respect Negative Volumes: If the imported object has a secondary mesh item/object and has “_negative” in its name, this option will allow subtracting this volume from the scene and creating the primary mesh item/object with whatever boolean operation you decide to use.
Cut Through Volumes: Cuts through the selected VoxTree layer and all child layers.
Import w/ Thickness: If the mesh you are attempting to import is a single-sided polygonal mesh or has holes, or you generally want to import something with walls, use this option to thicken the surface.
Select Mesh: This allows you to browse a mesh stored on your computer or another drive.
Subdivide: Subdivides mesh to be imported, giving it more initial resolution before importing.
Close Mesh: Closes any holes in the mesh upon importing.
Pick From Retopo: If you have retopology mesh in the Retopo Room, then you can use the mesh to merge to voxels. Note that all visible meshes from the Retopo Groups panel will be used. If you do not want this to happen, hide the meshes you don’t want to use first.
Shift (X, Y & Z): Shifts the mesh to be imported along the selected axis.
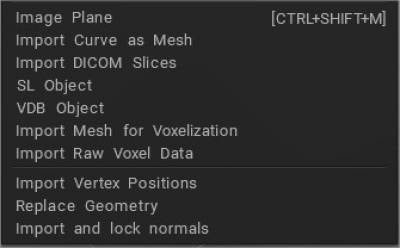
Import DICOM Slices
DICOM is the primary file format for storing and transferring medical images in a hospital’s database. There are other file formats for storing images. Besides DICOM, you may also see medical images saved in the NIFTI format (file suffix “.nii”), PNG, JPEG format, or even Python file objects like NumPy arrays.
So why use DICOM? Other file formats may be more convenient, but everything uses the DICOM format in clinical practice.
Understanding DICOM: How to read, write, and organize medical images.
We want to emphasize that 3DCoat does not have any medical licenses, and 3DCoat is not intended for medical purposes.
Import Mesh for Voxelization
Import polygonal mesh to be voxelized in Sculpt room. This tool lets you import polygonal meshes to convert into voxels. The mesh should be closed.
If it is not closed, you should import it with the thickness or make it closedLet us first go over some of the basic functions of this tool:
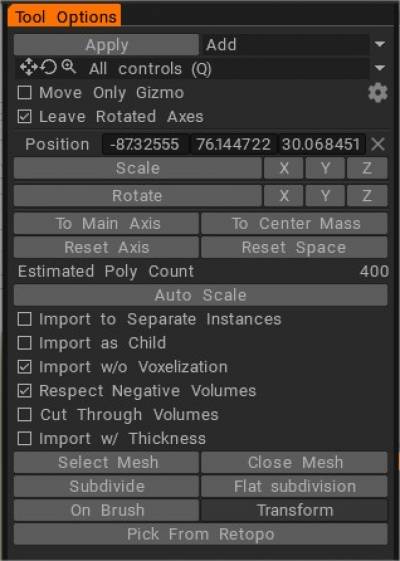
- Select mesh: Selects a mesh stored on your hard drive.
- Pick from retopo: If you have something retopologized in the Retopo Room, you can use the mesh to merge to voxels.
- On pen: Turns any merged mesh into a “Merge on the Fly” tool, which allows you to merge any object at the cursor position (respecting the base object’s normals and intrusion into or extrusion above the base object). Adjust the merged object’s size by right-click dragging left or right, and adjust its intrusion or extrusion by right-click dragging up or down.
- Subdivide: Subdivides your un-merged mesh, giving it more initial resolution before merging.
- Transform: Allows you to position any merged object with a “Transform widget”.
- Shift (X, Y & Z): Shifts the un-merged mesh along the selected axis inside a bounding box in local space.
- Presets: This tool has several presets; you are encouraged to explore them.
- Merge separate volumes: Merges each “sub-object” to its unique volume.
- Respect negative volumes: If an un-merged object has “_negative” listed in its name – (indicating a subtractive sub-object inside the file), this function will subtract this volume when merging it with other sub-objects. When using this feature as a “negative” or subtractive boolean object, you should know in advance.
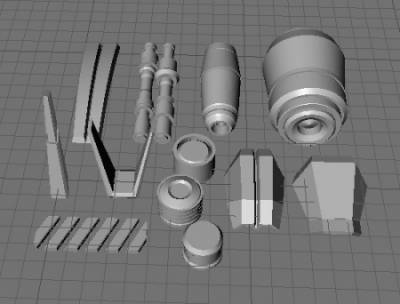
This function is great for creating greebles and nurnies.
Click to place (Merging On Pen)
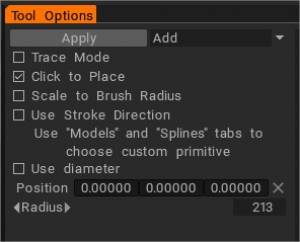
One of the most fluid and spontaneous ways to add nearly any predefined shape, model, greeble, or nurnie to your existing sculpture is to use the “Import Panel” or, for more frequently used elements, the “Windows > Panels > Sculpt Models”.
Just choose the “Click to place” option to access this powerful set of functions.

When this option is chosen, you can assemble a composite of any number of shapes, the on-the-fly – interactively changing the shape’s position, scale, rotation, and “penetration” or “levitation” on, into, or above the surface of another object or shape.
Every shape added in this way can be positively combined or negatively subtracted from any existing shape.
Mouse gestures adjust the scale, position, and penetration depth of your “Merged” object.
- Use the “Right Mouse Button” and drag to the left or right to Scale the Merged object.
- Use the “Right Mouse Button” and drag up or down to adjust the surface penetration of the Merged object.
Change the position of this object, respecting the orientation “Normals” of the object that is being added simply by moving the mouse cursor where desired and sliding its preview along the surface of the existing object.
If you’d like to use another point in space to base your primitive transform value from, choose the “Move Only Gizmo” option and then reposition that gizmo.
At any time, you may reset any axis or position of your primitive shape.
Importing for Voxel mode
The bottom line is that when you import an external model as Voxel, you are essentially changing its nature into a 3DCoat volume-based “Sculpture” – unique to the 3DCoat environment.
Most imported 3D objects are polygon-based, and because of this, they need to be translated into a Voxel volume of a given “Resolution”. This resolution depends on the scale you specify for this object upon import.
External objects enter the Voxel Room either by way of the “Opening Dialogs”, the “File/Import” menu, or by “Merging” operations.
In all 3 cases, your object is introduced into the Voxel Room surrounded by the “Transform Widget/Gizmo”. You can provide your imported model with the resolution it needs by visually scaling it up in the Viewport or by numerical entry. Once the proper Scale/Resolution is obtained – press “Enter” to make it valid and permanent.
When you “Import for voxelizing” or when you “Import” an external object there is an interesting and useful function called “On pen”, which allows you to interactively place instances of your imported mesh with any scale, orientation, and penetration depth (if another object already exists in a Voxel Layer) all “on-the-fly” and using the Mouse.
Dragging with the Right button down:
From right to left resizes the Merged object, up or down changes the “penetration” depth of the Merged object into whatever object may already be present on a Voxel Layer.
Suppose you have an object which exists in the “Models” Panel, and you wish to add this to a Voxel Layer. In that case, you can do this by simply clicking on its icon in the Panel, and you will be presented with a standard “Import” dialog, which will allow you to deal with it as you would any external model.
Importing for Surface Mode
You can also import directly into Surface Mode through the Opening Dialog.
Surface Mode is a subset of the Voxel Room but works entirely on surfaces (without volume). Surface Mode provides an adjustable triangular mesh skin representation of your imported model, which behaves similarly to voxels.
Once your imported model is in the Surface Mode workspace, you can use LiveClay, our “Dynamic Subdivision” (localized subdivision) implementation. This sculpting method adds resolution only where needed (locally), conserving software and hardware resources.
Tutorials
Importing low-poly mesh into Sculpt room: This video demonstrates some issues one may encounter when importing low-poly meshes into 3DCoat’s Sculpting workspace..especially in Surface mode…and how to handle them correctly.
Import with Flat Subdivision: This video demonstrates a recent Import option in the Sculpt workspace of 3DCoat, to use Flat Subdivision rather than Catmull Clark Subdivision. It subdivides without smoothing the object. It helps eliminate the need to spend extra time to “prep” a model for normal subdivision before Importing it into 3DCoat’s High-Poly/Voxel sculpting environment.
Quick Tip: Fixing Low Polygon Mesh Imports:
Importing objects into 3DCoat: Video to accompany an article I wrote on my blog.