 Tiếng Việt
  English
 Українська
 Español
 Deutsch
 Français
 日本語
日本語 Русский
 한국어
한국어 Polski
 中文 (中国)
 Português
 Italiano
 Suomi
Suomi Svenska
 中文 (台灣)
 Dansk
Dansk Slovenčina
 Türkçe
 Nederlands
 Magyar
 ไทย
ไทย हिन्दी
 Ελληνικά
 Lietuviškai
 Latviešu valoda
 Eesti
Eesti Čeština
 Română
 Norsk Bokmål
Video này bắt đầu loạt bài cung cấp thông tin tổng quan về các Công cụ Retopo được sử dụng phổ biến nhất trong 3D Coat, bắt đầu với các công cụ Retopology thủ công: Retopo Workspace
Video hướng dẫn công cụ Retopo
Bắt đầu nhanh Công cụ bố cục UV
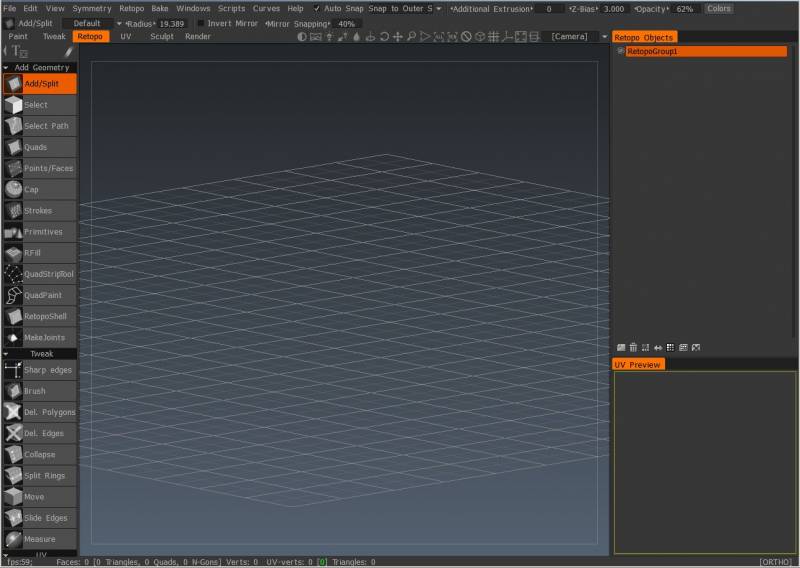
Tất cả các công cụ và chức năng để tạo và thay đổi cấu trúc liên kết có thể được tìm thấy trong Phòng Retopo .
Phòng Retopo và phòng mô hình có nhiệm vụ khác nhau và có các công cụ khác nhau.
– Phòng Retopo được thiết kế để tạo lưới poly thấp dựa trên lưới điêu khắc.
– Phòng mô hình được tạo ra sau đó và dành cho mô hình lưới poly thấp mà không có lưới điêu khắc.
Cho dù bạn đang tinh chỉnh cấu trúc liên kết được tạo tự động bằng các quy trình Auto Retopo của 3DCoat, tạo cấu trúc liên kết mô hình của bạn từ đầu hay điều chỉnh và tinh chỉnh cấu trúc liên kết bắt đầu trong một ứng dụng bên ngoài, Retopo Room đều có những gì bạn cần.
Mỗi đối tượng Cây điêu khắc có thể được chỉnh sửa riêng biệt từ Bảng điều khiển đối tượng Retopo (trong phiên bản 2022, Nhóm Retopo được đổi tên thành Nhóm đa). Chúng có thể được tạo tự động hoặc thủ công nếu bạn tách biệt các khu vực khác nhau trong mô hình của mình cho các mục đích và bố cục cấu trúc liên kết khác nhau.
Mỗi Lớp Voxel có thể được làm việc riêng biệt thông qua Bảng điều khiển Poly Groups . Chúng có thể được tạo tự động (khi Auto Retopo được sử dụng) hoặc thủ công khi bạn cô lập các khu vực khác nhau trong mô hình của mình cho các mục đích và bố cục cấu trúc liên kết khác nhau.
So với Phòng điêu khắc , Phòng Retopo khá dễ tiêu hóa, chỉ có bốn khu vực chính để tìm hiểu và sử dụng:
- Bảng công cụ , nơi bạn tìm thấy tất cả các công cụ để tạo và điều chỉnh cấu trúc liên kết, cũng như các công cụ để tạo các đường nối UV và mở cấu trúc liên kết của bạn để sửa đổi thêm trong “Phòng UV ”.
- Poly Groups Panel , nơi bạn có thể cô lập tất cả các khu vực và bộ phận của mô hình cần cấu trúc liên kết và kết cấu cụ thể.
- Bảng xem trước UV , thực hiện đúng như những gì nó nói, hiển thị bản xem trước bản đồ UV của bạn. Đừng nhầm đây là một khu vực để chỉnh sửa UV. Điều này được thực hiện trong “Phòng UV ” sau khi một mô hình đã được “Nung” vào “Phòng sơn”.
- Menu Retopo – cung cấp tất cả các chức năng “Import/ Export”, các tùy chọn “Baking” cũng như “Lưu” và “Khôi phục” công việc Retopology cụ thể của bạn.
Đảm bảo rằng bạn cũng chú ý đến các Tùy chọn xuất hiện trong cả “Bảng điều khiển công cụ” và Bảng tham số công cụ Retopo Top Bar (bảng trên cùng, nằm ngang bên dưới khu vực “Menu”). Các cài đặt có sẵn cho từng loại công việc bạn đang thực hiện sẽ tự động thay đổi trong cả hai Bảng.
Công cụ Retopo cho phép bạn xây dựng cấu trúc liên kết mới bằng cách làm việc với các đỉnh đa giác riêng lẻ, các cạnh đa giác, mặt đa giác và “dải” đa giác (các hàng đa giác được kết nối).
Tất cả cấu trúc liên kết đã tạo có thể tự động được đặt thành “Snap” với bề mặt Mô hình gần nhất. Toàn bộ mạng vòng lặp có thể được tạo ngay lập tức bằng cách sử dụng kết hợp các nét xuyên suốt và nét tự do.
“Mảng Vòng lặp Tròn” cũng có thể được thực hiện với nỗ lực tối thiểu bằng các Nét vẽ Tự do.
Sự khởi đầu của Mô hình đa giác thực sự cũng bắt đầu xuất hiện, hoạt động theo chức năng, trong giới hạn của Phòng Retopo .
Các chức năng Extrude và Bevel mới cho phép bạn đùn và vát cả các cạnh và mặt của cấu trúc liên kết, cho phép bạn thêm tất cả khối lượng và chi tiết mới vào các mô hình ban đầu hoặc đã nhập của mình.
– Đã thêm trình tạo lệnh Script trong công cụ nguyên thủy, Sculpt và phòng Retopo . Bạn có thể lưu các hành động của mình trong tệp tập lệnh, thay đổi các tham số nguyên thủy của bạn trong tập lệnh và chạy lại tập lệnh.
– Đã thêm hỗ trợ của Modeling và Retopo nguyên thủy thông qua Scripts. Bạn có thể sử dụng các lớp retopo để tạo các nguyên mẫu trong phòng Retopo và Modeling thông qua các tập lệnh.
– Đã thêm các công cụ mới để tạo nguyên mẫu 2D cho phòng Mô hình hóa và Retopo . Bạn có thể tạo các hình nguyên thủy 2D (hình tròn, hình hộp, mặt phẳng, hình elip, N-gon, hình đĩa, hình tam giác).
– Đã thêm nút Record Script ở menu trên cùng. Nút thay đổi màu sắc tùy thuộc vào trạng thái bản ghi. Nếu nút màu đỏ, tập lệnh đang ghi, nút màu xanh cho biết quá trình ghi đang dừng.
– Đã thêm các thao tác boolean cho retopo nguyên thủy trong phòng Retopo và Modeling. Bạn có thể tạo các nguyên hàm bằng cách sử dụng các phép toán boolean cộng, trừ, cắt và tách.
Menu Retopo và Nướng
Menu Retopo và Nướng
– Thông số công cụ Retopo Top Bar
– Xem trước UV
Thủ công vs Tự động retopology. Xem nhanh.
Industry Tuts chạy qua so sánh nhanh giữa cả retopo thủ công và auto-retopo trong video tua nhanh thời gian này bằng cách sử dụng các công cụ retopology tuyệt vời 3DCoat .
Tái cấu trúc tự động
Chức năng Tạo cấu trúc liên kết tự động được sửa đổi và cải tiến này hiện tự động tạo ra cấu trúc liên kết theo đường viền, rất chính xác, hoạt động tốt như nhau cho cả hình dạng cơ học và hữu cơ.
Tự động Retopo
Retop thủ công
3DCoat cung cấp rất nhiều công cụ để xây dựng cấu trúc liên kết tùy chỉnh, tự động hóa các tác vụ lặp đi lặp lại khi có thể, mang lại cho bạn tốc độ cần thiết để hoàn thành dự án đúng hạn.
Retopo thủ công
Retopo Poly Groups
3DCoat có một hệ thống Lớp để tái tạo lại các mắt lưới. Điều này giúp dễ dàng tái cấu trúc lại các mắt lưới của bạn với các khu vực có vấn đề và có nhiều phiên bản tái cấu trúc của cùng một đối tượng.
Giống như tất cả các tab Lớp khác trong 3DCoat, chúng hoạt động giống như các Lớp trong Photoshop. Bạn có thể nhấp và kéo các Lớp để sắp xếp lại chúng, kéo chúng vào biểu tượng Thùng rác để xóa chúng, ẩn và hiển thị chúng bằng biểu tượng Hiển thị, v.v.
Nhóm đa
Import Export
Import retopo
Export retopo: Xuất lưới Retopo dưới dạng một bản vá đa giác có thể chỉnh sửa ở một trong các định dạng sau – .obj, .lwo, .fbx, .stl và .ply
Export đã chọn: Chỉ xuất các mặt đã chọn dưới dạng bản vá có thể chỉnh sửa ở một trong các định dạng sau- .obj, .lwo, .fbx, .stl và .ply
Export các nhóm riêng biệt: Xuất từng Nhóm Retopo dưới dạng một đối tượng riêng biệt ở một trong các định dạng sau – .obj, .lwo, .fbx, .stl và .ply. Mỗi đối tượng giữ lại tên của Retopo Group tương ứng của nó.
Thông tin kĩ thuật
Retopo Workspace : Video này bắt đầu một loạt bài cung cấp tổng quan về các Công cụ Retopo được sử dụng phổ biến nhất trong 3DCoat , bắt đầu với các công cụ Retopology thủ công.
Bắt đầu nhanh: Chế độ Brush UV : Video này trình bày cách sử dụng Chế độ Brush khi chỉnh sửa UVs trong 3DCoat. Nó cho phép người dùng định hình lại, tinh chỉnh hoặc nới lỏng các đảo/vỏ UV theo kiểu tự do.
Bắt đầu nhanh Công cụ bố cục UV
Menu Retopo RMB : Video này minh họa menu RMB mới trong Retopo Workspace. Đó là ngữ cảnh nhạy cảm và nhỏ gọn để giúp người dùng làm việc hiệu quả hơn.
4.5 Bổ sung phòng Retopo : Video này bao gồm một số bổ sung mới cho Phòng Retopo trong 3DCoat 4.5.
Voxels so với Lưới tham chiếu : Video này so sánh hai phương pháp khác nhau để nhập lưới dày đặc vào 3DCoat.
Các ví dụ về Retopo
Quy trình làm việc trong phòng Retopo : Video này bắt đầu giai đoạn Retopo của hướng dẫn này, bao gồm phần minh họa cách sử dụng bộ công cụ Kitbashing để nhanh chóng truy cập và sử dụng các giá trị đặt trước Mô hình/Lưới làm điểm bắt đầu.
Thủ thuật Retopo nhanh và bẩn : Video này trình bày một số mẹo nhanh để tăng tốc quy trình làm việc của bạn khi làm việc trong Retopo Workspace xây dựng 4.1.13.
Dự án Retopo : Video này bắt đầu một dự án Retopo ngắn bằng cách sử dụng kết hợp các công cụ Retopo tự động và thủ công.
Mẹo nhanh: Sự cần thiết phải chọn đúng bản đồ UV , Retopo Mesh : Video này minh họa một tính năng tích hợp của 3DCoat khi làm việc trong Retopo Workspace để cho người dùng biết liệu họ có chọn đúng bản đồ UV và lớp Lưới hay không khi làm việc trên một lưới nhất định.
Nhân bản lưới Retopo : Video này trình bày hai phương pháp chính để nhân bản lưới retopo trong 3DCoat.
Hợp nhất nhiều bộ UV thành một
4.5 Bổ sung phòng Retopo : Video này bao gồm một số bổ sung mới cho Phòng Retopo trong 3DCoat 4.5.