한국어
한국어  English
 Українська
 Español
 Deutsch
 Français
 日本語
日本語 Русский
 Polski
 中文 (中国)
 Português
 Italiano
 Suomi
Suomi Svenska
 中文 (台灣)
 Dansk
Dansk Slovenčina
 Türkçe
 Nederlands
 Magyar
 ไทย
ไทย हिन्दी
 Ελληνικά
 Tiếng Việt
 Lietuviškai
 Latviešu valoda
 Eesti
Eesti Čeština
 Română
 Norsk Bokmål
레이어 0에서 지우거나 레이어에서 지우고 레이어 0을 숨기면 투명도를 칠할 수 있습니다. export 때 투명도 맵은 내보낸 색상 텍스처의 알파에 있게 됩니다.
Layer0을 숨기면 레이어에서 페인트하는 모든 색상이 투명도 맵으로 간주됩니다.
불투명도를 RBGA 색상 알파 값으로 생각하십시오. 불투명도 변화(반투명 재료 추가 등)를 얻으려면 알파 값으로만 칠하면 됩니다. 그런 다음 레이어 0을 숨기면 이제 레이어 색상 알파 값과 함께 반투명 또는 완전 투명이 표시됩니다.
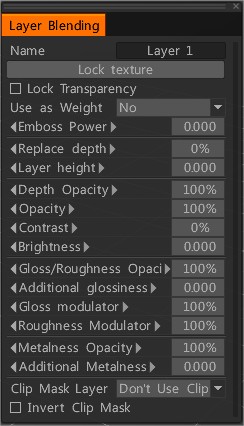
또는 레이어 불투명도를 설정할 수 있습니다. 예를 들어 레이어 1 불투명도 값을 0.3으로 설정한 다음 “레이어 0″을 숨기면 레이어의 0.3 알파 색상이 표시됩니다. (반투명)
3DC 코트가 “레이어 0″을 가시적으로 유지하는 이유: 사용자가 쉽게 색상을 지정할 수 있습니다(레이어 0 덮어쓰기). (레이어 0은 알파를 1.0(투명 없음)으로 유지하고 완벽한 색상은 0.5 0.5 0.5 RGB로 유지합니다). 레이어 0이 없으면 맵을 import 오거나 실제로 다른 레이어의 표면에 페인팅할 때까지 표면이 보이지 않을 수 있습니다. 칠하기 어렵게 만듭니다.
알파 값으로 스마트 재질을 페인트하거나 추가한 후 레이어 0을 숨긴 다음 색상(확산/알베도) 맵을 RGBA(png, tiff 등)로 export . 그런 다음 내보낸 색상 맵은 알파 값을 유지합니다. 또는 RBG 색상 맵으로 “흑백 불투명도” 맵을 export 옵션을 선택할 수 있습니다.
사용할 수 있는 렌더링 응용 프로그램에 따라 색상의 알파 값을 사용하거나 불투명도 맵(흑백)으로 export .
레이어 1의 불투명도를 0.5 등으로 변경해도 투명하지 않은 경우 위에 칠하는 또 다른 레이어가 있을 수 있습니다. 또는 “색상 혼합” 방식을 변경할 수 있습니다(레이어 패널에서 색상이 아래 레이어와 혼합되는 방식을 선택할 수 있습니다. 기본값 = 표준 혼합)
또한 스텐실 고정 마스크를 사용하여 불투명도(알파)로 색상을 추가하거나 마스크 추가와 함께 스마트 재료를 사용할 수 있습니다.
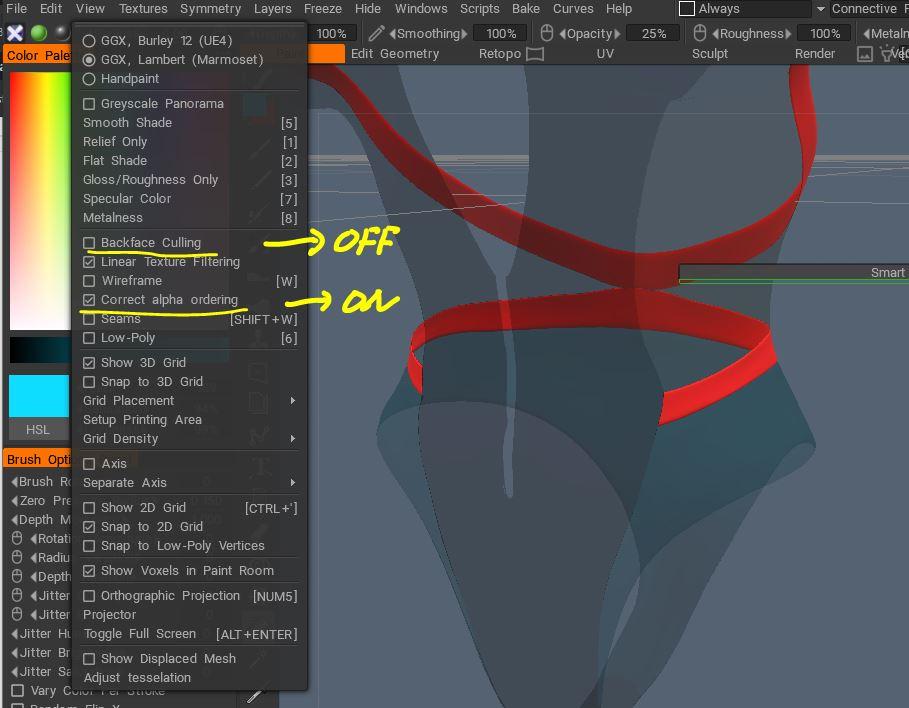
뷰 렌더링 문제만 있는 경우 뷰 메뉴에서 “backface Culling as OFF” 및 “Correct alpha ordering”만 설정하면 됩니다. 이와 같이:
레이어 메뉴에서 “LOCK LAYER TRANSPARENCY” 및 “MASK WITH LAYER…”와 같은 흥미로운 레이어 속성 과 “FREEZE PAINTED PIXELS” 또는 “FREEZE TRANSPARENT PIXELS”와 같은 작업을 잊지 마십시오(브러시 투명도를 조정할 수도 있음). ).
예: 먼저 “지우기” 레이어 0, 잔디 스트로크(잔디 재료 또는 실루엣) 몇 개를 그린 다음 “레이어 투명도 잠금”: 이제 다른 모든 사양/색상 스트로크(동일한 레이어에 있음)는 사전에만 영향을 미칩니다. – 그린 잔디.
또한 이 레이어를 후속 레이어의 마스크로 사용할 수 있습니다. 이렇게 하면 “잔디 레이어”가 다른 모든 레이어의 투명도 레이어가 됩니다. “FREEZE PAINTED PIXELS” 또는 “FREEZE TRANSPARENT PIXELS”로 플레이하는 것을 잊지 마십시오(& psd로 export 것을 잊지 마십시오! Photoshop 또는 Maya 에서 알파를 추출하려면 PSD 파일 속성을 “알파로 사용”으로 설정하기만 하면 됩니다. “투명성”으로)
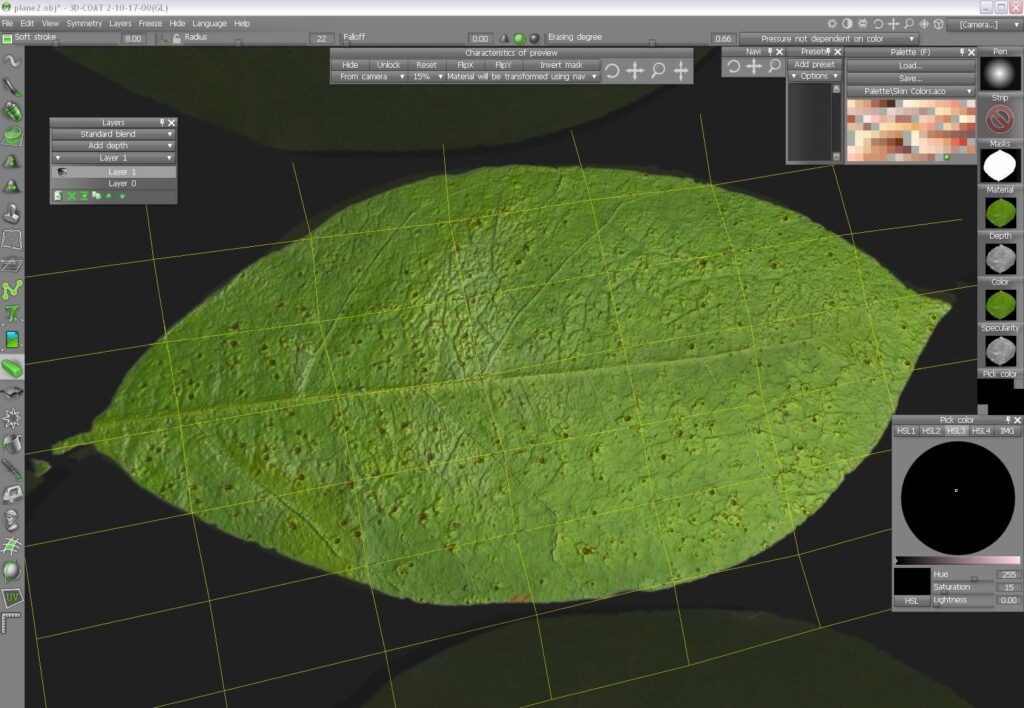
나뭇잎은 단 한 번의 획으로 칠해졌습니다(마스크 텍스처와 재질: 높이, 색상 및 거칠기가 있음에 유의하십시오).