 Magyar
  English
 Українська
 Español
 Deutsch
 Français
 日本語
日本語 Русский
 한국어
한국어 Polski
 中文 (中国)
 Português
 Italiano
 Suomi
Suomi Svenska
 中文 (台灣)
 Dansk
Dansk Slovenčina
 Türkçe
 Nederlands
 ไทย
ไทย हिन्दी
 Ελληνικά
 Tiếng Việt
 Lietuviškai
 Latviešu valoda
 Eesti
Eesti Čeština
 Română
 Norsk Bokmål
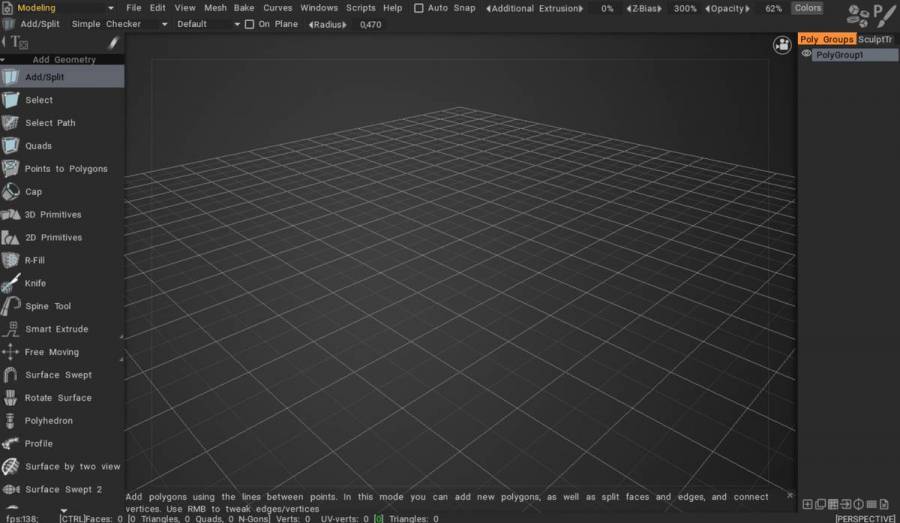
A 2021+ sorozathoz új modellező szoba került egy klasszikus alacsony poliszintű modellező eszközkészlettel.
A Retopo szobának és a modellező szobának különböző feladatai vannak, és különböző eszközei vannak.
– A Retopo helyiséget úgy tervezték, hogy alacsony polietilén hálót hozzon létre egy faragatlan háló alapján.
– A modellező helyiséget később alakították ki, és alacsony poli háló modellezésére szolgált, faragott háló nélkül.
Új paradigma bevezetése: Kezdje a Fast Low-poly modellezéssel az alapformához, majd készítsen egy Sculpt Mesh-t alfelosztással, és adjon hozzá részleteket a Sculpt szobában:
A Modeling munkaterület csupán egy kiterjesztése a Retopo Workspace-nek, amely már sok polimodellező eszközzel rendelkezett, így a felhasználó, ha akart, megfelelő mennyiségű modellezést végezhetett a 3DCoat-on belül.
Az új modellező munkaterület csak ebből épül fel, és ez még csak a kezdet. A Boolean-okkal valószínűleg a megjelenés után valamikor foglalkozni fognak.
Modellező eszközök oktatóanyagok
Ebben a videóban a szintén látható low-poly ketrec élőben felosztott változatát láthatjátok.
– Hogyan lehet aktiválni ezt a módot?
– Yousung: Ez az opció a Modellezőteremben és a Retopo szobában aktiválható.
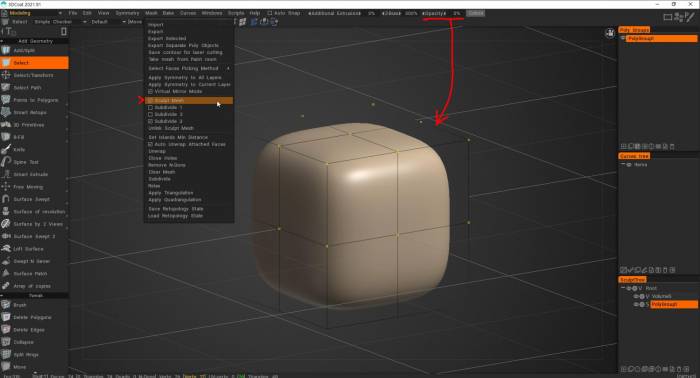
Használhatja, ha bejelöli a Sculpt Mesh elemet a felső Háló menüben.
Ha munka közben szeretne Sculpt Mesh-re váltani, nyomja meg a Sculpt Mesh leválasztása gombot.
Ha a polimodellt a videóhoz hasonlóan átlátszóan szeretné látni (ha csak a Sculpt hálót szeretné látni), egyszerűen csökkentse az Opacity értéket felül.
Miért hívják ezt “unlink sculpt mesh”-nek | írta Fluffy
Csak hogy tisztázzuk, az Unlink Sculpt Mesh egy (nagyon hasznos) módszer arra, hogy alacsony poliszintű modelljét a modellező/ retopo szobából a szobrászszobába vigye. Ezen túlmenően, mivel bármely modell, amelyet a modellező szobában készít, egyidejűleg létezik a retopo szobában is, használhatja az Import> Kiválasztás a Retopo menüpontot is.
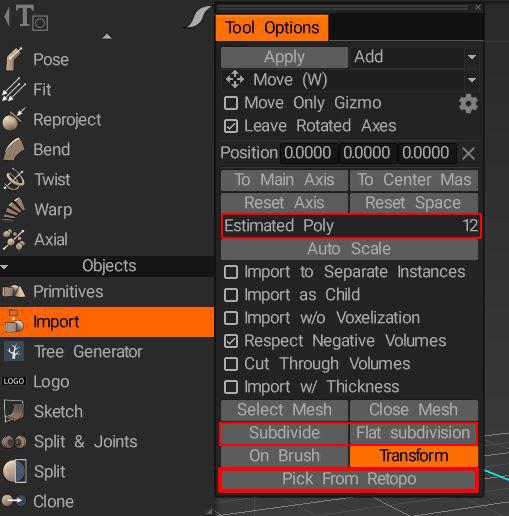
A felosztás és a lapos felosztás opciókkal növelheti a háló felbontását az import előtt. Az Estimated Poly segítségével megtudhatja, milyen sűrű lesz az objektum felbontása (felületi vagy voxel módban).
Ami a Voxel és a Felszíni mód közötti különbséget illeti, mivel a voxelek “térfogatképpontok”, amikor Voxel módban dolgozik, egyáltalán nem geometriával dolgozik, és a látott objektum csak egy a voxelek geometriai közelítése, amikor manipulálod őket, olyan, mint egy óriási 3D-s voxelmátrix, amelyet be- és kikapcsolsz, hogy 3D-s alakzatokat hozz létre, tehát minél nagyobb a voxelréteg felbontása, annál finomabb lehet az alak, de következésképpen annál inkább sokszögre van szükség az alakzat pontos közelítéséhez. Ezzel szemben Felszín módban csúcsokkal és sokszögekkel dolgozik. A Felszíni módú ecsetekben elérhető Automatikus felosztás opció használatával további finom részleteket adhat hozzá az objektum egyes részeihez anélkül, hogy növelni kellene a teljes objektum felbontását.
A voxelek rendkívül hasznosak az alakzatok blokkolására, az organikus modellezés és a logikai értékek végrehajtása pedig hibátlan a geometriával való munkavégzéshez képest, de az éles élek és a finom részletek megtartásához elég nagy felbontásra van szükség, amely több millió polinak felel meg, tárgyonként. Igyekszem a lehető legtovább voxel módban maradni (valószínűleg néha túl sokáig), és csak akkor váltok felület módra, ha finom részleteket akarok hozzáadni, vagy éleket és sarkokat szeretnék élesíteni. Finom részletek és kemény élek azok, ahol a Felszíni mód kiváló.
Hogyan készítsünk hajómodellt a semmiből a 3DCoat segítségével. TimeLapse.
Low-Poly modellezés Live Smooth funkcióval
Teljes 3D modellező csővezeték
Bevezetés a sokszögmodellezésbe
Gyorsan alakítható csővezeték sokszögmodellezéssel és új Brush .
Gyorsan formáló csővezeték: sokszögű modellezés
Hozzon létre egy Sculpt Mesh-t felosztással poli hálóból:
Hozzon létre egy Sculpt Mesh-et egy polihálóból
Ez a videó a 3DCoat 2021 teljes modellezési folyamatát mutatja be, beleértve a sokszögmodellezést és a PBR textúrát: Referenciaalapú sokszögmodellezést .
Ez a videó a 3DCoat 2021 néhány új modellező eszközének egyszerű bemutatásával kezdődik, amelyek közül néhány Curve-alapú:
Modellezőeszközök Demo sorozat s
Ez a videó 2 új eszköz használatát mutatja be a Modellezőteremben importált .iges görbék segítségével (az .iges görbék export/ import szükséges extra modul a 3DCoat 2021 megjelenése után lesz elérhető): . Surface by Two Views & Surface Loft. .IGES görbék használata .
Kérdés: Az élő felosztás kipróbálása és a szimmetria aktiválása és az extrudálás után a szimmetria nincs jelen a felosztott eredményben. Hogy-hogy?
Válasz: Ha a szimmetriát használja a Modellezőteremben, úgy tűnik, hogy szimmetrikusan működik a nézetablakban, de valójában a létrehozása előtti állapotban van.
A Mesh-Virtual Mirror Mode miatt szimmetrikus másolást kell végrehajtania a Polygroups-ból.