 Svenska
  English
 Українська
 Español
 Deutsch
 Français
 日本語
日本語 Русский
 한국어
한국어 Polski
 中文 (中国)
 Português
 Italiano
 Suomi
Suomi 中文 (台灣)
 Dansk
Dansk Slovenčina
 Türkçe
 Nederlands
 Magyar
 ไทย
ไทย हिन्दी
 Ελληνικά
 Tiếng Việt
 Lietuviškai
 Latviešu valoda
 Eesti
Eesti Čeština
 Română
 Norsk Bokmål
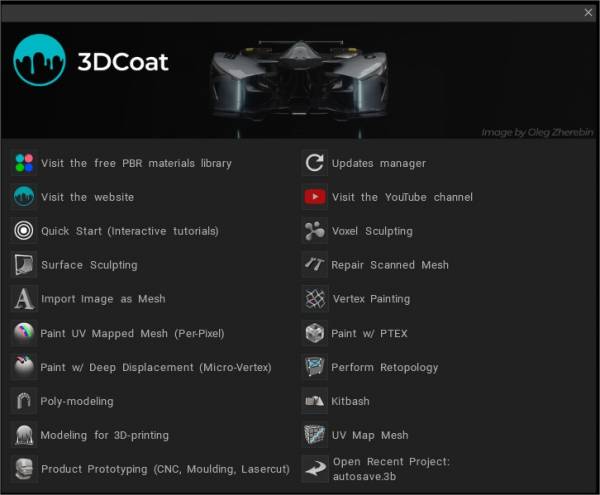
När du först startar 3Dcoat, visas en öppningsdialogruta som försöker kategorisera och förutse vad du vill göra med programmet (om det är stängt, använd Skift+M för att öppna det igen).
Vi kommer att förklara och förtydliga syftet med vart och ett av dessa alternativ.
Splash Screen, UI & Navigation
Besök PBR biblioteket
Teamet bakom 3DCoat är glada över att presentera vårt bibliotek med skannade PBR-färdiga smarta material.
Uppdateringshanterare
Automatisk inkrementell uppdatering! “Hjälp→ Uppdateringshanterare” gör det möjligt att få nya uppdateringar utan att hela installationsprogrammet laddas ner. Endast ändrade filer kommer att laddas ner. Alla versioner är installerade i samma mapp, 3DCoat-2021, versioner kan enkelt och snabbt bytas om det behövs. Så snart en ny uppdatering visas kommer meddelandet att meddela dig efter att du har öppnat 3DCoat.
Efter det första samtalet skapar AutoUpdater länken i StartMenu. Så du kommer att kunna använda AutoUpdater även efter att du har bytt till versioner när det inte stöddes. I det här fallet kan du anropa det från startmenyn istället för Hjälp→ Uppdateringshanterare.
I inställningarna kan du säga att du bara får meddelande om stabila uppdateringar. Och du kan stänga av aviseringar om det behövs.
Besök webbplatsen
Besök Youtube-kanalen
Snabbstart (Utbildningsuppdrag)
Starta de interaktiva handledningarna . Snabbstartsutbildningsuppdrag är tillgängliga från startskärmen i 3DCoat, samt några andra alternativ för nya användare att komma igång.
Voxel Skulptering
Börja skulptera inom 3DCoat med hjälp av några standardformer eller välj att öppna en .obj -fil som kommer att fungera som en “bas” som kommer att “Voxeliseras” med en upplösning som du kan bestämma genom att ändra storlek på objektets förhandsvisning med en “Gizmo”.
Ytskulptering
Använd den här Import för att välja ett “basnät” som ska ändras omfattande med 3DCoats stora arsenal av ytbaserade och Live-Clay-verktyg (dynamisk tessellation).
Anta att du vill Export en version av din skulptur som kommer att renderas eller animeras i en applikation från tredje part. I så fall måste du först skapa en organiserad topologi i Retopo rummet – och om du vill strukturera denna modell innan du exporterar, måste du skapa “UV sömmar” och “packa upp” din topologi till en resulterande UV karta – följt av “Baking” dina “Retopo Groups” i färgrummet.
Reparera skannat nät
Använd dessa alternativ för (högupplösta) maskor som är en produkt av att skannas.
Import som voxlar: Mycket enkel översättning av en polygonal ytskanning till ett volymbaserat Voxel objekt. Beroende på ditt val kommer 3DCoat att försöka stänga små eller alla hål i skanningen innan den “importeras” till Voxel rummet för ytterligare rengöring och modifiering.
Import som skal: Samma som ovan, förutom att resultatet, som det visas i Voxel rummet, är ett “ihåligt” objekt med betecknad “tjocklek”.
Import som yta: Levererar ditt nät direkt till “Surface Mode”, där utbudet av verktyg är optimalt för att rensa upp skannade nät.
Import som basrelief: Import ditt nät till Sculpt Room som en initial “Bas-Relief”-skulptur.
Rengöring av 3D-skanning : Den här videon börjar demonstrationen av hur man städar upp en 3D-skanning.
Import bild som mesh
Ger en omfattande uppsättning alternativ för att importera din modell till Paint Room, vilket gör den redo för Vertex Painting.
Alternativen i öppningsdialogrutan tillåter viss preliminär texturering med bildkartor som bas för slutliga strukturkartor för bump, stencil och färg (tillgänglig för export och användning inom tredjepartsprogram).
Höjdkartalandskap för spelmotorer : Denna handledning visar hur man skapar ett nät från en svartvit höjdkarta och färgstruktur om du har det, retopo det och måla på texturer, färger och fina bumpdetaljer, etc. Av Psionic Games.
Vertex Painting
Ladda ett nät som du vill använda “Vertex Color” som utgångspunkt.
Perfekt för när du vill måla ett medium/högt polygonalt nät utan UV mapping . Konceptualisera dina färger och glanskartor. Vertex-kartorna kan exporteras som sådana med nätet eller bakas till en bildkarta om du vill.
Om du import nätet för vertexmålningen och den har texturer kommer alla att appliceras på nätet (färg, glans, metall, förskjutning)
Måla UV mappat nät (Per-Pixel)
Öppna och Import ditt befintliga nät till Paint Room för texturering med metoden “Per-Pixel “.
Idealisk för låga polyspeltillgångar men inte begränsat till dessa.
Använd modeller med befintlig UV information eller import, så att 3DCoat automatiskt UV kartlägger ditt nät.
En befintlig “Normal karta” kan användas som bas för texturering.
Måla med Ptex
Slå ihop en modell från ett urval av standardmaskor eller använd en modell som du väljer för texturering med Ptex -metoden.
Ptex möjliggör texturering med en optimal fördelning av ytutrymme, vilket skapar en helt annan typ av UV karta. Även om den här typen av kartor kan översättas och kommuniceras till applikationer från tredje part (UV kartor kan läsas korrekt), kan den inte praktiskt redigeras i en traditionell “Paint”-applikation som andra typer av UV kartor tillåter.
Måla över modellen med djup förskjutning (Micro-vertex)
Välj att “Import” ett nät och välj alternativet Initial Subdivision för Painting och texturering med metoden “Micro-Vertex”.
Den här metoden låter dig definiera ett Viewport Mesh som är en uppdelad version av ditt importerade basnät.
Painting producerar automatiskt “riktig” förskjutning om “Djup”-ikonen är aktiverad och Visa > Visa förskjutet nät är påslaget.
Vid Export av ditt texturerade Viewport Mesh kan du också spara dess motsvarande förskjutningskarta (vanlig eller vektor).
Du kan också välja att bara export basnätet (som det var innan du justerade dess Viewport Density) eller samma mesh med någon annan uppdelad densitet.
Utför Retopologi
Import ditt nät direkt till Retopo Workspace för att justera befintlig topologi eller skapa en ny version med all ny topologi.
Retopo Workspace tillhandahåller också verktygen för att skapa UV sömmar och tillfälliga UV kartor, samt lägga ut ny topologi.
Arbetet som du utför i Retopo Workspace blir “permanent” vid den tidpunkten när du “bakar” “Retopo Groups” i Paint Workspace för texturering.
När du har gjorts permanent kan du utföra omfattande justeringar av dina UV kartor inom UV arbetsytan med hjälp av dess djupa mapping och layoutverktyg.
Poly modellering
Nytt modelleringsrum med en klassisk lågpoly-modelleringsverktygssats tillkom.
Nytt paradigm introducerat: Börja med Fast Low-poly-modelleringen för basformen, gör sedan ett Sculpt Mesh med Subdivision och lägg till detaljer i Sculpt-rummet:
Modelleringsarbetsytan är bara en förlängning av Retopo Workspace, som redan hade många polymodelleringsverktyg, så att användaren kunde göra en hel del modellering inom 3DCoat om de ville.
KitBash
Använd den här arbetsytan för att sammanfoga delar som kan fästas och länkas till varandra, som “lego”:
Ett nytt bibliotek med Splines har lagts till: Splines är en uppsättning flexibla objekt som kan sträckas med verktyget Curves eller Snake.
Modellering för 3D-printing
Öppna och korrigera den befintliga modellen eller skapa en ny från grunden. Observera att i utskriftsläget är scenen Z-upp. Om du vill ändra det senare kan du göra det i Redigera → Inställningar.
Du kan använda vår kostnadsfria produkt 3DCoat Print
– 3D-utskriftsvänligt läge i startminiatyren.
UV Map Mesh
Import ditt nät direkt till UV Workspace, Tweak Workspace, Objektpanel och Paint Workspace samtidigt.
Du kan välja att omorganisera befintliga UV kartor, skapa nya UV kartor, “justera” befintlig geometri och börja texturera ditt importerade nät med det här alternativet.
Produktprototyper (CNC, gjutning, Lasercut)
Använd höjdkartabilder för att konstruera ett Voxel objekt, ta bort underskärningar från ett importerat nät, stäng hål i ett importerat nät, “Import” ditt basnät till Sculpt Workspace som en “Bas-Relief”-skulptur eller förbered ditt “Importerade” nät för laserskärningsoperationer med denna uppsättning alternativ.
Öppna Senaste projekt
Välj det här alternativet för att öppna det listade “senaste” projektet som du har arbetat med.
Handledningar
Mannequin Model Preset : Den här videon täcker användningen av den nya Mannequin Model-förinställningen i 3DCoat (tillgänglig i byggnaden enligt nuvarande 3.7.12E) och dess underkomponenter tillgängliga i Models Pallet.
Gamla startskärmsalternativ Den här videon börjar en serie som visar möjligheten att börja direkt med specifika uppgifter via startskärmen. De punkter som tas upp eller berörs i den här videon är:
1) Voxel Sculpting eller Surface Mode Sculpting … vad är skillnaden, och vad är en Voxel, egentligen?
2) LiveClay: bara en kort förklaring och demonstration.