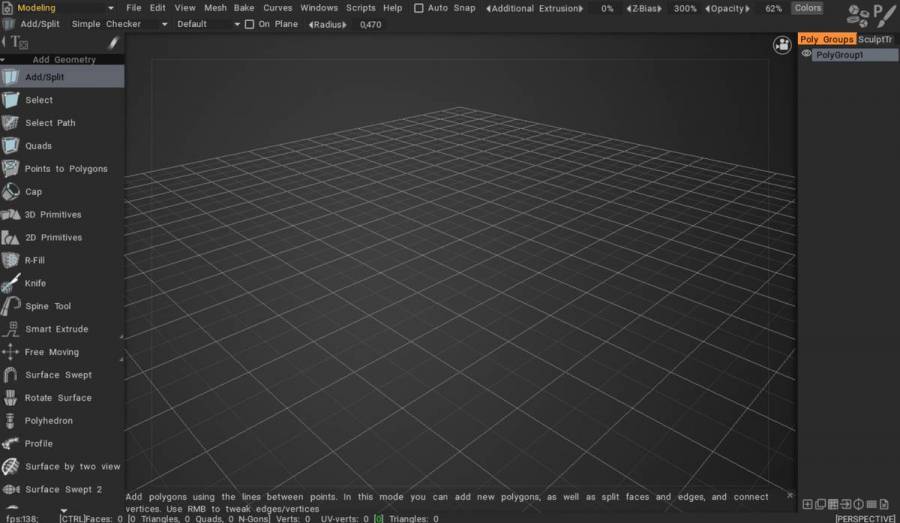
Modeler is a powerful room that allows you to edit polygons, edges and vertices, opening up new possibilities in the area of Hard Surface Modeling.
It is very similar to the Retopo room but the snapping to the surface is turned off by default.
- Modeler is ideal for low-poly modeling.
- You can edit polygons, edges, and vertices.
- Dynamic Subdivision enhances your modeling possibilities.
- Experiment with the different features to get the most out of it.
Start from the primitives tool, then continue with the SELECT tool to modify verts/edges/faces. Pay attention that tools list is very dependent on the current mode of selection: vertices, edges or faces.
Retopo room and modeling room have difference task and have same tools.
– The Retopo room is designed to create a low poly mesh based on a sculpt mes
– The Modeling room was created later and intended for modeling a low poly mesh without a sculpt mesh. This addition introduced a new paradigm on 3DCoat:
Start with the Fast Low-poly modeling for the base form, then make a Sculpt Mesh with Subdivision and add details in the Sculpt room.
The Modeling workspace is merely an extension of the Retopo Workspace, which already had a lot of polymodeling tools, so the user could do a fair amount of modeling within 3DCoat, if they wanted to.
The new modeling workspace just builds off of that, and it is just the start. (Booleans will likely be addressed at some point after the release)

Modeling toolset specification by tool
Live-subdivided version of the also visible low-poly cage
– How do you activate that mode?
– Yousung: This option can be activated in Modeling Room and Retopo Room.
You can use it by checking Sculpt Mesh in the upper Mesh menu.
If you want to switch to a Sculpt Mesh while working, press Unlink Sculpt Mesh.
If you want to see the poly model transparently like the video (if you want to see only the Sculpt mesh), just lower the Opacity value at the top.

Why its called “Convert to sculpt mesh” | by Fluffy
Just to clarify, Convert to Sculpt Mesh is one (very useful) method of getting your low poly model from the modeling/retopo room to the sculpting room.
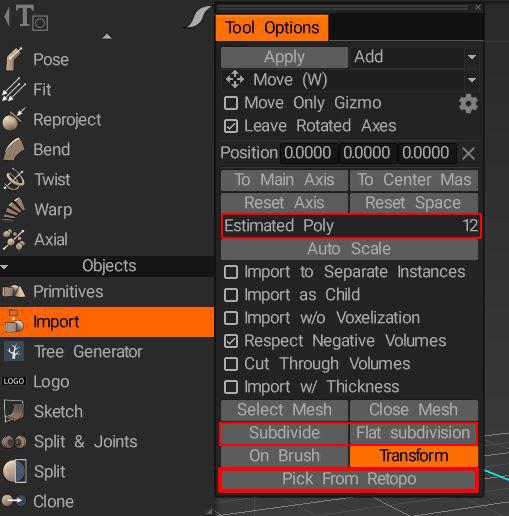
Additionally, since any model you make in the modeling room also exists simultaneously in the retopo room, you can use Import>Pick From Retopo as well.
The subdivide and flat subdivision options can be used to increase your mesh resolution before import. The Estimated Poly lets you know how dense the resolution of your object will be (in surface or voxel mode).
As far as the difference between Voxel and Surface mode goes, essentially, since voxels are “volumetric pixels” when you’re working in Voxel mode, you aren’t working with geometry at all, and the object you’re seeing is just a geometric approximation of the voxels as you manipulate them, kind of like a giant 3D matrix of voxels that you turn on and off to create 3D shapes, so the higher the resolution of the voxel layer the more refined that shape can be but consequentially the more polygons it will take to approximate that shape accurately.
Conversely, you work with vertices and polygons in the Surface mode.
Using the Auto-Subdivide option available in many of the Surface mode brushes, you can add additional fine details to parts of an object without having to increase the resolution of the entire object.
Voxels are extremely useful for blocking out shapes, and organic modeling and performing booleans with them is flawless in comparison to working with geometry, but to retain any sharp edges or fine details, you need a fairly high resolution which can equate to millions of polys, per object.
I try to stay in voxel mode as long as possible (probably a little too long at times) and only switch to surface mode once I want to add fine detail or sharpen edges and corners.
Fine details and hard edges are where Surface mode excels.
Tutorials
Low poly-modeling for beginners: The video series demonstrates the beginner’s guide to the Modeling Room in 3DCoat. The video tutorial are courtesy of Ian Thompson.
How to Create a Ship Model from Scratch using 3DCoat. TimeLapse.
Low-Poly Modeling for Beginners: Curves
Low-Poly Modeling with Live Smooth
Full 3D Modeling Pipeline
Intro to Polygon Modelling
Fast sculpting pipeline using Polygonal Modeling and a New Brush engine.
Fast Sculpting Pipeline: Polygonal Modeling
Create a Sculpt Mesh with Subdivision from a Poly mesh:
Create a Sculpt Mesh from a Poly mesh
This video demonstrates the full modeling pipeline in 3DCoat 2021, including Polygonal modeling & PBR Texturing: Reference-based Polygonal Modeling.
This video begins with a simple demonstration of a few of the new Modeling tools in 3DCoat 2021, some of which are Curve-based:
Modeling Tools Demo series
This video demonstrates the use of 2 new tools in the Modeling room with the help of imported .iges curves (the extra module for export/import of .iges curves will be available after the 3DCoat 2021 release): . Surface by Two Views & Surface Loft. Use of .IGES Curves.
Question: Trying out the live subdivision, and after activating symmetry and extruding, the symmetry is not present in the subdivided result. How come?
Answer: When you use Symmetry in Modeling Room, it appears to be working symmetrically in the viewport, but it is actually in a state before it was created.
Because of Mesh-Virtual Mirror Mode, you must do Symmetry Copy from Polygroups.
