 Čeština
  English
 Українська
 Español
 Deutsch
 Français
 日本語
日本語 Русский
 한국어
한국어 Polski
 中文 (中国)
 Português
 Italiano
 Suomi
Suomi Svenska
 中文 (台灣)
 Dansk
Dansk Slovenčina
 Türkçe
 Nederlands
 Magyar
 ไทย
ไทย हिन्दी
 Ελληνικά
 Tiếng Việt
 Lietuviškai
 Latviešu valoda
 Eesti
Eesti Română
 Norsk Bokmål
The Curves editor can be open in all workspace.
How to activate curves editor.
- Use E key and select curves mode or activate using this menu. You can also activate curves editor by using key Q.
- In curves editor use different modes to add and modify curves. Press RMB over the curve to access the curve properties or modify.
- Press ENTER to apply curve for current tool.
- If curve is closed, usually the area will be filled. If it is not closed, the brush will be run along the curve.
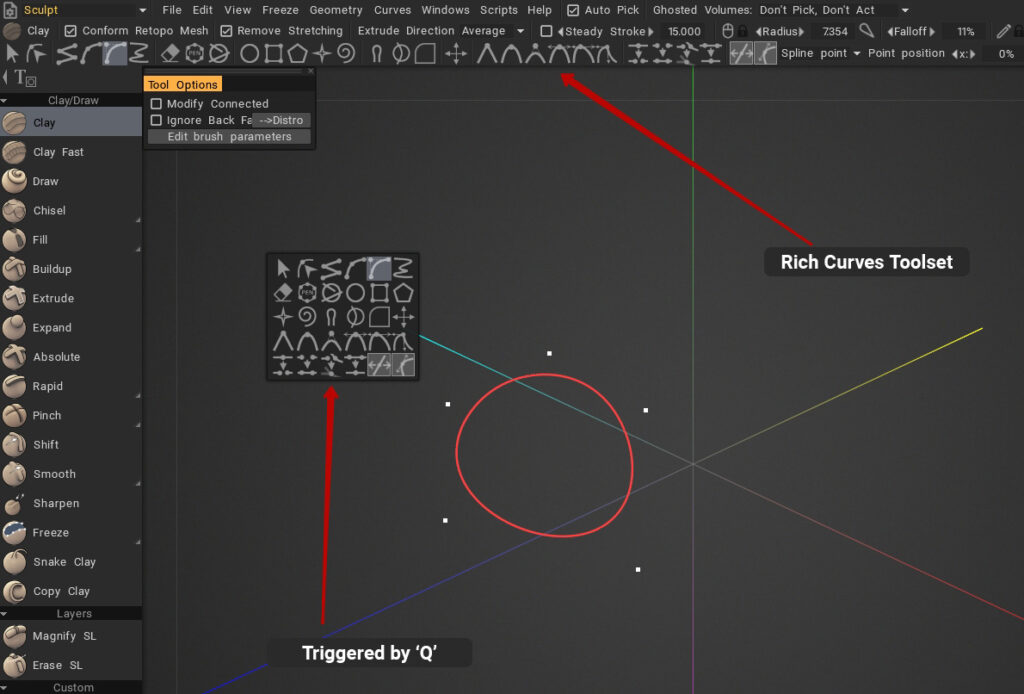
Curves Editor commands
When you open the Curve Editor, a tab is open on the upper viewport showing the curve editor tools.

3DCoat’s curve editor tools allow for vector-based creation of shapes and boundaries, with options to rotate, move, and scale curves.
Key tools include the ability to create different curve types (linear, spline, B-spline), edit points, and transform the entire curve.
The editor can be accessed with the ‘Open Curve Editor’ on Curves Menu or the ‘Q’ key for quick options, and curves are finalized by pressing ‘Enter’.
First six commands

The six tools -from left to right- have expanded options for better creation/manipulation.
They are:
- Select and manipulate the entire curve: Use SHIFT and CTRL to add/subtract selection. Hover the entire curve with a rectangle to select. If part of the curve will be outside the rectangle, the curve will not be selected. Select and drag to move. If you need exact transform, use transform mode.
- Select and manipulate one point or group of points.
Rules of this mode:
- Double click with LMB to insert or remove point.
- Click in space deselects all.
- Selection of points with click or rectangle will be performed only over the selected curve. You may select other curves with a SHIFT click over point.
- RMB over point changes its sharpness/softness, otherwise triggers curve properties.
- Add straight line segments to the curve: Press ESC to start a new curve. Click on the first or last point of the curve to extend it.
- Add spline segments to the curve: Press ESC to start a new curve. Click on the first or last point of the curve to extend it.
- Add bezier segments to the curve: Press ESC to start a new curve. Click on the first or last point of the curve to extend it.
- Add freehand drawn segments to the curve: Click on the first or last point of the curve to extend it. Use SHIFT to relax the last curve, change the speed of relaxing with the “Smoothing” slider.
- Simplification factor: The simplification factor for drawing a free curve. After you draw a free curve, the percentage of points that is specified in this parameter is removed from it.
- Smoothing factor: Smoothing Factor For FreeHand.
The first 4 tools show optional commands to handle vertices.

- Set selected vertices to be sharp.
- Set selected points to default spline behavior.
- Set selected points to be B-spline points.
- Equal tangent splines length handles.
- Parallel tangent splines length handles.
- General independent tangent splines length handles.

The tool General independent tangent splines show drops more options to control how to draw the curve.
The next 3 commands are as following
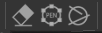
Erase: Erase curves under the pen circle.
Pen Circle: Click to add circle with default parameters.

- Number of sectors: amount of vertices created.
Cut Slice: Click, drag the mouse, release. The cut slice will be transformed to the curve.
The scene must contain a sculpted object and a retopo/modeling mesh in order for this to work correctly.
- Angle: press shift to discrete angle.
- Fixed angle: use fixed angle.
Commands to create specific curves

Add Ellipse: Click to add ellipse with default parameters. Drag to set the custom size. Hold SHIFT to create circle. SHIFT/CTRL click on other primitives to select/deselect.
Add Rectangle: Click to add rectangle with default parameters. Drag to set the custom size. Hold SHIFT to create the square. SHIFT/CTRL click on other primitives to select/deselect.
Add N-Gon: Click to add n-gons with default parameters. Drag to set the custom size. Hold SHIFT to create n-gon in round. SHIFT/CTRL click on other primitives to select/deselect.
Add Star: Click to add star with default parameters. Drag to set the custom size. Hold SHIFT to create star in round. SHIFT/CTRL click on other primitives to select/deselect.
Add Spiral: Click to add spiral with default parameters. Drag to set the custom size. SHIFT/CTRL click on other primitives to select/deselect.
- Select similar: Select objects of similar type and dimensions.
- Same type: Select objects of the same type.
- To regular curve: Convert selected curves to regular curves. It means that curves will not be derived from primitives and you may modify them manually. Generally, if you will add the point manually or move some point manually, the curve will become the regular curve automatically.
Modification tools

- Smudge the curve points: use SHIFT to relax the curve, change the speed of relaxing with the “Smoothing” slider.
- Move the curve points using the brush: Use SHIFT to relax the curve, change the speed of relaxing with the “Smoothing” slider.
- Remove Sharp Corners.
- Apply Symmetry.
Transform: Transform selected curves/points.

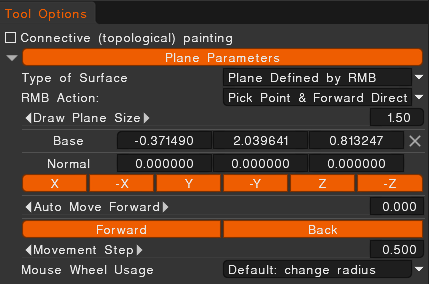
On Plane: Constraint strokes to a plane. Use RMB to define plane. Click the Plane Opt. button to further edit how the plane functions.
Tool for smooth points moving: Please choose curves or points to start. Drag points that are separated from the cursor by a radius distance. As the cursor moves, the points that fall into the action field change.
Tool for smooth points moving by a radius: Please choose curves or points to start. Dragging points are subject to the points that are separated from the cursor by a radius distance when the left mouse button is pressed. As the cursor moves, the points that fall into the field of action do not change.
- Degree: Translate acceleration for smooth points moving.
Modifying vertices

- Set selected vertices to be sharp.
- Set selected points to default spline behavior.
- Set selected points to be B-spline points.
- Joined tangent manipulators.
- Joined tangent rotation angle and extension manipulators.
- Joined tangent rotation angle, w individual extension manipulators.
- Joined tangent w/ individual rotation angle and individual extension manipulators.
Modifying points

- Split point: If the point is linked to another point it will be unlinked, otherwise, the curve will be split into 2 curves at this point.
- Join points: Use it to join 2 curves together, select 2 endpoints, and use join.
- Link several points together: Linked points may be placed on separate curves. After linking they will always be moved together in all operations when there is no contradiction. Use split to unlink.
- Collapse 2 points in one: Points should be sequential on the same curve.
Move vertices: If active, mouse moves vertices.
Move tangents: If active, mouse moves tangent vectors handles.
Options for insert point with double click.

- Spline point: When this item is selected, double-clicking on the curve adds a spline point.
- Sharp point: When this item is selected, double-clicking on the curve adds a sharp point.
- Preserve shape: When this item is selected, double-clicking on the curve adds a sharp point. The curve does not change its shape, but all points of the curve become points with parallel tangents.

Point position: adjust point position on XYZ coordinates. It offset coordinates on X.Y.Z axis.
- Tool for smooth points moving: Please choose curves or points to start. Drag points that are separated from the cursor by a radius distance. As the cursor moves, the points that fall into the action field change.
- Tool for smooth points moving by a radius: Please choose curves or points to start. Dragging points are subject to the points that are separated from the cursor by a radius distance when the left mouse button is pressed. As the cursor moves, the points that fall into the field of action do not change.
- Degree: Translate acceleration for smooth points moving.
Curves Properties with RMB
Pressing RMB menu over created curves on viewport or over the curve layer on Curve Tree to access or modify the curve properties.

Apply Curves Apply the selected Curves.
Save Curve: Save the selected Curve.
Points Extrude.
- Draw real offset: Draw real offset for extruding.
- Make corners sharp: Make corners sharp.
- Reverse curve direction: Invert curve direction.
Duplicate the selected Curve.
Place on Plane
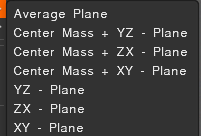
- Average plane
- Center mass + YZ – plane
- Center masss + ZX – plane
- Center mass + XY – plane
- YZ – plane
- ZX – plane
- XY – plane
Curves Operations
- Split Self Intersections: This command adds self-intersection points of the curve. The intersection is also the case if the points on the curves in the space are closer than the intersection tolerance value; by changing which, you can get more or fewer intersection points.
When you select “Split to segments,” you get a subdivision of the curve into successive segments. When you select “Split to clusters,” you get a subdivision of the curve into closed sub-clusters.
- Boolean Operations: This command performs the operations of intersection, union, and subtraction over curves.
First of all, the intersection points of the curves are located, and then the operations are performed. The intersection tolerance regulates the number of intersection points. The intersection is considered to be points lying at a distance less than this value.
- Simplify Curve: This command deletes the curve points so that the new curve is as similar as possible to the original curve.
The number of points is controlled by the parameter “multiplier”, which varies from 0 to 1.
- Remove sharp corners: This tool removes curve angles other than 180 degrees, replacing them with a circular arc of a given radius. If the option “Apply only to selected vertices” is selected, the operation will be performed at all selected vertices of the curve, regardless of the angle. If this option is not selected, then the operation is performed at all vertices of the curve, which the algorithm considers suitable.
- Subdivide Curve: Automatically add vertices to the curve. This command will add one point between every two points of the curve.
- Reverse Curve Direction: Invert curve direction.
Split Sculpt object by Curve: Cutting the model with the curve, applying the bevel. Split and joints may use curves as well.
Make Bevel from Curve: You may do the bevel via the RMB over the curve and look at how the bevel looks in real time.
Brush along curve: Applies brush along the curve with spacing and jitter.
Run brush along projection:
Edit Pressure Profile: Define how pressure will be distributed along the stroke.
Select/Freeze projection area: Select/Freeze area within closed curves projection.
Freeze/Selection to curve:
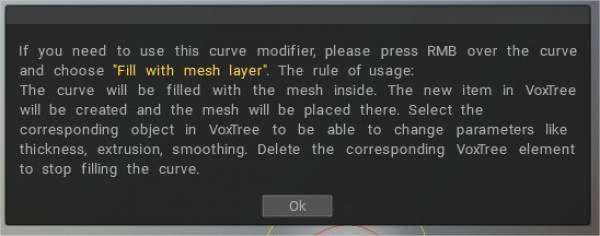
Fill with mesh layer: The curve will be filled with the mesh inside.
The new item in Sculpt Tree will be created, and the mesh will be placed there.
Select the corresponding object in Sculpt Tree to be able to change parameters like thickness, extrusion, and smoothing.
Delete the corresponding Sculpt Tree element to stop filling the curve.
Attach tube or models array: A pipe will be created alongside the curve.
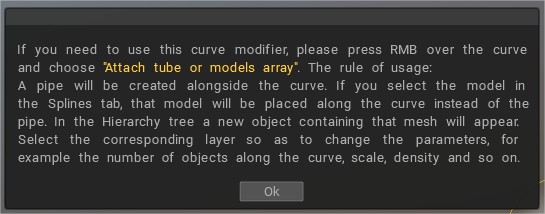
To add new geometry over the mesh’s surface > Select Tube/Array tool. Draw a curve and choose Attach tube or models array.
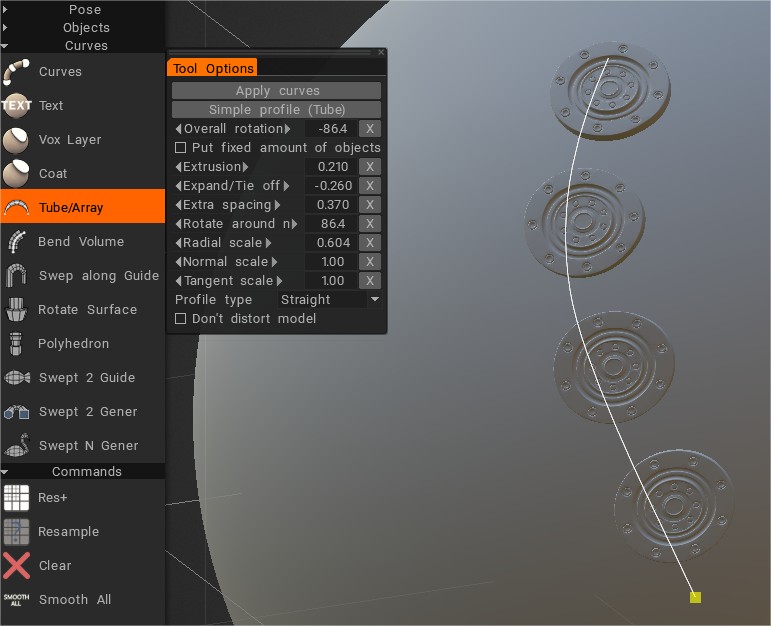
Splines and also Sculpt models can be used to fill with new geometry (attach tube or models array).
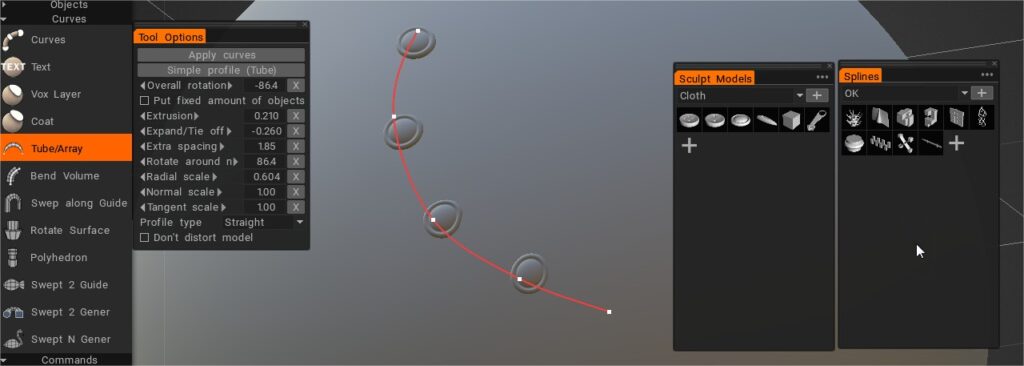
If you select the model in the Splines tab, that model will be placed along the curve instead of the pipe. In the Hierarchy tree, a new object containing that mesh will appear. Select the corresponding layer so as to change the parameters, for example, the number of objects along the curve, scale, density, and so on.
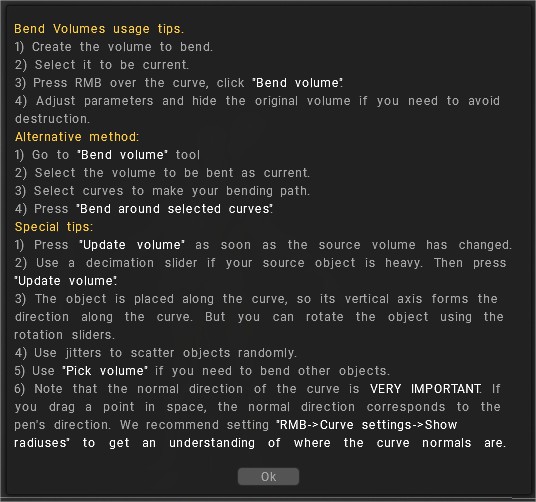
Bend Volume: Bend the object around the curve.
Bend Volume: Bend the object around the curve.
Sweep profile along Guide Curve: The sweep profile will be along the selected Guide Curve. After the “Tool Options” dialog appears,
You need select profile-curve. The new item in Sculpt tree will be created, and the mesh will be placed there.
Select the corresponding object in Sculpt tree to be able to change parameters like thickness, Angle, Twist-Angle, etc.
Delete the corresponding Sculpt tree element to stop filling the curve.
You can vary the curve shape using the option “Use Profile Graph”.
Create Rotate Surface: The Rotate surface will be generated by revolution of the selected profile around the selected curve-axis.
After the “Tool Options dialog” appears, you need to select the curve axis.
The new item in Sculpt tree will be created, and the mesh will be placed there. Select the corresponding object in Sculpt tree to be able to change parameters like thickness, Angle, twist angle, etc. Delete the corresponding Sculpt tree element to stop filling the curve.
Create Polyhedron: The Polyhedron will be generated by revolution and moving the selected profile around the selected curve-axis. After the “Tool Options dialog” appears, you need to select the curve axis.
The new item in Sculpt tree will be created, and the mesh will be placed there. Select the corresponding object in Sculpt tree to be able to change parameters like thickness, Quantity of facets, and smoothing.
Delete the corresponding Sculpt tree element to stop filling the curve.
Create Swept Surface 2 Guide:
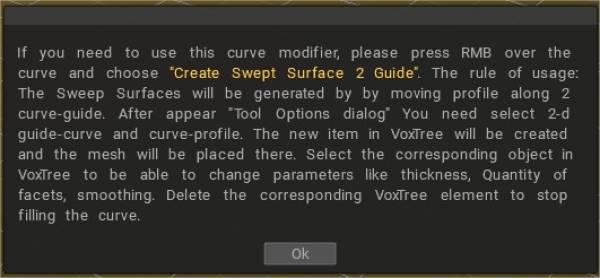
The Sweep Surfaces will be generated by moving the profile along two curve-guide. After the “Tool Options dialog” appears, you need to select 2-d guide-curve and curve-profile.
The new item in Sculpt Tree will be created, and the mesh will be placed there. Select the corresponding object in Sculpt Tree to be able to change parameters like thickness, Quantity of facets, and smoothing. Delete the corresponding Sculpt Tree element to stop filling the curve.
You also can vary the curve shape using the option “Use Profile Graph”.
Create Swept Surface 2 Geners: The Sweep Surface will be generated by moving of 2 profiles along the selected guide curve. After the “Tool Options dialog” appears, you need select curve-profile.
The new item in Sculpt Tree will be created, and the mesh will be placed there. Select the corresponding object in Sculpt tree to be able to change parameters like thickness, Quantity of facets, and smoothing. Delete the corresponding Sculpt tree element to stop filling the curve.
Create Swept Surface N Geners: The Sweep Surfaces will be generated by moving N profiles along two curve-guide.
After the “Tool Options dialog” appears, you need select 2-d guide and curve profiles. The new item in Sculpt tree will be created, and the mesh will be placed there.
Select the corresponding object in Sculpt tree to be able to change parameters like thickness, Quantity of facets, and smoothing.
Delete the corresponding Sculpt tree element to stop filling the curve.
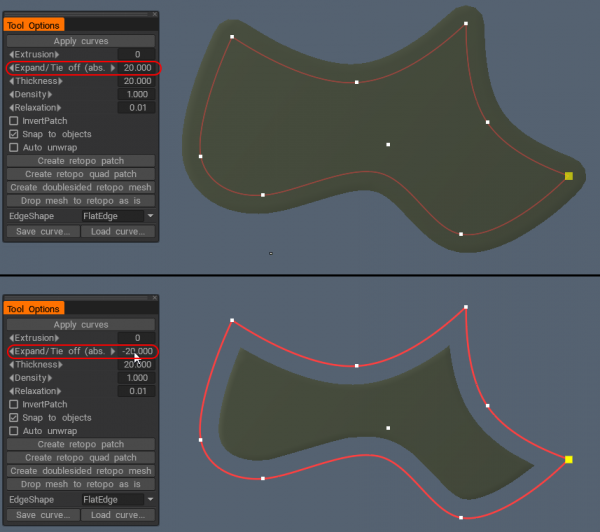
– Now with much better quality of “Expand/tie off” for patches and tubes for curves modifiers.
Snap to surface: Snap curves to the surface.
Curve Settings
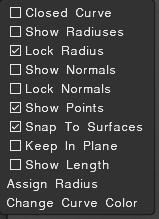
- Closed Curve: Draw a closed curve.
- Show radiuses
- Lock Radius
- Show normals
- Show points
- Snap To Surfaces
- Keep In Plane
- Show length
- Assign radius: Assign the same (current) radius to all points of the curve..
- Change curve color
Delete Item: Delete selected curve.
“Bend volume” tool to bend objects in-scene along the curve added.
Tutorials
Requirements for the model to be used in the Splines panel
- We will go through the steps of how to make a custom knotted rope that can be used with the Curves tool inside of 3DCoat (by Industry Tuts)
Swept Surface 1: Creating a swept surface using one guide curve and one profile curve..
Swept Surface 2: Create a swept surface using two guide curves and one profile curve.
Swept Surface 3: Creating a swept surface using One guide curve and Two profile curves.
Bird 3D: Creating a swept surface using a guide curve and profile curve.
Dolfine 3D: Creating a swept surface using a guide curve and profile curve.
Rotate Surface: Creating a surface of revolution.