• ไทย
  • เอกสาร 3DCoat
  • Chapters
    • รู้เบื้องต้นเกี่ยวกับ 3DCoat
    • เริ่มต้นใช้งาน
    • อินเทอร์เฟซและการนำทาง
    • ส่วนประกอบของ Brush
    • ห้องพื้นที่ทำงาน
    • Scripting และ Core API
    • คำถามและคำตอบ
    • licensing
    • บทแนะนำการฝึกอบรม
  • Pilgway
  • Products
    • 3DCoat
    • 3DCoatTextura
    • 3DCoatPrint
    • PBRLibrary
  • Blog Posts
  • Store
  • ไทย ไทย
    • English English
    • Українська Українська
    • Español Español
    • Deutsch Deutsch
    • Français Français
    • 日本語 日本語
    • Русский Русский
    • 한국어 한국어
    • Polski Polski
    • 中文 (中国) 中文 (中国)
    • Português Português
    • Italiano Italiano
    • Suomi Suomi
    • Svenska Svenska
    • 中文 (台灣) 中文 (台灣)
    • Dansk Dansk
    • Slovenčina Slovenčina
    • Türkçe Türkçe
    • Nederlands Nederlands
    • Magyar Magyar
    • हिन्दी हिन्दी
    • Ελληνικά Ελληνικά
    • Tiếng Việt Tiếng Việt
    • Lietuviškai Lietuviškai
    • Latviešu valoda Latviešu valoda
    • Eesti Eesti
    • Čeština Čeština
    • Română Română
    • Norsk Bokmål Norsk Bokmål
  • Creating 3D Character Using 3DCoat
Expand All Collapse All
  • รู้เบื้องต้นเกี่ยวกับ 3DCoat
  • เริ่มต้นใช้งาน
    • System requirements
    • Why 3DCoat is Unique?
    • การเปิดใช้งาน 3DCoat
    • ข้อผิดพลาดในการเริ่มต้น
      • Startup error Mac
    • Color management
    • Upgrading permanent license
    • Linux Setup
      • Linux initial setup per-user installation
      • Linux initial setup for system
      • Tablet setup
      • To GTK3 from GTK2
    • โครงสร้างโฟลเดอร์
      • Custom documents folder
    • รูปแบบต่างๆ ของ “การแก้ปัญหา”
    • Tablet on Window
    • Import และ Export
    • Applinks ใน 3DCoat
      • ลิงค์แอป Blender
        • Blender with the Applink in Linux
      • Blender 4.2/3/4/5 applink
      • Max Applink
      • Houdini applink
      • Lightwave uplink
  • Navigation
    • การเปิดกล่องโต้ตอบ (เมนูเริ่มด่วน)
    • แผงนำทาง
    • กล้องและระบบนำทาง
      • Customize Navigation as Blender
    • Viewport Navigation Gizmo
    • Left tool panel
    •  Activity Bar
    • การนำทางโดยใช้อุปกรณ์ 3DConnexion
      • How to compile Spacenavd on non Ubuntu distro
    • Stylus doesn’t work in sculpting
    • ปุ่มลัด
  • อินเทอร์เฟซและการนำทาง
    • เมนูไฟล์
    • แก้ไขเมนู
      • Calculate Curvature
      • Calculate Occlusion
      • Light Baking Tool
      • การตั้งค่า
    • ดูเมนู
    • สมมาตร
    • Textures
    • Calculate
    • เมนูเลเยอร์
    • เมนูแช่แข็ง
    • Hide
    • Bake
    • เส้นโค้ง 2022
      • เมนูเส้นโค้ง
      • Curves Properties RMB
      • เติมชั้นตาข่าย
      • Scale of imported curves
    • เมนู Windows
      • แผงป๊อปอัพ Windows แบบแท็บ
      • สไลเดอร์
    • Scripts
    • Addons
    • Capture
    • เมนูช่วยเหลือ
    • การปรับแต่ง
    • แก้ไขหรือสร้างห้องใหม่
  • ส่วนประกอบของ Brush
    • แถบด้านบน Brush
    • แปรงใช้งานทั่วไป
      • สร้างแปรงและสติกเกอร์
      • สร้างอัลฟ่าจากการแกะสลักปัจจุบัน
      • สร้าง Brush จากวัตถุ 3 มิติ
      • Create brushes based on Curves
      • Load photoshop .abr brushes
    • จังหวะ
      • เมนูป๊อปอัพเส้นโค้ง
    • ตัวเลือก Brush
    • ตัวจำกัดเงื่อนไข
    • แผงแถบ
    • แผงลายฉลุ
    • วัสดุอัจฉริยะ
      • เพิ่มรูปภาพหรือวัสดุใหม่
      • แนบวัสดุอัจฉริยะเข้ากับเลเยอร์
      • Import Quixel Material
    • วิธีสร้างพรีเซ็ตสำหรับ Brush
  • ห้องพื้นที่ทำงาน
    • Painting
      • Painting พื้นผิวและโหมด
        • Painting Per-Pixel
        • Painting แทนที่ (Micro-Vertex)
        • Ptex Painting
        • Painting พื้นผิว (Polypainting)
      • นำเข้าสู่ห้อง Painting
        • Initial CC subdivision
        • UV Set smoothing
        • Sharp (hard) edge
        • ล็อคค่าปกติ
        • โหลดเค้าโครง UV ใหม่หลังจากการเปลี่ยนแปลงโมเดล
        • DAZ Genesis models into 3DCoat
      • เมนูของพื้นที่ทำงาน Painting
        • Edit menu
        • เมนูพื้นผิว
          • เครื่องมือ Baking พื้นผิว
        • ซ่อน
        • เมนูสำหรับ Bake Paint
        • ตัวเลือกสี
      • แถบด้านบนสำหรับ Painting
      • แผงเลเยอร์
        • แผงผสม
        • Layer and Clipping Masks
      • เครื่องมือห้อง Painting
      • ความทึบ - ความโปร่งใส
      • ปรับแต่งพื้นที่ทำงาน
        • ปรับแต่งชุดเครื่องมือ
        • ส่งออกจากห้องปรับแต่ง
      • แผงแสดงตัวอย่างหน้ากาก/วัสดุ
      • ส่งออกจากห้อง Painting
    • พื้นที่ทำงาน UV
      • แถบด้านบน UV
      • แผงเครื่องมือ UV ด้านซ้าย
      • แผงแสดงตัวอย่าง UV
      • ตัวอย่างขั้นตอนการทำงาน UV
      • นำเข้าห้อง UV
      • ส่งออกจากห้อง UV
    • รีโทโพโลยี
      • นำเข้าสู่ห้อง Retopo
      • เมนู Retopo Mesh และเมนู Bake
        • โหมดกระจกเสมือน
      • Bake menu
        • Treat Poly Groups as Paint Objects
        • Baking guide
      • ท็อปบาร์
        • เลือกรูปทรงเรขาคณิต
      • แผงเครื่องมือด้านซ้ายในห้อง Retopology
        • วัตถุประสงค์และหน้าที่โดยรวม
        • เพิ่มรูปทรงเรขาคณิต
          • เครื่องมือ Strokes ใน Retopology
        • เครื่องมือปรับแต่ง Retopo
        • เครื่องมือ UV
        • คำสั่งสำหรับห้อง Retopology
      • AUTORETOPO
        • Autopo guide
      • โพลีกรุ๊ป
    • ปั้น
      • Sculpt Layer
      • ต้นไม้แกะสลัก
      • ตัวเลือก Sculpt Brush
      • Top Bar
      • เครื่องยนต์ Brush
      • เมนูย่อยเรขาคณิต
      • แกะเมนู “คลิกขวา”
      • เฉดสี
      • โหมด Voxel
        • การแกะสลัก Voxel บริสุทธิ์
        • ความหนาแน่นและความละเอียด
        • เครื่องยนต์ดิน
        • เครื่องมือ Voxel
        • เครื่องมือพื้นผิวบน Voxels
        • เครื่องมือปรับแต่ง Voxel
        • Painting เชิงปริมาตร
        • เครื่องมือวัตถุ Voxel
      • โหมดพื้นผิว
        • เครื่องมือพื้นผิว
        • เครื่องมือปรับแต่งพื้นผิว
        • เครื่องมือปรับพื้นผิว
        • Painting พื้นผิว
        • เครื่องมือวัตถุพื้นผิว
        • ความละเอียดหลายระดับ
          • Multires tools
          • Multires adjust
          • Multires commands
      • ปั้นโค้ง
        • เส้นโค้งสไปลน์
        • Splines model creation
      • การแทนที่เวกเตอร์
      • เครื่องมือแปลงพื้นผิว
        • เครื่องมือแปลง Voxel
        • Instancer
        • Move
        • Pose
        • Fit
        • Reproject
        • Surface Array
      • Voxel Primitives & เครื่องมือ Import
      • บูลีนสด
      • คำสั่งสำหรับห้อง Sculpt
      • Import สู่ห้องแกะสลัก
      • ส่งออกจากห้องแกะสลัก
    • แสดงผล
      • Comparison of different roughness values
      • ฟังก์ชั่น Render Panel
      • จานเสียง
      • อบแสงปลอม - ไม่ใช่ PBR-
    • Factures
      • ขั้นตอนการทำงาน
    • ง่ายที่สุด
    • การสร้างแบบจำลอง
      • Mesh Menu
      • แผงเครื่องมือด้านซ้ายในห้องสร้างแบบจำลอง
        • เพิ่มเรขาคณิต
          • เลือกแล้ว
        • บิด
        • Smart Hybrid
        • UV
          • คำสั่ง
        • ตาข่ายทั้งหมด
      • ตัวอย่างพื้นผิวห้องใต้หลังคาโดย Fluffy
      • การปิดกั้นโดย Poeboi
      • Import Zbrush Polygroups for UV mapping
    • Kitbash - การสร้างโมเดล 3 มิติอย่างรวดเร็ว
      • Create kitbash
      • Left tool panel Kitbash
    • 3DPrint
    • Photogrammetry
      • How to install Reality Capture
      • Reality Capture doesn’t show up ?
    • ตาข่ายถึงห้อง NURBS
    • Nodes
      • Sculpt shaders Nodes Library
  • Scripting และ Core API
    • Scripting
    • Core API
    • ไพทอน API
  • ฟรี 3DCoatPrint

Why 3DCoat is Unique?

1608 views 1

Written by Serhii
July 23, 2025
Interface & Navigation
Workspaces Rooms
Key Features

3DCoat is an advanced 3D creation suite for creating and painting 3D models (available in 70 languages), specializing in such 3D technologies: voxel and polygonal Sculpting , Concept Art Making, various types of Retopology (automatic, manual, and smart with the curves), UV Editing and UV mapping (manually and automatically here and here ), Hand-painting and PBR Texture Painting, Lowpoly modeling, Rendering, Photogrammetry with help of Reality Capture (easy scans cleaning) and has free PBR Library. Only 3DCoat offers the unique in the industry true volumetric painting feature, allowing you to paint a volume and create a 3D texture by adding color to voxels.

Where other applications in this market segment tend to specialize in one specific task, such as Digital Sculpting or Texture Painting, 3DCoat provides a unified pipeline for asset creation and 3D visualizations such as still images.

For instance, you can make a comparative analysis of 3DCoat with other applications by entering “3DCoat vs Zbrush” or “3DCoat vs Substance Painter” in the Google search bar – Google Gemini will give you that analysis. Similarly, you can make an analysis of “3DCoat vs Blender” using ChatGPT.

Additionally, you can create a comparative table using ChatGPT: “3DCoat vs Blender vs ZBrush vs Substance Painter”.

As a result, considering the breadth of pipeline coverage, 3DCoat can be regarded in some sense as the optimum golden mean between Blender, ZBrush, and Substance Painter, offering comprehensive professional capabilities in sculpting, retopology, UV editing, texturing, and photogrammetry with the help of RealityCapture.

Thus, it covers the entire cycle (sculpt → retopo → UV → PBR texturing → export) and in each of these areas, it has no critical failures – everything is at a level suitable for production.

Here is the approximate picture that ChatGPT gave concerning 3DCoat as a golden mean:

Alternatively, 3DCoat can be a valuable and perfect companion for any of the tools mentioned above.

To learn 3DCoat, you can start with AntonTenitsky’s free Intro to 3DCoat playlist.

We also strongly recommend Anton’s Training Course for Beginners, “Intro to 3DCoat: From Noob to Cook”. It’s a great way to learn the basic techniques and get started with 3DCoat. It contains 153 short videos, 1-3 minutes per tool (nearly 8 hours). It makes navigation and studying convenient.

The course is designed to guide you through the fundamental features of 3DCoat, covering key topics like sculpting, manual and auto-retopology, UV mapping, baking texturing, and rendering. The tutorial also bridges the workflow between 3DCoat and Blender, showing how to set up scenes and create camera animations for professional-quality presentations. For those interested in obtaining the course, we have a Special Offer: use the promo code 3DCOAT30 to get a 30% discount. (Note: Gumroad automatically proposes you to leave a tip. However, it’s optional, and you can adjust/remove it before making your payment.)

Videos of latest releases (YouTube channel is here)


Main Technologies Inside 3DCoat:


Texturing (hand-painting and PBR)

  • MicroVertex, Per Pixel or Ptex Painting, and Polypaint approaches.
  • Realtime Physically Based Rendering viewport with HDRL
  • Smart Materials with easy set-up options
  • Multiple Paint Layers. Popular blending modes and Layer groups.
  • Tight interaction with Photoshop.
  • Texture size up to 16k.
  • Fast Ambient Occlusion and Curvature map calculation.
  • Rich toolset for all kinds of painting tasks, and more…
  • PBR texturing is described here
  • Hand painting is described in this article


Digital Sculpting (voxels and surface)

  • Voxel sculpting with no topological constraints
  • Complex boolean operations
  • Vox hide feature
  • Live booleans
  • Soft booleans
  • Dozens of fast and fluid sculpting brushes
  • Adaptive dynamic tesselation
  • Dozens of fast and fluid sculpting brushes
  • More about digital sculpting in this article、

Modeling

  • Classic polygonal modeling is fully supported.
  • Move, Rotate, Scale, Extrude, Inset, and other popular instruments.
  • Full 3d production pipeline became even easier.
  • Splines and Joints – cool way for fast modeling.
  • Kitbash Room is specially designed to perform fast dressing of complex scenes.
  • Use the extensive existing model library, or create your own.
  • Extensive library of primitives.
  • Basic Principles Of Low Poly Modeling

Retopology Tools

  • Auto-retopology (AUTOPO) with user-defined edge loops.
  • Retopology by decimation.
  • Auto Retopology with Instant Meshes addon.
  • Fast and easy-to-use Manual Retopo tools.
  • Smart Retopology toolset
  • Possibility to import reference mesh for retopology
  • Use your current low-poly mesh as your retopo mesh.
  • Retopo groups with color palettes for better management.
  • Advanced baking settings dialog.
  • Library of Retopo models.
  • See more…

UV Mapping

  • Professional toolset for creating and editing UV-sets
  • Auto UV mapping
  • Udim Support.
  • Native Global Uniform (GU) unwrapping algorithm
  • Multiple UV-sets support and management
  • Support ABF, LSCM, and Planar unwrapping algorithms
  • Individual islands tweaking
  • Several checkers views
  • More about UV mapping you can read in this article

Rendering

  • Physically Based Rendering.
  • High Dynamic Range Lighting.
  • Screen Space Reflections and Lights.
  • Renderman support.
  • Multiple colored lights.
  • Render passes.
  • DOF and other effects.
  • Node editor for Environment and Post Effects
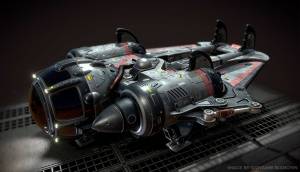
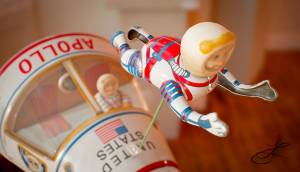
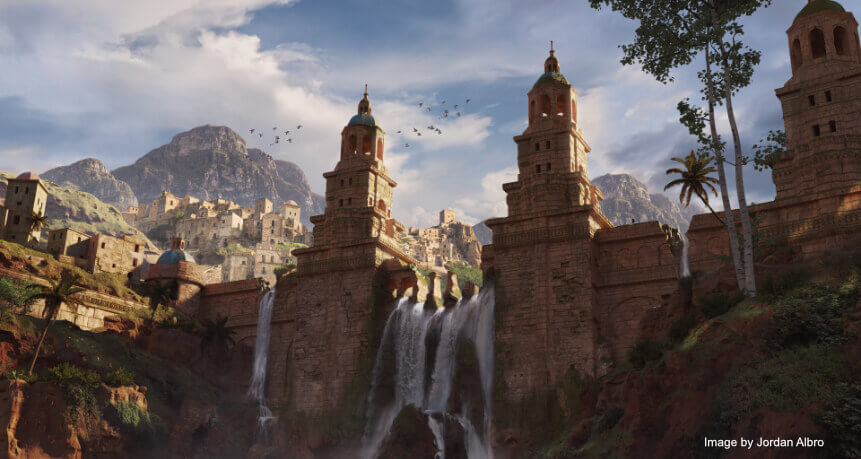
Concept art making

  • 3DCoat really shines when making Concept Arts.
  • With Voxels technology, you don’t need to worry about any technical aspects.
  • Turn your ideas into a great concept in no time

Everything starts with a Concept!
It is very convenient now to use 3d software in concept art production pipeline.
Usually it starts with a rough or detail 3d blocks, separate 3d objects or even complete 3d scenes with later paintover in Photoshop or other 2d image editor.


3DCoat Tutorials

Find more tutorial videos on our YouTube channel

3DCoat YouTube channel

Was this helpful?

1 Yes  No
Related Articles
  • Surface Array
  • Top Bar
  • Curves Properties RMB
  • Left tool panel Kitbash
  • Create kitbash
  • Color management
Previously
System requirements
Up Next
การเปิดใช้งาน 3DCoat
AI:
Hi! How can I help you?
Attention: This is a beta version of AI chat. Some answers may be wrong. See full version of AI chat