• ไทย
  • เอกสาร 3DCoat
  • Chapters
    • รู้เบื้องต้นเกี่ยวกับ 3DCoat
    • เริ่มต้นใช้งาน
    • อินเทอร์เฟซและการนำทาง
    • ส่วนประกอบของ Brush
    • Node System
    • GPU Texturing
    • ห้องพื้นที่ทำงาน
    • Scripting และ Core API
    • คำถามและคำตอบ
    • Licensing
  • Learn
    • Getting Started
    • Painting
    • Sculpt
    • Modeling
    • Retopology
    • UV
    • Smart Materials
    • Nodes
    • Photogrammetry
    • Render
    • Print
    • Learning
    • บทแนะนำการฝึกอบรม
  • Blog
    • 2026 Key Features and Improvements
    • Texturing with nodes
    • Shader Nodes VS. a Material Nodes
    • Multiple UV Tiles/UDIMs to one single UV set ?
    • I want to create geometry only with displacement to be manufactured with a CNC machine
    • Creating 3D Character Using 3DCoat
    • DAZ Genesis models into 3DCoat
    • Cavity and Curvature maps
    • Types of normal maps
    • Texture painting pipeline
    • Load new UV layout After Model Changes
    • Import Zbrush Polygroups for UV mapping
  • Products
    • 3DCoat
    • 3DCoatTextura
    • 3DCoatPrint
    • PBRLibrary
  • Store
  • Pilgway
  • ไทย ไทย
    • ตัวสลับหลายภาษา
    • ตัวสลับหลายภาษา
    • ตัวสลับหลายภาษา
    • ตัวสลับหลายภาษา
    • ตัวสลับหลายภาษา
    • ตัวสลับหลายภาษา
    • ตัวสลับหลายภาษา
    • ตัวสลับหลายภาษา
    • ตัวสลับหลายภาษา
    • ตัวสลับหลายภาษา
    • ตัวสลับหลายภาษา
    • ตัวสลับหลายภาษา
    • ตัวสลับหลายภาษา
    • ตัวสลับหลายภาษา
    • ตัวสลับหลายภาษา
    • ตัวสลับหลายภาษา
    • ตัวสลับหลายภาษา
    • ตัวสลับหลายภาษา
    • ตัวสลับหลายภาษา
    • ตัวสลับหลายภาษา
    • ตัวสลับหลายภาษา
    • ตัวสลับหลายภาษา
    • ตัวสลับหลายภาษา
    • ตัวสลับหลายภาษา
    • ตัวสลับหลายภาษา
    • ตัวสลับหลายภาษา
    • ตัวสลับหลายภาษา
    • ตัวสลับหลายภาษา
    • ตัวสลับหลายภาษา
  • เอกสาร 3DCoat
  • Chapters
    • รู้เบื้องต้นเกี่ยวกับ 3DCoat
    • เริ่มต้นใช้งาน
    • อินเทอร์เฟซและการนำทาง
    • ส่วนประกอบของ Brush
    • Node System
    • GPU Texturing
    • ห้องพื้นที่ทำงาน
    • Scripting และ Core API
    • คำถามและคำตอบ
    • Licensing
  • Learn
    • Getting Started
    • Painting
    • Sculpt
    • Modeling
    • Retopology
    • UV
    • Smart Materials
    • Nodes
    • Photogrammetry
    • Render
    • Print
    • Learning
    • บทแนะนำการฝึกอบรม
  • Blog
    • 2026 Key Features and Improvements
    • Texturing with nodes
    • Shader Nodes VS. a Material Nodes
    • Multiple UV Tiles/UDIMs to one single UV set ?
    • I want to create geometry only with displacement to be manufactured with a CNC machine
    • Creating 3D Character Using 3DCoat
    • DAZ Genesis models into 3DCoat
    • Cavity and Curvature maps
    • Types of normal maps
    • Texture painting pipeline
    • Load new UV layout After Model Changes
    • Import Zbrush Polygroups for UV mapping
  • Products
    • 3DCoat
    • 3DCoatTextura
    • 3DCoatPrint
    • PBRLibrary
  • Store
  • Pilgway
  • ไทย ไทย
    • ตัวสลับหลายภาษา
    • ตัวสลับหลายภาษา
    • ตัวสลับหลายภาษา
    • ตัวสลับหลายภาษา
    • ตัวสลับหลายภาษา
    • ตัวสลับหลายภาษา
    • ตัวสลับหลายภาษา
    • ตัวสลับหลายภาษา
    • ตัวสลับหลายภาษา
    • ตัวสลับหลายภาษา
    • ตัวสลับหลายภาษา
    • ตัวสลับหลายภาษา
    • ตัวสลับหลายภาษา
    • ตัวสลับหลายภาษา
    • ตัวสลับหลายภาษา
    • ตัวสลับหลายภาษา
    • ตัวสลับหลายภาษา
    • ตัวสลับหลายภาษา
    • ตัวสลับหลายภาษา
    • ตัวสลับหลายภาษา
    • ตัวสลับหลายภาษา
    • ตัวสลับหลายภาษา
    • ตัวสลับหลายภาษา
    • ตัวสลับหลายภาษา
    • ตัวสลับหลายภาษา
    • ตัวสลับหลายภาษา
    • ตัวสลับหลายภาษา
    • ตัวสลับหลายภาษา
    • ตัวสลับหลายภาษา
Expand All Collapse All
  • รู้เบื้องต้นเกี่ยวกับ 3DCoat
  • เริ่มต้นใช้งาน
    • System requirements
    • Why 3DCoat is Unique?
    • การเปิดใช้งาน 3DCoat
    • ข้อผิดพลาดในการเริ่มต้น
      • Startup error Mac
    • Color management
    • Upgrading permanent license
    • Linux Setup
      • Linux initial setup per-user installation
      • Linux initial setup for system
      • Tablet setup
      • To GTK3 from GTK2
      • Error libicuuc.so.70
    • โครงสร้างโฟลเดอร์
      • Custom documents folder
    • รูปแบบต่างๆ ของ “การแก้ปัญหา”
    • Tablet on Window
    • Import และ Export
    • Applinks ใน 3DCoat
      • ลิงค์แอป Blender
        • Blender with the Applink in Linux
      • Blender 4.2/3/4/5 applink
      • Max Applink
      • Houdini applink
      • Lightwave uplink
  • Navigation
    • การเปิดกล่องโต้ตอบ (เมนูเริ่มด่วน)
    • แผงนำทาง
    • กล้องและระบบนำทาง
      • Customize Navigation as Blender
    • Left tool panel
    •  Activity Bar
    • การนำทางโดยใช้อุปกรณ์ 3DConnexion
      • How to compile Spacenavd on non Ubuntu distro
    • Quick Access Menu
    • Stylus doesn’t work in sculpting
    • ปุ่มลัด
  • อินเทอร์เฟซและการนำทาง
    • เมนูไฟล์
    • แก้ไขเมนู
      • Bake Geometry Info
      • Calculate Occlusion
      • Calculate Curvature
      • Light Baking Tool
      • การตั้งค่า
    • ดูเมนู
    • สมมาตร
    • Textures
    • Calculate
    • เมนูเลเยอร์
    • เมนูแช่แข็ง
    • Hide
    • Bake
    • เส้นโค้ง 2022
      • เมนูเส้นโค้ง
      • Curves Properties RMB
      • เติมชั้นตาข่าย
      • Scale of imported curves
    • เมนู Windows
      • แผงป๊อปอัพ Windows แบบแท็บ
      • สไลเดอร์
    • Scripts
    • Addons
    • Capture
    • เมนูช่วยเหลือ
    • การปรับแต่ง
    • แก้ไขหรือสร้างห้องใหม่
  • ส่วนประกอบของ Brush
    • แถบด้านบน Brush
    • แปรงใช้งานทั่วไป
      • สร้างแปรงและสติกเกอร์
      • สร้างอัลฟ่าจากการแกะสลักปัจจุบัน
      • สร้าง Brush จากวัตถุ 3 มิติ
      • Create brushes based on Curves
      • Load photoshop .abr brushes
    • จังหวะ
      • เมนูป๊อปอัพเส้นโค้ง
    • ตัวเลือก Brush
    • ตัวจำกัดเงื่อนไข
    • แผงแถบ
    • แผงลายฉลุ
    • วัสดุอัจฉริยะ
      • เพิ่มรูปภาพหรือวัสดุใหม่
      • แนบวัสดุอัจฉริยะเข้ากับเลเยอร์
      • Import Quixel Megascans
    • วิธีสร้างพรีเซ็ตสำหรับ Brush
  • Node System
    • Node Editor
    • Node & Object Inspectors
    • Node Graph
    • NodeGraph Language (NGL)
    • GPU Nodes
      • Color
      • GeometryIn
      • In
      • Layer
      • Material
      • Math
      • Noise
      • Noise3D
      • Out
      • Pattern
      • Pattern3D
      • Shape
      • Texture
      • Tilable
      • UV
    • Filters
    • Masks
    • Materials
    • Modifiers
    • Volumes
  • ฟรี 3DCoatPrint
  • GPU Texturing
    • PBM Channels
    • Per-Pixel Painting
  • ห้องพื้นที่ทำงาน
    • Painting
      • Painting พื้นผิวและโหมด
        • Painting Per-Pixel
        • Painting แทนที่ (Micro-Vertex)
        • Ptex Painting
        • Painting พื้นผิว (Polypainting)
      • นำเข้าสู่ห้อง Painting
        • Initial CC subdivision
        • UV Set smoothing
        • Sharp (hard) edge
        • ล็อคค่าปกติ
        • โหลดเค้าโครง UV ใหม่หลังจากการเปลี่ยนแปลงโมเดล
        • DAZ Genesis models into 3DCoat
        • ID map
      • เมนูของพื้นที่ทำงาน Painting
        • Edit menu
        • เมนูพื้นผิว
          • เครื่องมือ Baking พื้นผิว
        • ซ่อน
        • เมนูสำหรับ Bake Paint
        • ตัวเลือกสี
      • Surface Materials
      • แถบด้านบนสำหรับ Painting
      • แผงเลเยอร์
        • แผงผสม
        • Layer and Clipping Masks
      • เครื่องมือห้อง Painting
      • ความทึบ - ความโปร่งใส
      • ปรับแต่งพื้นที่ทำงาน
        • ปรับแต่งชุดเครื่องมือ
        • ส่งออกจากห้องปรับแต่ง
      • แผงแสดงตัวอย่างหน้ากาก/วัสดุ
      • ส่งออกจากห้อง Painting
    • พื้นที่ทำงาน UV
      • แถบด้านบน UV
      • แผงเครื่องมือ UV ด้านซ้าย
      • แผงแสดงตัวอย่าง UV
      • ตัวอย่างขั้นตอนการทำงาน UV
      • นำเข้าห้อง UV
      • ส่งออกจากห้อง UV
    • รีโทโพโลยี
      • นำเข้าสู่ห้อง Retopo
      • เมนู Retopo Mesh และเมนู Bake
        • โหมดกระจกเสมือน
      • Bake menu
        • Treat Poly Groups as Paint Objects
        • Baking guide
      • เครื่องมือ Strokes ใน Retopology
      • ท็อปบาร์
        • เลือกรูปทรงเรขาคณิต
      • แผงเครื่องมือด้านซ้ายในห้อง Retopology
        • วัตถุประสงค์และหน้าที่โดยรวม
        • เพิ่มรูปทรงเรขาคณิต
        • เครื่องมือปรับแต่ง Retopo
        • เครื่องมือ UV
        • คำสั่งสำหรับห้อง Retopology
      • AUTORETOPO
        • Autopo guide
      • โพลีกรุ๊ป
    • ปั้น
      • Sculpt Layer
      • ต้นไม้แกะสลัก
      • ตัวเลือก Sculpt Brush
      • Top Bar
      • เครื่องยนต์ Brush
      • เมนูย่อยเรขาคณิต
      • แกะเมนู “คลิกขวา”
      • เฉดสี
      • โหมด Voxel
        • การแกะสลัก Voxel บริสุทธิ์
        • ความหนาแน่นและความละเอียด
        • เครื่องยนต์ดิน
        • เครื่องมือ Voxel
        • เครื่องมือพื้นผิวบน Voxels
        • เครื่องมือปรับแต่ง Voxel
        • Painting เชิงปริมาตร
        • เครื่องมือวัตถุ Voxel
      • โหมดพื้นผิว
        • เครื่องมือพื้นผิว
        • เครื่องมือปรับแต่งพื้นผิว
        • Surface Layer
        • เครื่องมือปรับพื้นผิว
        • Painting พื้นผิว
        • ความละเอียดหลายระดับ
          • Multires tools
          • Multires adjust
          • Multires commands
      • ปั้นโค้ง
        • เส้นโค้งสไปลน์
        • Splines model creation
      • การแทนที่เวกเตอร์
      • เครื่องมือแปลงพื้นผิว
        • เครื่องมือแปลง Voxel
        • Instancer
        • Move
        • Pose
        • Fit
        • Reproject
        • Surface Array
      • Voxel Primitives & เครื่องมือ Import
        • Hollow Box
      • บูลีนสด
      • คำสั่งสำหรับห้อง Sculpt
      • Import สู่ห้องแกะสลัก
      • ส่งออกจากห้องแกะสลัก
    • แสดงผล
      • Comparison of different roughness values
      • ฟังก์ชั่น Render Panel
      • จานเสียง
      • อบแสงปลอม - ไม่ใช่ PBR-
    • Factures
      • ขั้นตอนการทำงาน
    • ง่ายที่สุด
    • การสร้างแบบจำลอง
      • Mesh Menu
      • แผงเครื่องมือด้านซ้ายในห้องสร้างแบบจำลอง
        • เพิ่มเรขาคณิต
          • Make Joints
          • เลือกแล้ว
        • บิด
        • Smart Hybrid
        • UV
          • คำสั่ง
        • ตาข่ายทั้งหมด
      • ตัวอย่างพื้นผิวห้องใต้หลังคาโดย Fluffy
      • การปิดกั้นโดย Poeboi
      • Import Zbrush Polygroups for UV mapping
    • Kitbash - การสร้างโมเดล 3 มิติอย่างรวดเร็ว
      • Create kitbash
      • Left tool panel Kitbash
    • 3DPrint
    • Photogrammetry
      • How to install Reality Capture
      • Reality Capture doesn’t show up ?
    • ตาข่ายถึงห้อง NURBS
    • Nodes
      • Texturing with nodes
      • Sculpt shaders Nodes Library
      • Open PBR
  • Scripting และ Core API
    • Core API
    • ไพทอน API
    • Extensions and Addons

PBM Channels

2275 views 3

Written by Volodymyr Makovetskyi
May 13, 2026

The 3DCoat render system supports an advanced physically based material (PBR/PBM) model. It includes not only standard channels but also specialized effects to create the most realistic surfaces possible.

Below is a detailed description of each channel and its impact on the material’s appearance, based on the internal shader architecture.


1. Base Channels

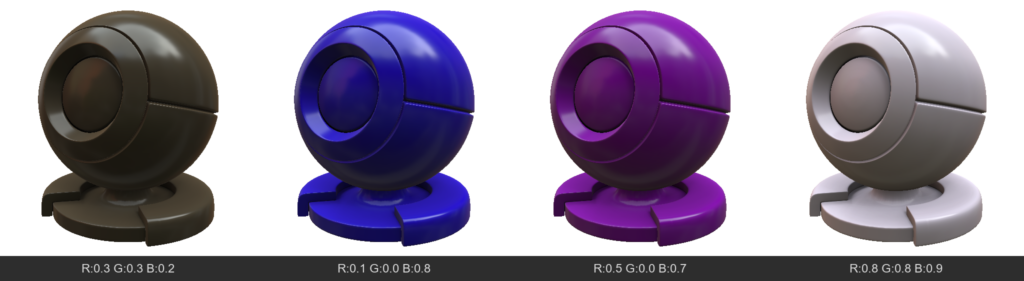
  • AlbedoColor (Albedo / Base Color)
    The main color of the surface. For dielectrics (non-metals), this is their own color. For metals, it’s their reflection color.
  • Opacity
    Determines how opaque a pixel is. Usually used for “CutOut” transparency (leaves, meshes), hiding geometry where the value is low.
  • Emissive
    Adds self-illumination to the material. The surface will be bright even in complete darkness and can cast light on neighboring objects (via global illumination).
  • TSNormal (Tangent Space Normal)
    A normal map that defines fine surface relief without altering the geometry itself.
  • AmbientOcclusion
    Micro-shadowing in recesses. Darkens areas that are hard for diffuse light to reach, emphasizing the volume of the relief.
  • Mask
    A general technical channel that can be used for layer blending logic or creating custom effects.

2. Specular & Metalness

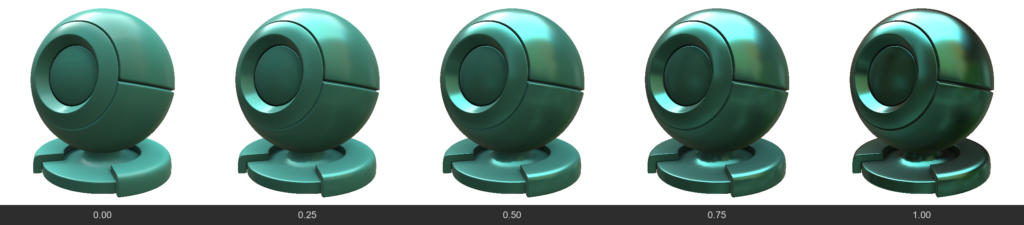
  • Metalness
    Determines whether a material is a metal.
    0 (Dielectric): Reflects only 4% of light at a direct angle (depends on IOR), albedo acts as the surface color.
    1 (Metal): Albedo becomes the reflection color (e.g., yellow gold), and the diffuse color disappears.
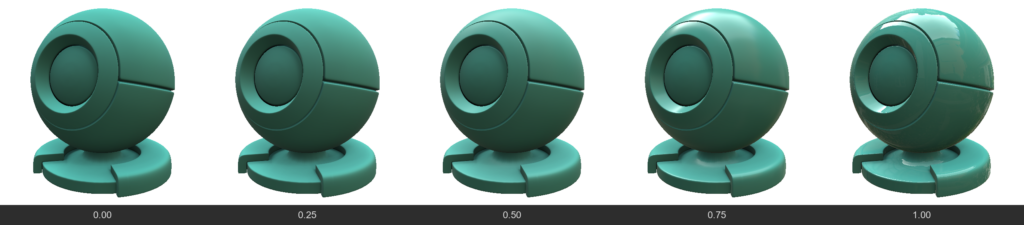
  • Roughness / Gloss
    Gloss = 1.0 - Roughness. Determines the “polish” of the surface. High Gloss gives sharp, mirror-like reflections, while high Roughness blurs reflections, making the surface matte.
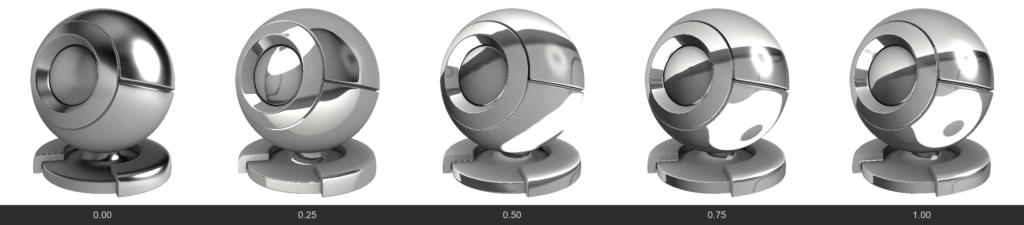
  • IOR (Index of Refraction)
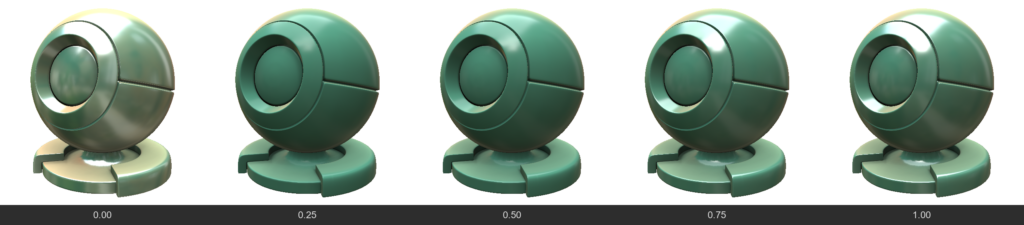
    Determines the strength of the base reflection (F0) for non-metals. For example, water has an IOR ~1.33, glass ~1.5. Affects how strongly a surface reflects light when viewed at a direct angle.
    For refractive materials, IOR affects the refractive power of the Fresnel, and for opaque materials, only the Fresnel
    To enable control of this value via a brush, the internal parameter accepts values ​​ranging from 0 to 1; however, it is applied as a value three times greater—meaning 0 corresponds to 1, 0.333 corresponds to 1, and 1 corresponds to 3. Nevertheless, individual nodes within the node editor will accept the actual physical IOR value.
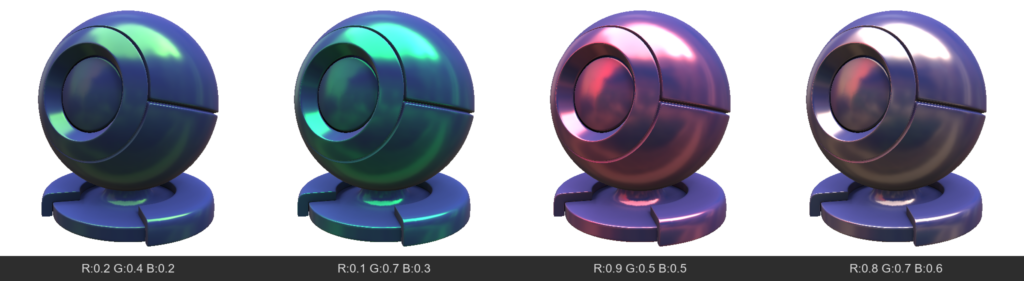
  • ReflectionColor
    Additional color control for reflection. Usually, reflection for non-metals is colorless, but this channel allows you to forcefully change its tint (e.g., for stylized materials).
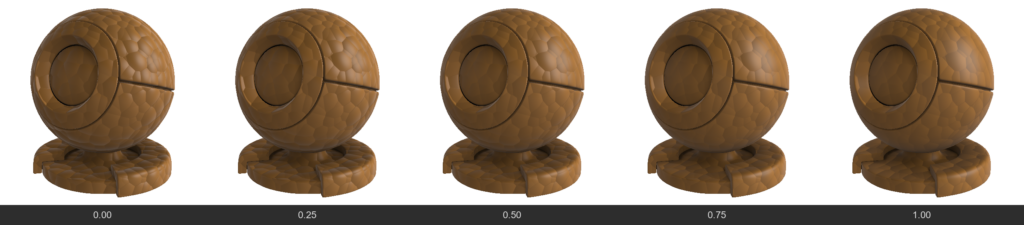
  • SpecularEdgePower
    Controls the Fresnel effect (how strongly a material reflects light when viewed at a grazing angle). Allows you to enhance or weaken highlights on the edges of an object.
  • FlatSpecular
    Allows you to “flatten” reflections, ignoring fine irregularities from the normal map. Useful for stylization or avoiding “noisy” highlights on complex details.

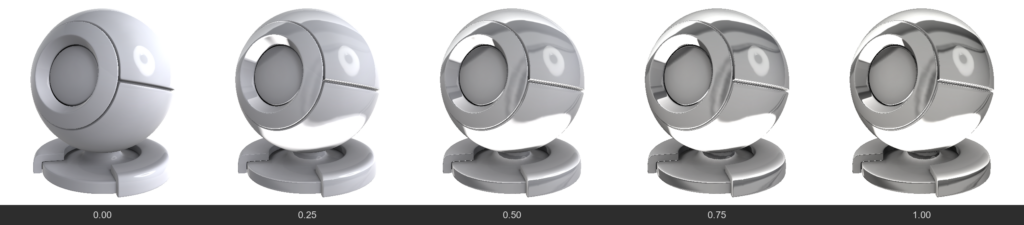
3. Refraction / Glass

  • Refraction
    Unlike Opacity (which simply “cuts” a hole), this is physical material transparency (like glass or water). Light passes through the surface and refracts. The higher the value, the more transparent the material.
  • RefractionBlur
    Frosted glass. Blurs the background visible through a transparent object. Often linked to regular Roughness but allows controlling background blur separately.
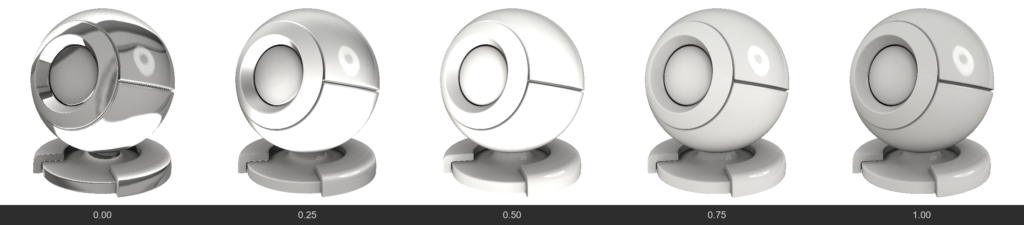
  • RefractionMetalness
    0 = refraction, 0.5 = dielectric, 1.0 = metalness
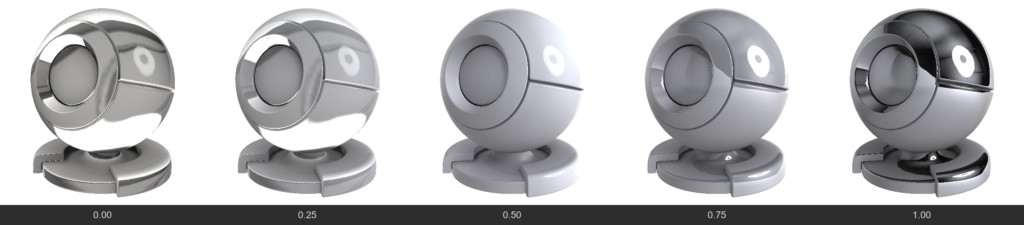
  • RefractionChromatic (Chromatic Aberration)
    Separates refracted light into a spectrum (like a prism), creating colored halos on the edges of thick glass.

4. SubSurface Scattering (SSS & Volume)

Used for translucent materials (skin, wax, milk, plastic, jade).

  • SubSurface / Volume
    Determines how deep light penetrates into the material. This makes shadows softer and translucent edges brighter.
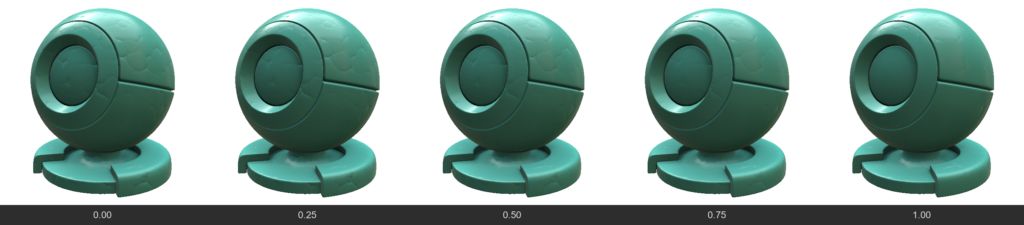
  • SubSurfaceColor
    The color of the light that scatters beneath the surface. For example, for human skin, AlbedoColor would be flesh-toned, while SubSurfaceColor would be red (due to blood under the skin).
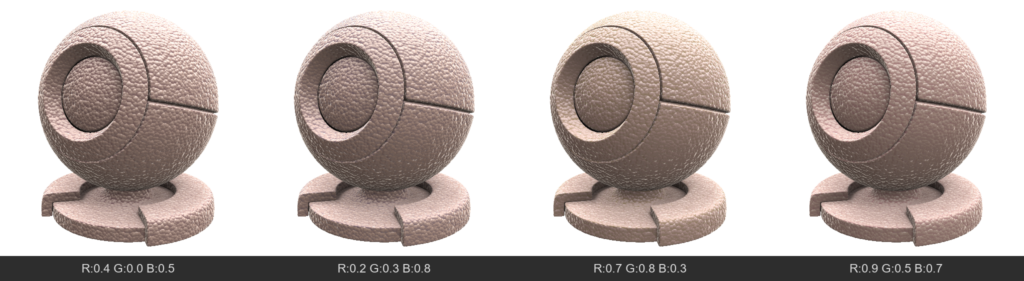
    SubSurface Color also affects the refraction color.

5. Special Surface Effects

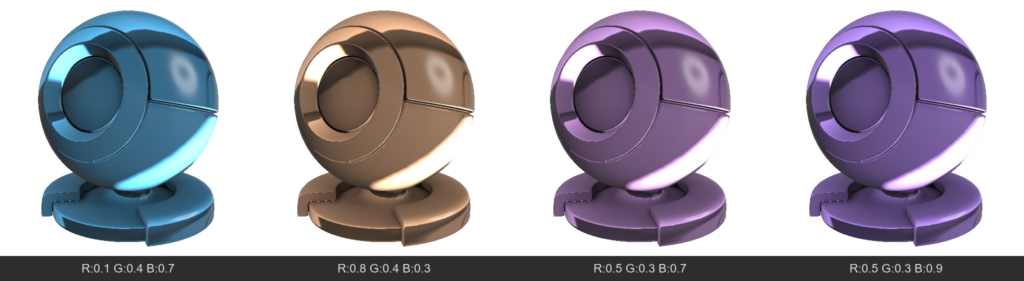
  • Anisotropy
    Stretches the specular highlight in a specific direction. Characteristic of brushed metal (pots), hair, or silk.
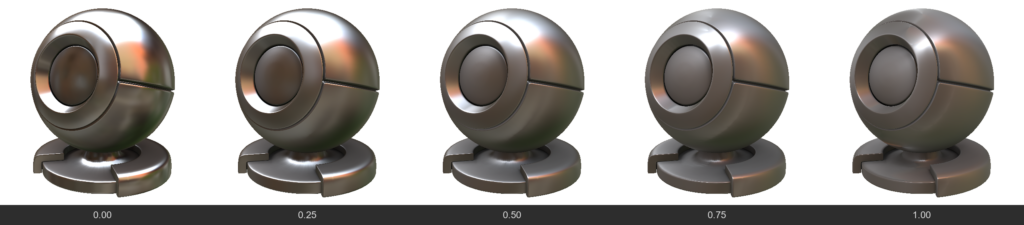
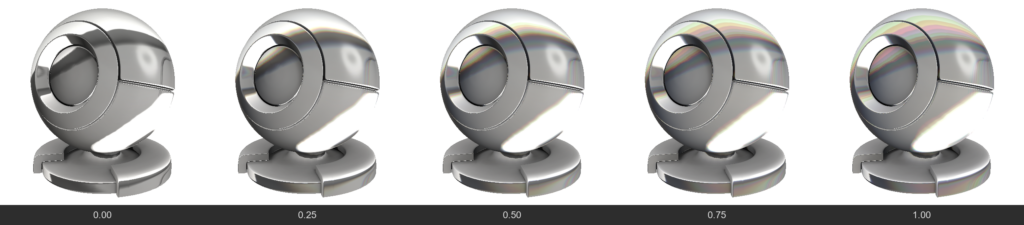
  • Iridescence
    Thin film interference effect. Creates rainbow shifting colors depending on the viewing angle (like on soap bubbles, insect wings, or spilled gasoline).
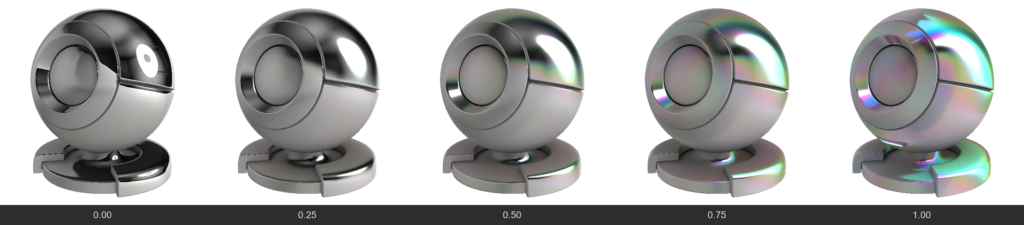
  • EffectNormal
    A color channel (vector direction) that defines the direction for stretching the anisotropic highlight and the direction for the iridescence gradient.
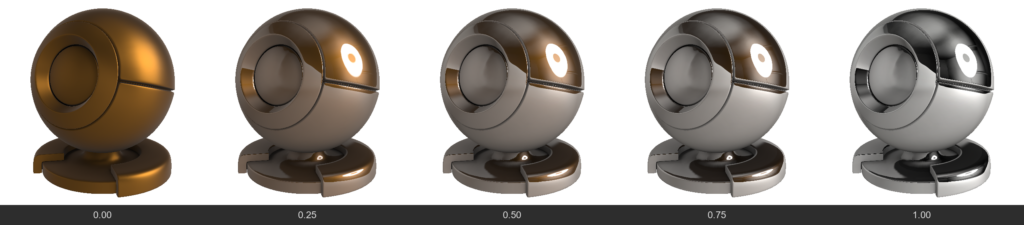
  • ClearCoat
    Creates an additional transparent glossy layer on top of the existing material (like car paint or varnished wood). This layer has its own reflection, independent of the base material.
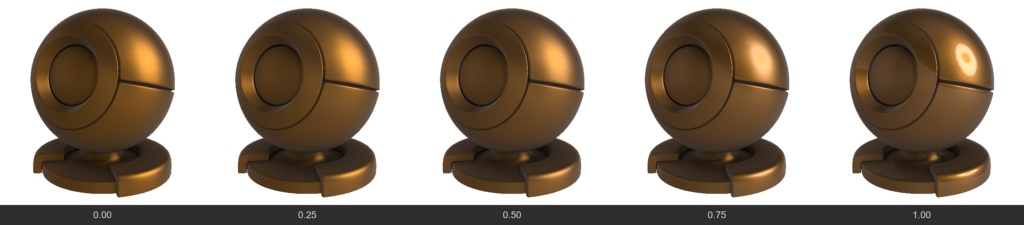
  • ClearCoatGloss
    Determines how smooth the clear coat layer is.
6. Fabrics, micro-protrusions and Fuzz

These channels are designed to simulate materials with complex microstructures on the surface (fabrics, dust).

  • Sheen
    Creates a soft highlight on the edges of an object. Characteristic of velvet, peach, suede. This is light reflecting from micro-fibers at grazing angles.
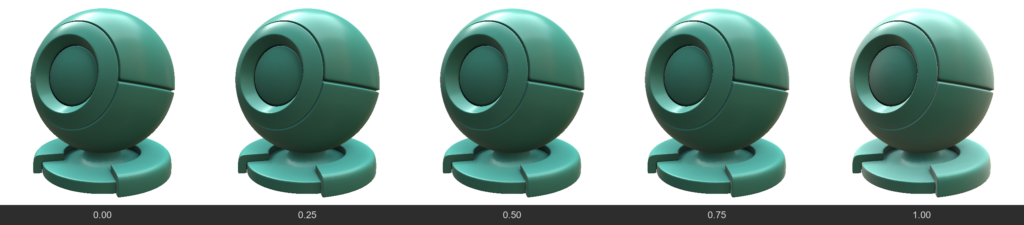
  • SheenColor
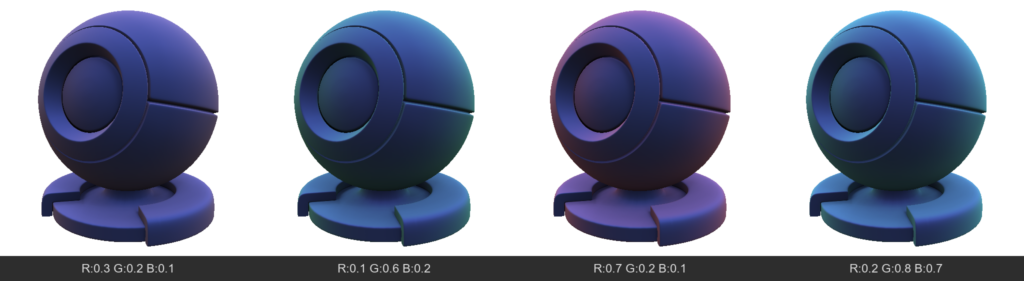
    Tints the fabric highlight a specific color.
  • Microprotrusions (Fuzz / Dust)
    Simulates the presence of microscopic particles (or dust) on the surface that scatter light differently than the main surface. Can make the material “dusty”.
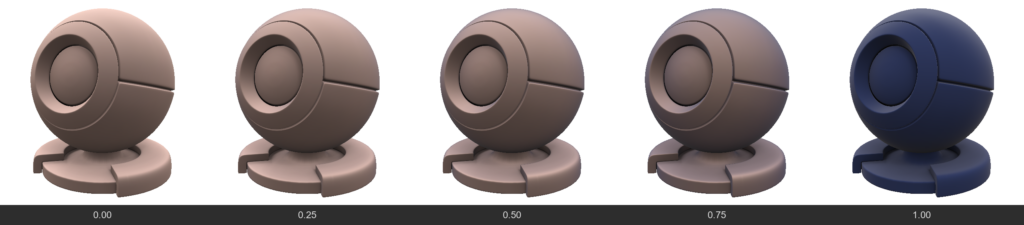
  • MicroprotrusionsGloss
    Controls how sharply these micro-fibers reflect light.
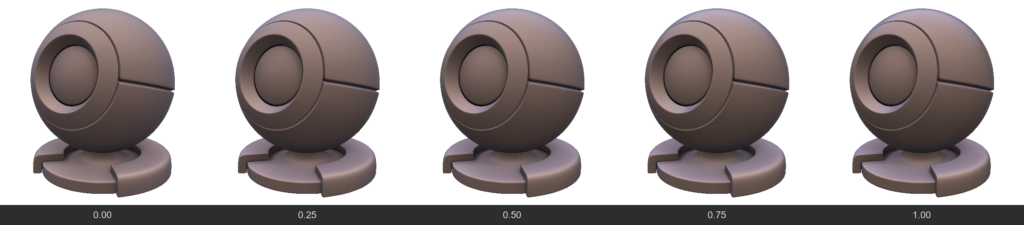
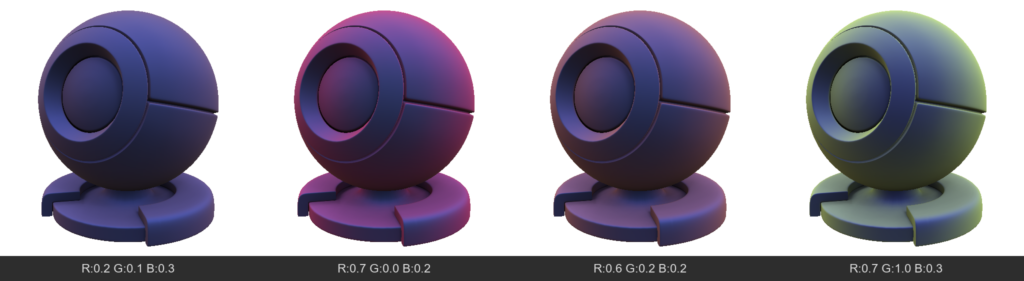
  • MicroprotrusionsColor
    The color of the dust or fuzz resting on the material.
In 3DCoat, FWSNormal is a specific technical property used in node-based materials within the GPUPPP (GPU Per-Pixel Painting) mode.
It specifically functions as a combination map that defines the direction of fur and organic fibers when simulating complex, layered textures.
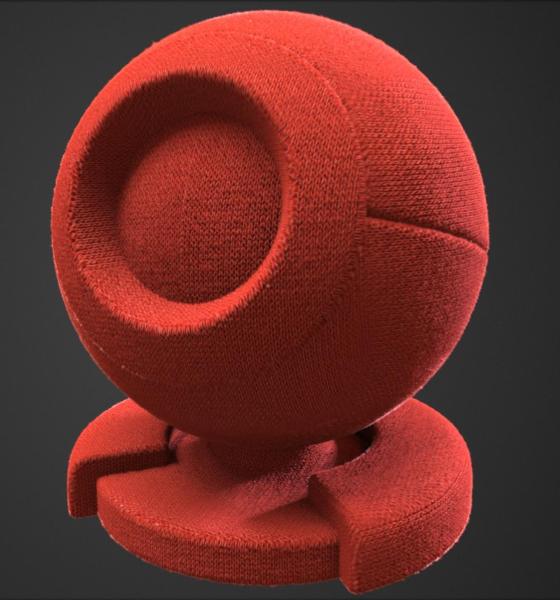

How it Works
The node-based system utilizes FWSNormal alongside two other crucial parameters to create realistic, dynamic fur surfaces:

  • SoftDisplacement: Shifts the mesh vertices outwards to give the fur physical volume and height without ruining the underlying shading models.
  • Sheen: Simulates the way light scatters softly across the micro-fibers or tiny hairs.
  • FWSNormal: Acts as the directional map, telling the system exactly which way the fur or hair flows across the 3D surface.

How to Use It
To make sure properties like FWSNormal and SoftDisplacement function correctly during texturing, you need to ensure specific viewport settings are active:

  • Navigate to the View Menu.
  • Turn on “Show Displacement Mesh”.
  • Ensure Tessellation is enabled and configured properly so the software has enough geometry to calculate the physical shift.

Was this helpful?

3 Yes  No
Related Articles
  • Noise3D
  • Noise
  • Bake Geometry Info
  • Make Joints
  • Texturing with nodes
  • Hollow Box
Previously
GPU Texturing
Up Next
Per-Pixel Painting
AI:
Hi! How can I help you?
Attention: This is a beta version of AI chat. Some answers may be wrong. See full version of AI chat