 ไทย
ไทย  English
 Українська
 Español
 Deutsch
 Français
 日本語
日本語 Русский
 한국어
한국어 Polski
 中文 (中国)
 Português
 Italiano
 Suomi
Suomi Svenska
 中文 (台灣)
 Dansk
Dansk Slovenčina
 Türkçe
 Nederlands
 Magyar
 हिन्दी
 Ελληνικά
 Tiếng Việt
 Lietuviškai
 Latviešu valoda
 Eesti
Eesti Čeština
 Română
 Norsk Bokmål
เช่นเดียวกับแอปพลิเคชันอื่น ๆ 3DCoat ให้คุณปรับแต่งพื้นที่ทำงานให้เหมาะกับความต้องการของคุณ
คุณสามารถซ่อนหรือแสดงแผง ย้ายแผงหน้าต่างแบบป๊อปอัปแบบแท็บไปรอบๆ และแม้แต่เทียบ/ปลดแผง หรือเปลี่ยนให้เป็นหน้าต่างลอย หากคุณไม่ต้องการหรือต้องการเห็นหน้าต่างใดหน้าต่างหนึ่ง ให้ปิดหน้าต่างนั้น
คุณสามารถนำกลับเข้าสู่อินเทอร์เฟซผ่านเมนูหน้าต่างได้ทุกเมื่อ
การปรับแต่งพื้นที่ทำงานของคุณทำให้ 3DCoat ทำงานในลักษณะที่เหมาะสมกับความต้องการและเวิร์กโฟลว์ของคุณมากที่สุด
ใช้เมนูนี้เพื่อเลือกแผงฟังก์ชันที่คุณต้องการให้แสดงในรูปแบบอินเทอร์เฟซโดยรวม
แผงเหล่านี้สามารถลอยได้อย่างอิสระหรือเชื่อมต่อกับส่วนใดๆ ของอินเทอร์เฟซได้ง่ายๆ โดยการลากแถบชื่อเรื่องและวางแผงหลังจากที่คุณเห็นตัวอย่างที่ไฮไลต์ของตำแหน่งใหม่
สามารถบันทึกและโหลดการจัดเรียงใหม่ได้
– แปรง [T] & ตัวเลือก Brush
แผงตัวเลือก Brush
แผงตัวเลือก Brush ประกอบด้วยฟังก์ชันส่วนใหญ่เกี่ยวกับแปรง
Brush ของ 3DCoat สามารถกำหนดเป็น “โปรไฟล์” ได้โดยใช้ Brush Alpha Panel ภาพเหล่านี้เป็นภาพเริ่มต้นหรือแบบกำหนดเอง ซึ่งมีผลกับทั้งความลึกของแอปพลิเคชัน Brush และรูปร่างของ “ขนแปรง” ด้วย นอกจากนี้ยังสามารถสร้าง Brush Alphas จากไฟล์ 3D .obj โดยแยกแผนที่ความสูงตามมุมมองออกจากโมเดล
– ช่องสี, จานสี[B], สวอตช์
– จานสีที่กำหนดเอง
สร้างจานสีของคุณเองผ่านเมนู “Windows/ป๊อปอัป/จานสี” (คุณสามารถกำหนดแป้นพิมพ์ลัดสำหรับสิ่งนี้ได้)
คลิกขวาที่สีใดๆ เพื่อลบ แทรก หรือแก้ไขสีใดๆ โดยใช้ตัวเลือกสี
จานสีใหม่สามารถสร้างและบันทึกเพื่อการเข้าถึงในภายหลังได้ – จานสีเหล่านี้จะถูกจัดเก็บไว้ในโฟลเดอร์ย่อยของโฟลเดอร์หลัก 3DCoat “จานสี”.
เมื่อจัดเก็บแล้ว จานสีเหล่านี้จะอยู่ในรายการเสมอ – เข้าถึงได้ผ่านเมนู “ลูกศรแบบเลื่อนลง”
หมายเหตุ: หากต้องการปิดใช้งานการใช้สีตามที่กำหนดโดยแถบสี ให้คลิกขวาที่แถบสี – และ “X” จะปรากฏขึ้นเหนือแถบสี เพื่อแจ้งให้คุณทราบว่าคุณไม่ได้มีอิทธิพลต่อการวาดภาพด้วยสีเหล่านี้อีกต่อไป
วิธีใช้จานสี : วิธีใช้งานหน้าต่างจานสี โดย คริสตอฟ เวอร์เนอร์
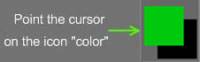
ตอนนี้เราต้องเรียนรู้วิธีใช้สีอย่างถูกต้อง สำหรับจุดนี้ เคอร์เซอร์บนไอคอน “สี” บนแผงเครื่องมือด้านซ้าย และคลิกที่สี่เหลี่ยมใต้คำจารึก “สี” เมื่อทำเช่นนั้น คุณจะเห็นแผงที่ให้คุณเลือกสี
– ต้นไม้โค้ง
ช่วยให้คุณใช้ชุดเครื่องมือเส้นโค้งที่ทรงพลังมาก จริงๆ แล้ว มันมีไว้สำหรับรุ่นหลักถัดไป แต่คุณสามารถใช้ในโหมดดูตัวอย่างได้ หลังจากเปิดใช้งานตัวเลือก ให้รีสตาร์ท 3DCoat
เมนู Curves จะปรากฏขึ้นพร้อมกับโลกใหม่ของการทำงานอันทรงพลัง โปรดทราบว่านี่เป็นเครื่องมือเบต้า (แต่อยู่ในสถานะที่ดีและเสถียร); ใช้โดยยอมรับความเสี่ยงของคุณเอง
– ดีบักเลเยอร์
– ความลึกของช่อง [D]
– ช่องความเงา[R]
– ข้อต่อ
เครื่องมือแยกและข้อต่อ อัปเดตเครื่องมือแยกและข้อต่อใน 3DCoat 2021 : วิดีโอนี้สาธิตการใช้เครื่องมือแยกและข้อต่อใหม่ โดยหลักแล้วเป็นการปรับปรุงเวิร์กโฟลว์สำหรับแบบจำลองการก่อสร้าง/การแกะสลักที่จะส่งออกไปยังการพิมพ์ 3 มิติ โปรดทราบว่าจะทำงานเฉพาะในโหมด Surface (รูปหลายเหลี่ยมเท่านั้น)
เครื่องมือข้อต่อกำลังจะมาถึง 3DCoat 2021! การสาธิตการทำงานของข้อต่อ
– เลเยอร์และการผสมเลเยอร์
แสดงรายการเลเยอร์ทั้งหมด พร้อมตัวเลือกเพิ่มเติม เลเยอร์ไม่ได้ขึ้นอยู่กับฐานวัตถุ แต่เป็นเลเยอร์ฉากชนิดหนึ่ง
ห้องพ่นสีและห้องปั้น
จากมุมมองในแผงนี้โดยตรง คุณสามารถเปลี่ยนชื่อ (โดยดับเบิลคลิกชื่อ) ซ่อน ล็อก และลบรายการที่นี่
การผสมเลเยอร์สี
แสดงคุณสมบัติของเลเยอร์ปัจจุบัน
– โมเดล
เพิ่มไลบรารีโมเดลของคุณเอง
– ประวัติวัสดุ
ประวัติของวัสดุที่ใช้ทับซ้อนกัน วัสดุทั้งหมดที่ใช้กับเลเยอร์จะถูกเก็บไว้ในประวัติพร้อมกับการตั้งค่าทั้งหมด
หลายความละเอียด
ได้มีการแนะนำการแกะสลักแบบหลายความละเอียด ใช้ได้กับเลเยอร์ การแทนที่ และ PBR กด Space แล้วดูที่บรรทัดล่างสุด หรือใช้ Windows->Popups->MultiResolution
ทาสีวัตถุ
แสดงรายการ Paint Objects ในระบบ Layer คุณสามารถเปลี่ยนชื่อ ซ่อน ล็อก และลบวัตถุที่แสดงรายการที่นี่
หากคุณคุ้นเคยกับวิธีที่ Lightwave จัดการกับเลเยอร์ สิ่งนี้ควรจะชัดเจนทันทีในหน้าที่ของมัน
– ที่ตั้งไว้ล่วงหน้า
แสดงแผงเครื่องมือที่ตั้งไว้ล่วงหน้า
– ประวัติศาสตร์ดึกดำบรรพ์
แผนผังประวัติของวัตถุดั้งเดิมที่ใช้แล้วสำหรับการทำซ้ำโมเดลอย่างรวดเร็วโดยรักษาการตั้งค่าแต่ละรายการไว้
– เครื่องมือโปรเจคเตอร์วิวพอร์ต
เช่นเดียวกับโปรเจ็กเตอร์ คุณสามารถฉายพื้นผิวใดๆ ทั่วทั้งฉากได้ นี่เป็นเพียงการอ้างอิงเท่านั้น ไม่มีผลต่อสีหรือคุณสมบัติของวัสดุ
– พร็อกซี่เลื่อน
Proxy Slider เป็นคุณสมบัติที่มีประโยชน์มาก ช่วยให้ผู้ใช้ก้าวลงสู่ระดับย่อย/ความละเอียดที่ต่ำลงอย่างรวดเร็ว และทำการเปลี่ยนแปลงเชิงโต้ตอบด้วยแผงใหม่ขนาดเล็กนี้
Sculpt Tools: Proxy Slider: วิดีโอนี้สาธิตการใช้ตัวเลื่อนความละเอียดเชิงภาพและเชิงโต้ตอบใหม่สำหรับวัตถุ Proxy ในพื้นที่ทำงาน Sculpt ช่วยให้ผู้ใช้สามารถลดขั้นตอนลงไปยังระดับย่อย/ความละเอียดที่ต่ำกว่าได้แบบโต้ตอบ
แผงด่วน [~]
ใช้ปุ่ม “~” เพื่อเข้าถึงแผงกึ่งโปร่งใสที่มีพารามิเตอร์สำหรับทั้งสามช่องอย่างรวดเร็วในรูปแบบกะทัดรัด (คุณสามารถปักหมุดไว้ที่ใดก็ได้บนพื้นที่ทำงานของคุณ) หากมีเครื่องหมาย “X” บนทรงกลม ทรงกลมนั้นจะถูกปิด
Polygroups (วัตถุ Retopo )
Retopology Groups Panel ซึ่งคุณสามารถแยกพื้นที่และส่วนต่างๆ ทั้งหมดของโมเดลของคุณที่ต้องการโทโพโลยีและพื้นผิวเฉพาะได้
โมเดล Retopo
Kitbashing สำหรับ Retopo Work : วิดีโอนี้แสดงตัวอย่างบางส่วนของการใช้ Retopo Models Panel ในห้อง Retopo เพื่อบันทึก เข้าถึง และใช้ค่าพรีเซ็ต/ดั้งเดิมของ Mesh สำหรับงาน Retopology อย่างรวดเร็ว
– ต้นไม้แกะสลัก [N]
– เฉดสี
– วัสดุอัจฉริยะ
วัสดุอัจฉริยะ
Smart Materials ช่วยให้คุณสามารถลงสีด้วยวัสดุที่มีความแม่นยำทางร่างกาย รวมทั้งสร้างมันขึ้นมาได้ พวกเขาสามารถฉายบนตาข่ายของคุณด้วยวิธีการต่าง ๆ และอนุญาตให้ทาสีพื้นผิวขั้นสูงได้อย่างรวดเร็ว
เส้นโค้ง
ข้อมูลจำเพาะของรุ่นสไปลน์
เมนูเริ่ม [SHIFT+M]
ลายฉลุ
แผงลายฉลุ
สเตนซิลใช้เป็นวิธีการปกปิด (ป้องกัน) พื้นที่จากการแกะสลักและลงสีเพื่อความลึกและความโปร่งใสของปากกา
– แถบ
แผงแถบ
Strips ช่วยให้คุณสามารถสร้างรูปแบบซ้ำ ๆ ไปตามจังหวะของคุณ
– โหมด Stroke [E]
แผงโหมด Stroke
ในแผงโหมด Stroke คุณจะพบโหมดแรงกดสไตลัส โหมดบ่วงบาศ และโหมดเส้นโค้ง แต่ละโหมดเหล่านี้ช่วยให้คุณควบคุมจังหวะของคุณด้วยแรงกด ใช้เส้นโค้งเป็นเส้นทาง บ่วงบาศ และอื่นๆ แผงควบคุมนี้มีแง่มุมที่หลากหลายที่สุดของแปรงใน 3DCoat
https://www.youtube-nocookie.com/embed/nRbQI33DGY0
วิดีโอนี้สาธิตโหมดการวาด 3D Spline ใหม่ และความแตกต่างจากโหมดการวาด Spline แบบปิด
– วัสดุพื้นผิว
แสดงรายการวัสดุพื้นผิวของวัตถุ คุณสามารถเปลี่ยนชื่อ ซ่อน ล็อควัสดุพื้นผิว และเปลี่ยนขนาดพื้นผิวสำหรับ export
– สมมาตร [S]
– ตัวเลือกเครื่องมือ
– จานสีเครื่องมือ [SPACE]
ใช้ เมนู Quick Access Spacebar เพื่อเปิดหน้าต่างเมนูเครื่องมือแบบลอยตัว
– ดูตัวอย่าง UV
– ความลึก
เปลี่ยนแรงกด Brush
– ความเข้มของความมันวาว
เปลี่ยนความเข้มความเงา/ความหยาบ
ค่าจะกลับค่าขึ้นอยู่กับเวิร์กโฟลว์ Import/ export พื้นผิวที่คุณใช้ อธิบายพื้นผิวระดับไมโครของวัตถุและควบคุมวิธีที่แสงสะท้อนออกจากวัตถุ (หรือที่เรียกว่าความหยาบ) เช่น สะท้อนอย่างสมบูรณ์ (ลูกโครม) การสะท้อนพร่ามัว หรือกระจาย (ชอล์ค)
– ความทึบ
เลือกความทึบเพื่อใช้สี
– รัศมี
เปลี่ยนรัศมี Brush
– การหมุน
ปรับมุมการหมุนของแปรง
– ปรับให้เรียบ
ปรับระดับความเรียบที่ใช้ขณะวาดด้วยปุ่ม SHIFT
ปิดแผงทั้งหมด
– เลือกสี / ความลึก / ความมันวาว
รายการนี้มีจุดประสงค์เพื่อกำหนดคีย์ลัดสำหรับการดำเนินการหยิบใหม่เท่านั้น[V]
– เลือกเลเยอร์ / ปริมาณปัจจุบัน
รายการนี้มีจุดประสงค์เพื่อกำหนดคีย์ลัดใหม่สำหรับการดำเนินการเลือกเลเยอร์/ระดับเสียง[H]
– เลือกเลเยอร์เพิ่ม
Pick_layer_add. [SHIFT+H]
– เลือกชั้นย่อย
เลือกเลเยอร์ย่อย [CTRIL+H]
– หน้าต่างคุณสมบัติปริมาณทริกเกอร์
– ป๊อปอัพ
B ตัวเลือกสี
F เลือกจุดหมุน
L แสดงรายการเลเยอร์
Spacebar แสดงแผงเครื่องมือ
D ความลึกของช่อง
ซีคัลเลอร์แชนแนล
R Specular แชนเนล
T รายการแปรง
รายการ M ของวัสดุอัจฉริยะ
E ประเภทของการวาดภาพ
~ แผงด่วน
เอส สมมาตร